Emulsion serves as the silent architect of any successful sponge, ensuring that fats and liquids bond to create a crumb capable of maintaining its structure during a chaotic first birthday.

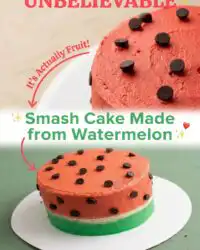
When constructing a Smash Cake Made from Watermelon, the technical objective is to achieve a balance between a tender mouthfeel and a rigid exterior. This recipe relies on a precise creaming method to aerate the butter, providing the necessary lift for three distinct layers. By focusing on the structural integrity of the crumb, we ensure the cake behaves predictably when handled by a child. The following procedure detail how to manipulate temperature and timing to produce a result that is both visually striking and technically sound.
What Makes the Texture Right
Prep: 60 min · Serves: 6 · Difficulty: Medium
- Balanced crumb structure for easy smashing
- Vibrant layering using controlled food pigmentation
- Stable buttercream suited for intricate piping
- Optimized dimensions for small highchair trays
- Professional finish with minimal technical equipment
Structure is what makes the melt possible, providing a stable canvas for the sensory experience of a smash cake session.
Get The Full Cake Recipe
Print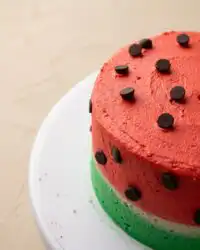
Smash Cake Made from Watermelon
- Total Time: 1 hour 55 mins
- Yield: 6 servings
Description
This vibrant watermelon-themed smash cake combines a stable, easy-to-smash crumb structure with colorful, precise buttercream piping. Designed for a first birthday, it offers the perfect balance of aesthetic appeal and professional structural integrity.
Ingredients
- Unsalted butter, room temperature
- Granulated sugar
- Large eggs, room temperature
- All-purpose flour
- Baking powder
- Whole milk
- Liquid food colouring (pink and green)
- Powdered sugar
- Vanilla extract
Instructions
- Cream butter and sugar. Place the butter and granulated sugar in a stand mixer and cream them on medium speed until the mixture reaches the ribbon stage, appearing pale and voluminous. Add the eggs one at a time, allowing each to fully emulsify into the fat before adding the next.
- Integrate dry ingredients. Sift the all-purpose flour and baking powder twice, then gradually introduce these dry ingredients into the creamed mixture in three stages, alternating with the milk to maintain a stable emulsion.
- Divide and tint. Divide the batter into two separate bowls, placing one-third into the first bowl for the green rind layer and tinting the remaining two-thirds with pink food coloring using a gentle folding motion.
- Bake the layers. Distribute the batter into three greased five-inch round pans and bake at 175°C for 25 minutes, or until a probe thermometer inserted into the center registers 98°C.
- Cool and trim. Allow the cakes to cool in their pans for ten minutes before transferring to a wire rack, then chill in the freezer for 30 minutes to firm the crumb for easier trimming.
- Prepare the buttercream. Beat softened butter until nearly white before gradually adding sifted powdered sugar and vanilla extract until a medium-stiff peak consistency is achieved.
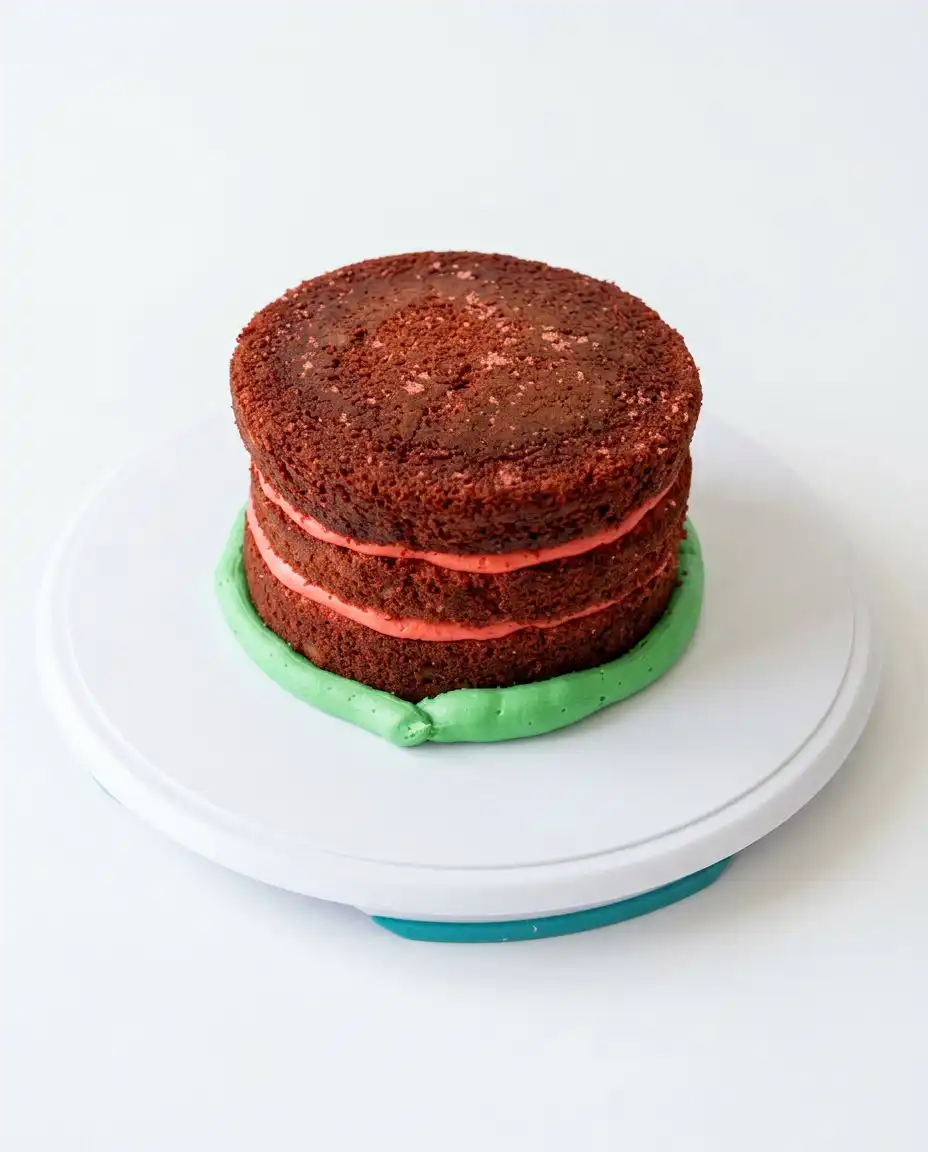
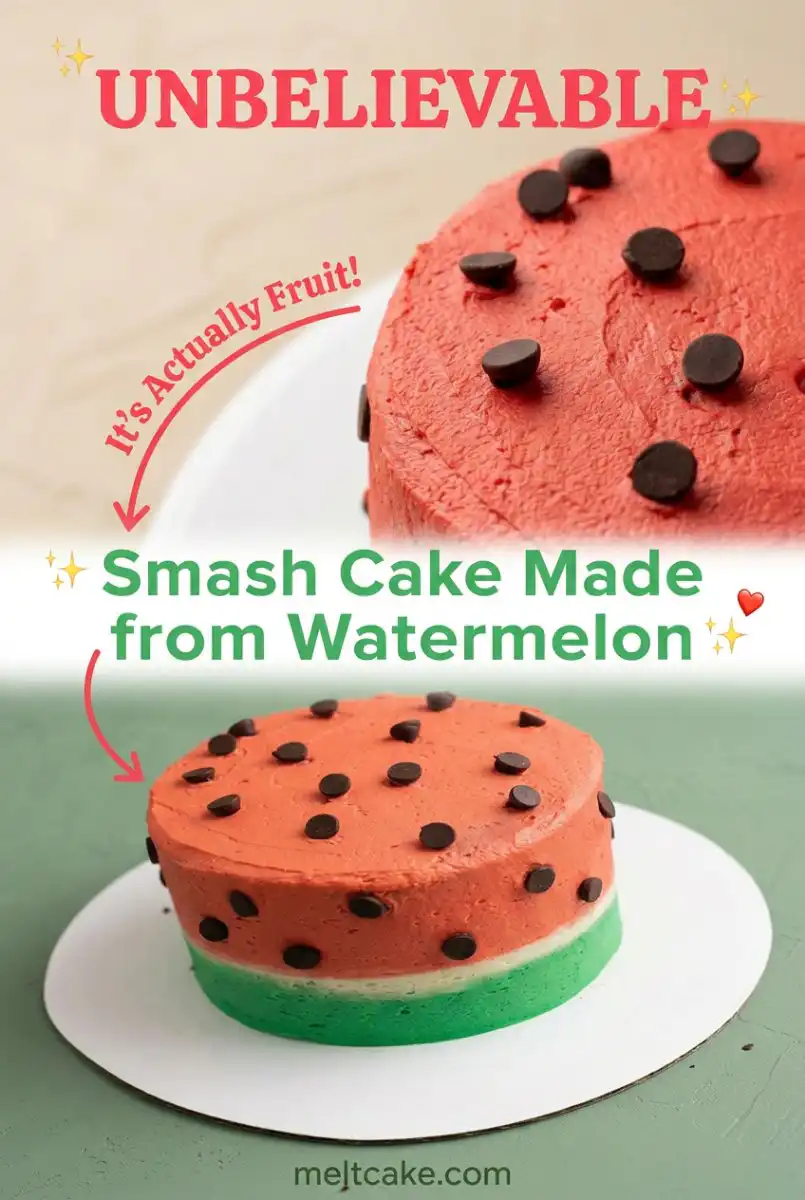
- Assemble the cake. Stack the layers starting with green at the base, applying a thin layer of pink buttercream between each, and finish with a thin crumb coat.
- Decorate the exterior. Use a piping bag to create pink swirls over the cake and add black-tinted icing dots to mimic watermelon seeds, refining each shape with a clean toothpick.
Notes
- Ensure all dairy and egg ingredients are at room temperature to prevent the emulsion from breaking during the creaming stage.
- Use a digital kitchen scale to divide batter between pans for uniform baking times across all three layers.
- Freeze the baked cake layers before trimming to achieve cleaner edges and reduce crumb shedding during assembly.
- If buttercream loses its structure, place the bowl over a cool water bath and whisk briefly to regain a smooth, pipeable consistency.
- Prep Time: 60 mins
- Cook Time: 25 mins
- Category: Dessert
- Method: Baking
- Cuisine: Contemporary
Weighed & Ready
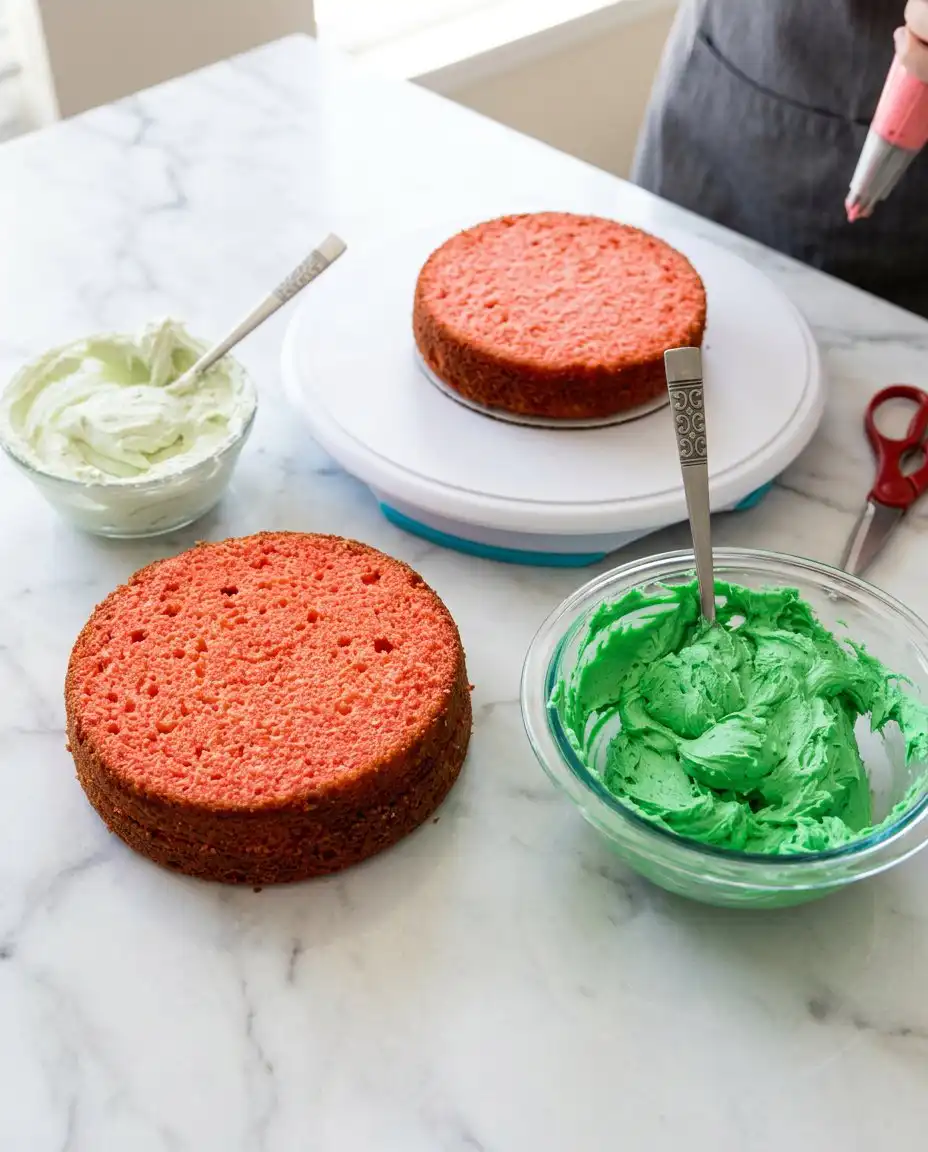
Success in the pastry kitchen begins with the precise measurement of ingredients, where the ratio of fat to flour dictates the final tension of the sponge. For this themed construction, we prioritize the stability of the fats to ensure the layers do not compress under their own weight. Each component has been selected for its specific contribution to the mechanical strength and moisture retention of the bake.
- Unsalted Butter: This provides the primary fat source, which, when creamed correctly at 20°C, traps air to create a light but sturdy internal matrix.
- All-Purpose Flour: The protein content in this flour allows for moderate gluten development, essential for a cake that must withstand being handled without instantly disintegrating.
- Baking Powder: A chemical leavener that reacts with heat to expand the air cells created during creaming, ensuring a consistent rise across all three pans.
- Granulated Sugar: Beyond sweetness, sugar interferes with gluten formation, ensuring the final texture remains tender enough for a six-month-old to break apart.
- Whole Milk: This liquid component hydrates the starches and proteins, facilitating gelatinisation during the baking process for a smooth, cohesive crumb.
- Liquid Food Colouring: High-pigment gels or liquids are used to achieve the distinct pink and green hues without significantly altering the hydration levels of the batter.
| Ingredient | Why It Matters |
|---|---|
| Butter | Creates the aerated foundation through precision creaming. |
| All-Purpose Flour | Provides the structural framework to support the three-tier stack. |
| Baking Powder | Ensures a uniform vertical rise and prevents dense centering. |
| Whole Milk | Aids in protein hydration and the final smooth consistency. |
The Tested Procedure
Step 1: Precision Creaming and Emulsion
Begin by ensuring your butter and eggs have reached a room temperature of approximately 19°C to 21°C. Place the butter and granulated sugar in a stand mixer and cream them on medium speed until the mixture reaches the ribbon stage, appearing pale and voluminous. Add the eggs one at a time, allowing each to fully emulsify into the fat before adding the next to prevent the batter from curdling.
Step 2: Sifting and Dry Component Integration
Sift the all-purpose flour and baking powder twice to ensure even distribution of the leavening agent and to aerate the dry mass. Gradually introduce these dry ingredients into the creamed mixture in three stages, alternating with the milk to maintain a stable emulsion. The batter should transition from a thick paste to a smooth, glossy consistency that flows slowly from a spatula.
Step 3: Pigmentation and Layer Division
Divide the batter into two separate bowls, placing exactly one-third into the first bowl for the green rind layer. Tint the remaining two-thirds with pink food coloring, ensuring the color is concentrated enough to remain vibrant after the heat of the oven. Use a gentle folding motion to incorporate the dye, being careful not to overwork the flour and develop excessive gluten.
Step 4: Baking the Smash Cake Made from Watermelon
Distribute the batter into three greased five-inch round pans, with the green batter occupying one and the pink batter the remaining two. Bake at 175°C for 25 minutes, or until a probe thermometer inserted into the center registers 98°C and the surface springs back immediately. The edges should just begin to pull away from the pan sides, indicating that the structural skin has set.
Step 5: Thermal Stabilization and Trimming
Allow the cakes to cool in their pans for exactly ten minutes before transferring them to a wire rack to reach ambient temperature. Once cool, wrap each layer tightly in plastic wrap and place them in the freezer for 30 minutes to firm the crumb. This drop in temperature makes the trimming process much cleaner, allowing you to remove the domed tops with an offset palette knife without tearing the delicate interior.
Step 6: Buttercream Preparation and Aeration
Beat the softened butter until it is nearly white before gradually adding the sifted powdered sugar and vanilla extract. The goal is a medium-stiff peak consistency that holds its shape but remains spreadable enough to avoid pulling at the cake’s surface. If the icing feels too soft, refrigerate it for 15 minutes to allow the lipids to recrystallize and regain their structural hold.
Step 7: Stacking and Structural Assembly
Place the green layer at the base of your cake board, applying a thin, even layer of pink buttercream to act as an adhesive. Stack the two pink layers on top, ensuring they are perfectly centered to prevent the tower from leaning as the fats soften at room temperature. Use a cake spatula to apply a thin crumb coat to the exterior, which will trap any loose particles and provide a smooth substrate for final decoration.
Step 8: Final Decoration and Seed Placement
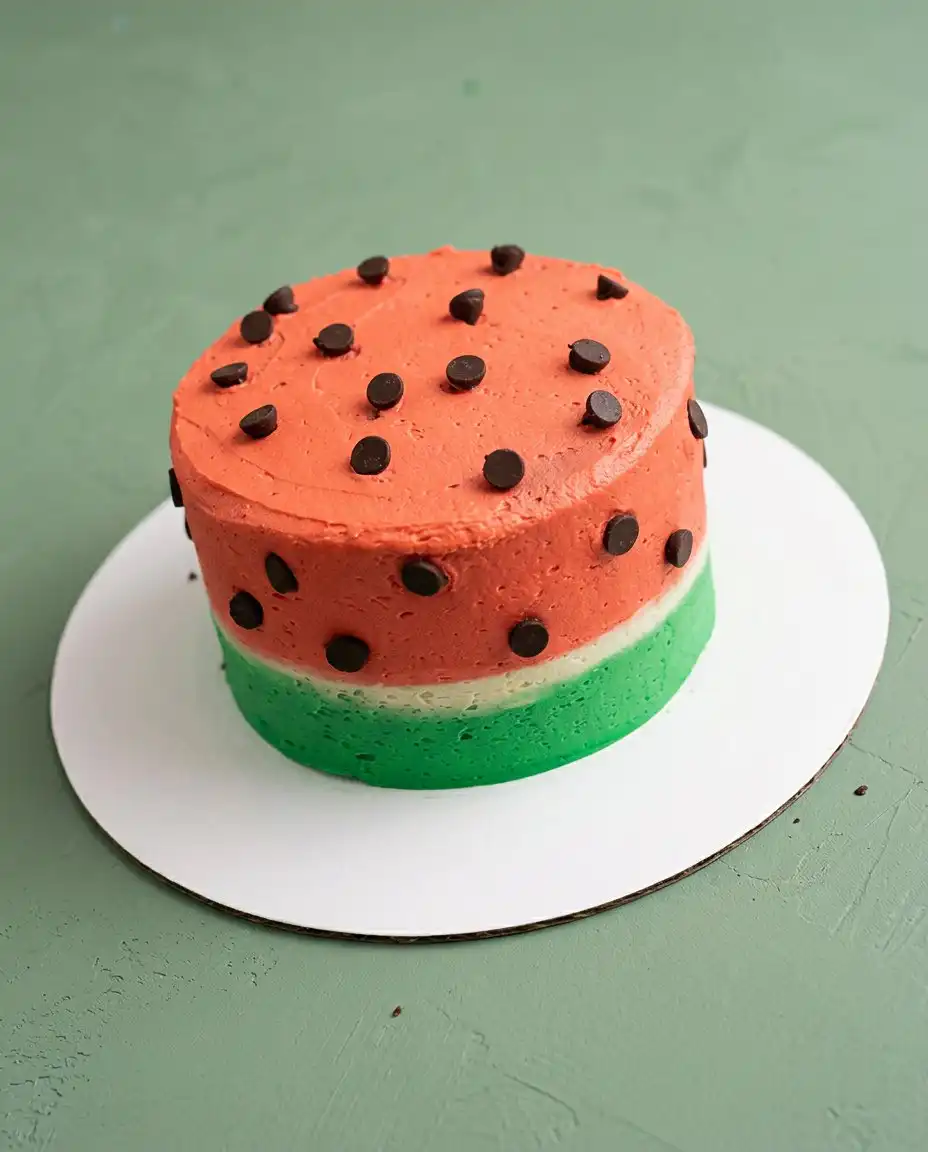
Fill a piping bag with the remaining pink frosting and use a star tip to create a uniform pattern of swirls across the top and sides. For the seeds, use the black-tinted icing to pipe small, teardrop-shaped dots that mimic the appearance of a real fruit interior. Use a toothpick to refine the shape of each seed, wiping the tip clean between each application to ensure the black pigment does not bleed into the pink base.
Pastry Bench Tips
Temperature control is the most frequent point of failure in buttercream construction; if the butter is too warm, the emulsion will fail and become greasy. To resolve a broken buttercream, place the bowl over a cool water bath and whisk vigorously until the fats realign and the texture becomes smooth again. This mechanical correction is essential for maintaining the sharp edges required for professional piping.
Freezing the cake layers before trimming is a standard industry technique that minimizes crumb shedding and ensures a level surface. You can find further inspiration on managing tiered layers in this two layer smash cake birthday story which illustrates the importance of a flat base. A level cake is less likely to topple during the high-energy environment of a birthday celebration.
When applying the black icing seeds, keep the piping tip 2mm above the surface to ensure the dot remains raised and dimensional. This creates a tactile contrast that is visually more appealing than flat, smeared markings on the frosting. For more ideas on fruit-themed aesthetics, you may review how to assemble fruit-based cakes to understand the visual cues that make these designs successful.
If your cake feels overly dense, it is likely that the flour was over-mixed after the milk was added, leading to excessive gluten development. To fix this in future bakes, only stir until no dry streaks remain, as the 30-second window between a mixed batter and an overworked one is incredibly narrow. Precision in timing during the final mixing stage protects the tender mouthfeel that babies prefer.
Always use a digital scale to divide your batter into the pans to ensure all layers bake at the same rate. This consistency prevents the green layer from being overbaked while the pink layers remain underdone in the center. Weighted measurements remove the margin of error that comes with volume-based pouring, resulting in a more predictable professional outcome.
Avoid using heavy fondant for a smash cake as it can present a choking hazard and is difficult for small hands to pull apart. Buttercream provides the necessary resistance for a satisfying smash while remaining soft enough for easy consumption. The structural skin of the buttercream should be set in the fridge but served at room temperature for the best texture.
Frequently Asked Questions
How to make a watermelon cake for a baby?
Constructing this for a baby requires focusing on soft textures and safe ingredients that are easy to swallow. You should ensure the cake is baked thoroughly to avoid any gummy centers while keeping the frosting thickness manageable for small hands. Avoid any small candies or hard decorations that could pose a choking hazard during the smash process.
What is watermelon smash?
A watermelon smash typically refers to a sensory play activity or photo session where an infant is encouraged to interact with a cake designed to look like a watermelon. It allows the child to explore different textures, from the creamy frosting to the soft sponge, often resulting in messy and memorable photographs. The theme is popular for summer birthdays and outdoor celebrations due to its bright, refreshing aesthetic.
What is a smash cake made of?
This specific version is made from a traditional butter sponge base that has been colored with food-grade dyes to mimic fruit. It includes standard pastry components like flour, sugar, and eggs, but is scaled down to a five-inch diameter to suit an infant’s size. The goal is a composition that is soft enough to be dismantled by hand but sturdy enough to stand upright on a cake board.
How to make a cake with a watermelon?
While some versions use the actual fruit as the core, this recipe uses the technical precision of baking to create a themed representation. By using green batter for the base and pink for the top, you create a visual cross-section that looks like the fruit when sliced. This provides a more traditional cake flavor while maintaining the fun, vibrant appearance of the summer fruit.
Can I make this cake in advance?
You can bake the layers up to two days before the event, provided they are wrapped tightly in plastic wrap and kept in the refrigerator. This allows the crumb to settle and makes the assembly process much faster on the day of the party. For the best texture, frost the cake on the day it will be served to prevent the icing from drying out or absorbing refrigerator odors.
How do I store leftovers from a smash cake?
Given that the cake will likely be dismantled during the session, any remaining edible portions should be stored in an airtight container. Keep the container in the refrigerator for up to three days, though the texture of the exposed sponge will begin to dry out quickly. If the cake was served outdoors in the heat, it is safer to discard any portions that were left out for more than two hours.
Considered Adjustments
For those seeking a healthy cake alternative, you can substitute a portion of the sugar with unsweetened applesauce. This adjustment increases the moisture content significantly, so you must extend the baking time by approximately five minutes to ensure the center is fully set. The resulting crumb will be denser but will remain exceptionally soft for the infant’s palate.
Natural pigmentation can be achieved by using concentrated beet juice for the pink layers and matcha powder for the green rind. While the colors may not be as neon as synthetic dyes, they provide a sophisticated, earthy palette that aligns with a more organic aesthetic. Ensure the matcha is sifted finely to prevent any bitter clumps from disrupting the delicate flavor of the vanilla sponge.
If you prefer a lighter finish, a stabilized whipped cream frosting can replace the buttercream for a less sugary profile. Use a small amount of gelatin or a specialized starch stabilizer to ensure the cream holds its shape during the photo session. This modification requires constant refrigeration until the moment of serving to prevent the structure from collapsing in warm environments.
Serving the Structure
When presenting the Smash Cake Made from Watermelon, the temperature of the buttercream is the most critical factor for the desired interaction. Remove the cake from the refrigerator at least 45 minutes before the session to allow the butter to soften, ensuring it is pliable enough for the baby to move. A cake served too cold will be difficult to smash and may frustrate the child during their sensory exploration.
Placing the cake on a sturdy, non-slip cake board or a highchair tray is essential for safety and stability. If you are serving this alongside a larger dessert for guests, a cake with fruit theme can tie the entire table together. Provide a small offset spatula or a dull spoon to the child if you wish to encourage them to start the dismantling process, though most prefer using their hands.
Keep a bowl of warm water and a soft cloth nearby to manage the cleanup once the photo session is complete. The pink and green dyes can temporarily stain skin and clothing, so prompt cleaning is recommended. Setting the scene with a neutral background will allow the vibrant colors of the watermelon theme to stand out, making the technical details of your piping and layering the focal point of the imagery.
What the Technique Gives You
Mastering the Smash Cake Made from Watermelon provides a unique opportunity to apply pastry precision to a joyful, informal occasion. By understanding the science of creaming and the importance of thermal stabilization, you create a dessert that is as structurally sound as it is visually captivating. The crisp shell of the buttercream protects the creamy interior, ensuring every photograph captures the intended design before the celebration begins.
As you move forward with your baking, remember that the smallest details, such as the temperature of your ingredients or the weight of your batter, dictate the success of the final product. This methodical approach ensures that your two layer smash cake birthday projects are consistently successful. We invite you to share your results and continue refining your technical skills on the pastry bench.
For more technical guides and pastry inspiration, connect with us on our social platforms. Join our community on Pinterest, follow our latest techniques on Facebook, or see the structure in motion on TikTok. We also share real-time updates and tips through our Telegram channel for dedicated bakers.