During my early training in a traditional British patisserie, I became obsessed with the concept of moisture migration—the slow, silent transfer of water between components. This Oreo Icebox Cake is the ultimate expression of that discipline, turning rigid biscuits into a soft, sophisticated crumb through the power of a cold rest. It is a reminder that in pastry, time is as vital an ingredient as flour or sugar.

This recipe requires only four ingredients, yet it achieves a level of textural sophistication that belies its simplicity. By layering dark cocoa biscuits with a stable, lightly sweetened chantilly, we create a dessert that is both structurally sound and incredibly tender. The result is a victory of technique over complexity, yielding a melt-in-your-mouth finish that feels profoundly professional.
Structure Meets Texture
This dessert represents a beautiful victory of structural science over heat. While traditional sponge cakes rely on the expansion of air in a hot oven, the Oreo Icebox Cake relies on osmotic pressure. As the moisture from the whipped cream is drawn into the dry, porous cocoa biscuits, the starch granules soften and expand. This creates a unified texture where the boundary between cream and cookie disappears, resulting in a mouthfeel that is remarkably similar to a dense, moist chocolate cake.
Furthermore, the simplicity of the build allows the quality of your ingredients to shine. Because we are not baking the cream, the fat content remains stable, providing a rich, coating sensation on the palate that is often lost in high-heat applications. You will appreciate the methodical nature of the assembly—the rhythmic layering of biscuits and cream—which guarantees a beautiful cross-section when sliced. It is a spectacular demonstration of how precision and patience can transform humble pantry staples into an exquisite masterpiece.
Print
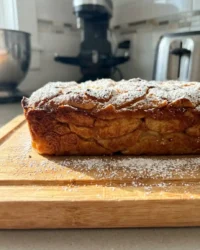
Oreo Icebox Cake
- Total Time: 4 hours 30 mins
- Yield: 9 servings
- Diet: Vegetarian
Description
This sophisticated no-bake dessert transforms classic cocoa cookies into a tender, cake-like crumb through the scientific process of moisture migration. By layering biscuits with a stabilized chantilly cream and allowing for a precise cold rest, you achieve a professional-grade dessert with minimal ingredients.
Ingredients
- 2 cups (480 ml) heavy whipping cream (minimum 36% fat)
- 2 tablespoons powdered sugar
- 1 teaspoon pure vanilla extract
- 35 Oreo cookies (32 for layers, 3 for topping)
Instructions
- Place your mixing bowl and whisk attachment in the freezer for 10 minutes to ensure they are thoroughly chilled.
- Pour the heavy cream into the chilled bowl along with the powdered sugar and vanilla extract; whip on medium-high speed until stiff peaks form.
- In an 8-inch square pan, arrange a tight, even layer of 16 Oreo cookies to create the structural base.
- Spread exactly half of the whipped cream over the cookies using an offset spatula, ensuring it reaches all corners.
- Place a second layer of 16 cookies over the cream, pressing very lightly, then top with the remaining whipped cream and smooth the surface.
- Crush the remaining 3 cookies into a fine dust and sprinkle over the top of the cake.
- Cover the pan tightly and refrigerate for at least 4 hours, or up to 24 hours for a perfectly unified texture.
- For the cleanest slices, place the cake in the freezer for 30 minutes before serving and use a sharp knife dipped in hot water.
Notes
To ensure structural integrity, never substitute the heavy cream for a lower-fat alternative, as the 36% fat content is necessary to support the weight of the cookies. If you prefer a free-standing cake, use a springform pan lined with acetate to reveal perfectly clean layers upon removal.
- Prep Time: 30 mins
- Cook Time: 0 mins
- Category: Dessert
- Method: No-Bake
- Cuisine: American
The Technical Foundation

For a dessert with so few components, the quality and temperature of each ingredient are paramount to achieving the correct structural integrity.
- Heavy Whipping Cream (2 cups / 480 ml): You must use a cream with a fat content of at least 36%. This fat provides the structural matrix that supports the weight of the cookies. The cream should be used straight from the refrigerator to encourage the formation of stable fat globules during whipping.
- Powdered Sugar (2 tablespoons): Beyond sweetness, the cornstarch present in most commercial powdered sugars acts as a minor stabilizer for the whipped cream, helping it hold its shape over the long chill period.
- Pure Vanilla Extract (1 teaspoon): I recommend a high-quality extract or even vanilla bean paste. Since there is no cooking involved, the aromatic compounds remain volatile and provide a deep, authentic flavor profile.
- Oreo Cookies (32 whole, plus 3 crushed): The classic chocolate sandwich cookie provides the dark, cocoa-rich structure. The internal cream filling helps prevent the biscuit from becoming too soggy, maintaining a pleasant bite within the softened crumb.
Precision is key here; if your cream is too warm, it will not trap enough air, and the cake will lack the necessary height and volume to be truly spectacular.
The Method
Step 1: Prepare the Equipment and Cream
Before beginning, place your mixing bowl and whisk attachment in the freezer for ten minutes. This technical step ensures the heavy cream stays cold, which is vital for building a strong protein and fat network. Pour the 2 cups of heavy whipping cream into the chilled bowl, then add the 2 tablespoons of powdered sugar and 1 teaspoon of vanilla extract. Begin whipping on a low speed to incorporate the sugar, then gradually increase to medium-high.
Step 2: Achieve Stable Peaks
Watch the cream closely; we are looking for the “stiff peak” stage. As the whisk moves through the cream, it should leave distinct tracks that do not collapse. When you lift the whisk, the cream should stand straight up without drooping. Be careful not to overwhip, as this will break the emulsion and create a grainy, butter-like texture. The cream should look smooth, glossy, and firm—this is the foundation of our structure.
Step 3: The Geometric Foundation
In an 8-inch (20 cm) square pan, arrange a single layer of the whole Oreo cookies. You may need to break a few to fill the gaps, but aim for a tight, even grid. This layer acts as the floor of your cake, providing the structural base needed for clean removal. Precision in the layout here prevents the cream from sinking to the bottom and ensures every slice has a consistent ratio of biscuit to cream.
Step 4: Layering with Precision
Measure out exactly half of your whipped cream and spoon it over the first layer of cookies. Use an offset spatula to smooth the cream into an even sheet, making sure it reaches the corners of the pan. Place the second layer of 16 cookies directly on top of the cream, pressing very lightly to set them. Top this with the remaining whipped cream and smooth the surface until it is perfectly level.
Step 5: Decorative Finish and The Chill
Take the 3 remaining cookies and crush them into a fine, irregular dust. Sprinkle this over the top of the cake to add a textural contrast and visual indicator of the flavors within. Cover the pan tightly with plastic wrap to prevent the cream from absorbing any refrigerator odors. Place the pan in the fridge for a minimum of 4 hours, though 12 to 24 hours is the professional standard for the most unified texture.
Step 6: The Finishing Touch
For the most precise presentation, place the cake in the freezer for 30 minutes before you intend to serve it. This slightly firms the fats, allowing for a surgical cut that showcases the beautiful black-and-white stripes of the interior. Use a sharp, thin-bladed knife for the best results.
Precision Secrets

To achieve a truly professional finish, you must manage the temperature of your cream with absolute discipline. If you find your whipped cream is starting to lose its structure before you finish layering, return it to the fridge for five minutes to firm up. For those looking to master even more complex textures, understanding the balance of fat and sugar is essential; you might find my guide on snickers-cake helpful for mastering layered stability.
Another technical trick is to use a springform pan if you want a free-standing cake. By lining the sides with acetate, you can peel back the ring to reveal perfect, un-smudged layers. For further reading on the science of cold-set desserts, you can view the methodology at Little Sunny Kitchen. Always remember that the “cake” texture is a result of time; rushing the chill will result in a crunchy cookie, not a tender crumb.
Technical Variations
Once you have mastered the basic structural build, you can experiment with flavor profiles while maintaining the integrity of the cake. Replacing the standard Oreos with Golden Oreos or Mint Oreos provides a completely different aesthetic and taste. If you choose to add fruit, such as thin slices of strawberry, place them between the cream and the cookie layer to prevent the juice from weeping into the cream.
For a more advanced variation, you could incorporate a thin layer of stabilized ganache between the cream layers. This adds a more rigid structural element and a deeper chocolate note. If you enjoy the combination of fruit and cream, I recommend studying the construction of my raspberry-white-chocolate-cake for inspiration on balancing acidity with fat content. Regardless of the variation, maintain the 1:1 ratio of cookie height to cream height for the best visual balance.
Presentation Precision

Serving this cake is an exercise in timing. To ensure a spectacular presentation, use a knife that has been dipped in hot water and wiped dry between every single cut. This melts the fats in the cream just enough to create a smooth, mirror-like surface on the side of each slice. For a complete textural experience, serve this alongside a rich, warm beverage to provide a temperature contrast to the cold cream.
If you are hosting a formal gathering, you might consider plating individual squares with a small dollop of fresh cream and a single whole cookie for height. For more ideas on presenting chocolate-heavy desserts, my old-fashioned-chocolate-cake guide offers several plating techniques that emphasize structural beauty. Always serve immediately upon removal from the fridge to preserve the crispness of the crushed cookie topping.
Master the Craft
Mastering the Oreo Icebox Cake is a victory of patience and precision over the need for heat. It proves that with an understanding of moisture and fat, you can create a dessert that is as beautiful as it is delicious. I invite you to continue your journey into the science of texture by exploring my cocoa-dream-lab for more technical insights. If you find success with this method, please share your results with our community of devoted bakers. You can find me on Instagram, Facebook, and Pinterest to see more technical demonstrations and pastry art.

