During my early years training in a classic British pastry kitchen, we were taught that a cake’s success lies in its structural integrity as much as its flavor profile. This Oreo Cake is a technical study in texture, balancing the resistance of cocoa-rich biscuits with a sponge that offers zero resistance to the fork. It is a triumph of methodical baking, where we focus on a controlled crumb to support the inclusion of heavy solids without losing the rise.

Achieving a professional-grade cookies and cream profile requires more than just mixing biscuits into a standard batter; it demands a specific density to hold the weight of the inclusions. This recipe uses a reverse-creaming technique to yield a tight, velvet-like structure that melts beautifully on the palate. By managing the fat-to-flour ratio with precision, we create a cake that is both structurally sound for stacking and exquisitely tender to eat.
A Masterclass in Structural Texture
You will appreciate this recipe because it moves beyond the basic ‘box mix’ aesthetic to create a dessert with genuine architectural beauty. The contrast between the snowy-white sponge and the dark, jagged pieces of cocoa biscuit creates a visual rhythm that is as satisfying as the taste. This Oreo Cake is designed for the baker who values the science of a good ‘melt’—where the fat melts at body temperature, releasing the deep cocoa flavors and creamy vanilla notes in a timed sequence.
The inclusion of sour cream provides a specific acidity that tenderizes the crumb, while the egg whites maintain a pristine color that makes the Oreo pieces pop. This isn’t just a cake; it is a calculated balance of moisture and strength. The result is a dessert that stands tall on a cake board but yields instantly to a pastry fork, providing a sophisticated mouthfeel that commercial cakes simply cannot replicate.
Print
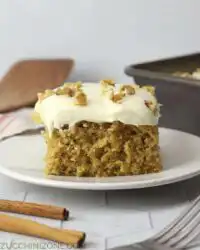
Oreo Cake
- Total Time: 2 hours 10 mins
- Yield: 12 servings
- Diet: Vegetarian
Description
This sophisticated Oreo Cake utilizes a professional reverse-creaming method to achieve a velvety, tight-crumbed sponge that perfectly supports chunks of cocoa biscuits. Topped with silky cookies-and-cream buttercream and a precise chocolate ganache drip, it is a masterclass in structural baking and balanced textures.
Ingredients
- 240g All-Purpose Flour
- 200g Granulated Sugar
- Baking Soda
- Baking Powder
- Salt
- 170g Unsalted Butter, room temperature
- Egg Whites
- 120g Sour Cream
- 120ml Whole Milk
- Vanilla Extract
- 120g Oreos, hand-chopped
- 340g Unsalted Butter (for buttercream)
- 600g Confectioners’ Sugar
- Heavy Cream
- Semisweet Chocolate
- Additional Heavy Cream (for ganache)
Instructions
- Preheat oven to 350°F (175°C) and prepare three 6-inch cake pans with butter and flour.
- Sift together flour, 200g sugar, baking soda, baking powder, and salt into a large bowl.
- Beat 170g butter in a stand mixer for 2 minutes, then mix in dry ingredients on low until texture resembles damp sand.
- Whisk egg whites, sour cream, milk, and vanilla, then gradually pour into the flour-butter mixture and beat on medium for 60 seconds.
- Gently fold in chopped Oreos by hand and divide batter evenly among pans using a kitchen scale.
- Bake for 25-30 minutes until internal temperature reaches 205°F (96°C), then cool in pans for 10 minutes before moving to a wire rack.
- Make buttercream by whipping 340g butter, confectioners’ sugar, and cream until fluffy; fold Oreo crumbs into a portion of it.
- Create ganache by melting chocolate and cream together until smooth and slightly warm to the touch.
- Assemble by layering cake with Oreo buttercream and ganache, then apply a crumb coat, final frost, and ganache drip.
Notes
To ensure a perfectly flat top for easy stacking, consider using wet cake strips around your pans during the baking process. Always use room-temperature dairy ingredients to prevent the batter from seizing, which maintains the desired silky emulsion for the final crumb.
- Prep Time: 40 mins
- Cook Time: 30 mins
- Category: Dessert
- Method: Reverse Creaming
- Cuisine: American
The Technical Foundation of the Crumb

Every component in this Oreo Cake has been selected for its contribution to the final structure. We are looking for specific protein levels and fat percentages to ensure the cake doesn’t crumble under the weight of the buttercream and ganache.
- All-Purpose Flour (240g): This provides the essential skeleton for our cake. Its protein content is high enough to support the cookies but low enough to remain tender.
- Unsalted Butter (170g): At room temperature (roughly 68°F/20°C), the butter is plastic enough to coat the flour particles, which is the key to our reverse-creaming method.
- Egg Whites: By omitting the yolks, we remove the yellow tint and some of the emulsifying fats, allowing for a whiter, lighter sponge that highlights the black cocoa of the cookies.
- Sour Cream (120g): This adds necessary fat and acidity. The acidity breaks down gluten strands, contributing to a tighter, more uniform crumb.
- Whole Milk (120ml): Provides hydration for the flour’s starches to gelatinize during baking.
- Chopped Oreos (120g): These should be chopped by hand to maintain distinct textures. Avoid a food processor, which creates dust that will turn your batter grey.
- Confectioners’ Sugar (600g): Finely milled sugar is vital for the buttercream to achieve a silky, non-gritty texture that coats the tongue.
The Methodical Process
Step 1: Prep and Sifting
Preheat your oven to 350°F (175°C). Prepare three 6-inch cake pans by greasing them with unsalted butter and dusting with flour. Sift the 240g of flour, 200g of sugar, baking soda, baking powder, and salt together into a large bowl. Sifting is not optional; it aerates the dry ingredients and prevents clumps in the reverse-creaming stage.
Step 2: The Reverse Creaming Phase
In a stand mixer fitted with the paddle attachment, beat the room-temperature butter on medium speed for two minutes until it is light and aerated. Add the sifted dry ingredients to the butter and mix on the lowest speed. We are looking for a texture resembling damp sand. This process coats the flour in fat, creating a physical barrier that prevents excessive gluten development when the liquids are added.
Step 3: Wet Ingredient Integration
In a separate medium bowl, whisk together the egg whites, sour cream, milk, and vanilla extract until the mixture is homogeneous. With the mixer on low, gradually pour the liquid mixture into the butter-flour sand. Once the liquid is incorporated, increase the speed to medium and beat for exactly 60 seconds. This builds just enough structure to keep the cake from being too fragile.
Step 4: Folding and Scaling
Using a silicone spatula, gently fold the 120g of chopped Oreos into the batter. Do not over-mix, or the cocoa from the cookies will streak the white batter. Divide the mixture evenly between the three pans. I highly recommend using a kitchen scale to ensure each pan has an identical mass of batter, which guarantees they bake at the same rate.
Step 5: Precision Baking
Bake for 25 to 30 minutes. Use a digital probe thermometer if possible; the internal temperature should reach 205°F (96°C), or the centers should spring back when touched lightly. Let the cakes cool in the pans for 10 minutes to allow the structure to set before transferring them to a wire rack. Cooling is a vital part of the technical process.
Step 6: Creating the Silky Buttercream
Beat the 340g of butter for 5 minutes until it is extremely pale and fluffy. Gradually add the confectioners’ sugar and heavy cream on low speed. Once combined, whip on high for another 2 minutes. Reserve 1 cup of the white cream for the top dollops, then fold the crushed Oreo crumbs into the remainder. The crumbs should be fine enough to pass through a piping tip if needed.
Step 7: Ganache Drip Management
Combine the semisweet chocolate and cream in a small saucepan over the lowest heat. Whisk until the emulsion is glossy and smooth. The temperature of the ganache is critical; it should be slightly warm to the touch (about 90°F or 32°C). If it is too hot, it will melt your buttercream; too cold, and it won’t drip down the sides elegantly.
Step 8: Final Assembly
Place the first cake layer on a rotating turntable. Spread a level layer of Oreo buttercream, then add a thin spiral of ganache. Repeat with the second layer. Coat the entire exterior in a thin ‘crumb coat’, chill for 20 minutes, then apply the final layer of buttercream. Use an offset spatula for a sharp, professional edge. Apply the ganache drip, pipe the white dollops, and chill for 60 minutes before slicing.
Jordan’s Technical Wisdom

For a perfectly flat cake layer without a domed top, I recommend using cake strips. These fabric bands are soaked in water and wrapped around the pan to keep the edges cool, allowing the center to rise at the same rate as the sides. This results in a more uniform crumb and less waste from leveling. Additionally, the temperature of your ingredients is non-negotiable. If your sour cream or milk is cold, the fat in the butter will seize, resulting in a broken emulsion and a coarse, greasy texture. If you are interested in a different flavor profile that requires similar precision, our old-fashioned-chocolate-cake offers a fantastic lesson in cocoa hydration. Always test your ganache drip on the side of a glass before committing to the cake; a single drop will tell you if the viscosity is correct.
Technical Adaptations
While this white sponge is the standard, you can modify the structural foundation for different results. For a deeper cocoa experience, replace 30g of the flour with Dutch-processed cocoa powder. This will change the pH of the batter, so you may need to increase the baking soda by an additional 1/8 teaspoon to maintain the lift. Alternatively, for a fruit-forward variation, you can fold in freeze-dried raspberry powder into the buttercream. This provides a sharp acidity that cuts through the richness of the cookies. For more ideas on fruit and chocolate pairings, see our raspberry-white-chocolate-cake guide. You can also experiment with different biscuit types, such as golden sandwich cookies, though the structural sugar content will vary slightly.
Presentation and Portioning Precision

To showcase the internal architecture of this Oreo Cake, you must use a sharp, thin-bladed knife. Dip the blade in hot water and wipe it completely dry before each cut. This prevents the dark cookie crumbs from dragging through the white cake layers, preserving the visual contrast. Serve each slice at a temperature slightly below room temperature—roughly 65°F (18°C). This allows the buttercream to remain firm enough for structure while the cake sponge feels moist. For a decadent pairing, serve with a glass of cold whole milk or a small dollop of unsweetened whipped cream to balance the sugar. If you enjoy layered desserts with varying textures, our snickers-cake provides a similar challenge in managing multiple components.
Master the Craft
This Oreo Cake is a testament to the fact that precision creates better mouthfeel. By following the reverse-creaming method and managing your temperatures, you have created a dessert that is as structurally sound as it is delicious. The journey to pastry mastery is one of constant refinement, and this cake is a perfect milestone. For those who wish to continue their education in the science of chocolate and texture, I invite you to visit our cocoa-dream-lab for more technical insights. I would be delighted to see your results, so please share your bakes and tag us on Instagram, Facebook, or Pinterest. Happy baking, and remember: precision is the path to perfection.


