Every busy baker knows the panic of a Tuesday night realization that Mom’s birthday is tomorrow and the schedule is packed. You want a cake that screams luxury and effort, yet you only have a small window of time between daily errands and evening relaxation. This method focuses on that perfect, moist texture that melts instantly, paired with a stunning spatula-painted floral design that looks like high-end gallery art.

By using a high-quality cake mix and a few texture-focused shortcuts, we create a crumb that is consistently tender and never dry. We are skipping the complex piping bags for a simple tapered spatula technique that delivers sophisticated roses and daisies in minutes, proving that express doesn’t mean compromising on beauty.
Express Texture Meets High-End Design
This cake is a total game-changer for anyone who values their time but refuses to serve a dry, boring dessert. We focus on a moisture-rich base that stays soft for days, ensuring every bite is just as luscious as the first. The spatula-painting technique is incredibly forgiving, allowing you to create artistic floral patterns without needing the steady hand of a professional pastry chef. It is the ultimate quick indulgence that feels deeply personal and thoughtful for the most important woman in your life.
Print
Happy Birthday Mom Cake
- Total Time: 1 hour 5 mins
- Yield: 10 servings
- Diet: Vegetarian
Description
Create a stunning floral masterpiece for Mom using an express spatula-painting technique on a moist, tall-profile cake. This approachable method yields gallery-quality results that pair professional-looking icing art with the reliable texture of a high-quality mix.
Ingredients
- Favorite Cake Mix (enough for two 6-inch rounds)
- 4 lb. tub Creamy White Decorator Icing
- Juniper Green icing color
- Moss Green icing color
- Leaf Green icing color
Instructions
- Bake cake batter in two 6-inch round pans according to instructions and let cool completely to room temperature.
- Level the cake tops, fill with a thin layer of icing, and stack the layers to achieve a modern 5-inch tall profile.
- Coat the exterior with white decorator icing using a turntable and icing smoother to create a clean, smooth canvas.
- Tint small portions of icing with the various green colors in small bowls to create a garden palette.
- Use a tapered spatula to press and swipe white icing in circular motions to build textured spatula roses.
- Form daisies with pointed petals and add green leaves using the spatula tip to complete the hand-painted oil canvas look.
Notes
To achieve the best results with the spatula painting, chill the iced cake for 15 minutes before applying the decorative flowers; a firmer surface prevents the base icing from smearing into your floral art.
- Prep Time: 35 mins
- Cook Time: 30 mins
- Category: Dessert
- Method: Baking and Painting
- Cuisine: American
The Express Pantry

To get that melt-in-your-mouth feel without the wait, we rely on smart shortcuts and professional tools. Here is what you need to gather for this quick-finish masterpiece:
- Favorite Cake Mix: Choose a high-quality mix or your go-to reliable recipe for two 6-inch rounds.
- Creamy White Decorator Icing: A 4 lb. tub saves you from the mess of making huge batches of buttercream from scratch.
- Juniper Green, Moss Green, and Leaf Green Icing Colors: These specific shades create a realistic, sophisticated garden palette.
- 6-inch Round Pans: Smaller pans help achieve that trendy, tall 5-inch profile that looks so professional.
- Cake Turntable and Icing Smoother: These are the secrets to getting that bakery-flat finish in seconds.
- Tapered Spatulas: These are your “brushes” for the floral art.
The Quick Process
Step 1: Prep and Bake Your Layers
Bake your cake batter following the specific instructions for your mix or recipe. Use two 6-inch round pans to ensure a tall, elegant look. Once baked, let them cool on a grid until they are room temperature. Level the tops, fill with a thin layer of icing, and stack them to reach a height of approximately 5 inches. This height is key for the modern visual appeal.
Step 2: Create a Smooth Canvas
Place your stacked cake on the turntable. Use your angled spatula and icing smoother to coat the exterior with white decorator icing. Aim for a clean, smooth finish on the sides and top. This serves as your blank canvas for the floral painting. Don’t worry if it isn’t 100% perfect, as the flowers will add texture and hide minor imperfections.
Step 3: Mix Your Garden Palette
In small bowls, tint your icing. Create a dark green using the Juniper Green color. For the light green, combine Leaf Green and Moss Green until you reach a soft, natural herb tone. Reserve the majority of your icing as bright white for the flower petals.
Step 4: Paint the Spatula Roses
Using the tip of your tapered spatula, scoop a small dollop of white icing. Press it onto the side of the cake to form the center of a rose. Swipe more small amounts of icing in a circular motion around that center to build out the petals. The natural ridges from the spatula create a realistic, textured petal look instantly.
Step 5: Add Daisies and Greenery
For the daisies, pull the spatula tip toward the center of the flower to create a tapered, pointed petal. Use your green icing and the tapered spatula to tuck in leaves and flower centers. This layering technique adds depth and makes the cake look like a hand-painted oil canvas.
Express Texture Secrets

To keep your cake from drying out during the decorating process, always keep your icing tub tightly sealed when not in use. If you want to add an extra layer of flavor, consider a quick fruit soak or a thin layer of jam between the cakes. For a bright, tart contrast that pairs beautifully with the creamy white icing, you might enjoy the flavor profile of our raspberry-white-chocolate-cake. Another secret is to chill the cake for 15 minutes after the initial smoothing but before you start the spatula painting; this firm surface makes the floral application much easier and cleaner.
Flavor Express Twists
While white icing is the classic canvas for these flowers, you can swap the base cake for any flavor Mom loves. If she is a fan of deep, rich textures, try using this decorating technique on our old-fashioned-chocolate-cake base. You can also experiment with different flower colors; replace the white petals with soft pink or lavender by using different icing gels. For a citrus twist, add a teaspoon of lemon zest to the icing before smoothing it onto the cake for a refreshing scent that matches the garden theme.
Instant Enjoyment

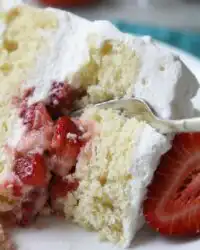
Serve this cake immediately for the best texture, as the decorator icing is most luscious at room temperature. Use a sharp, thin knife dipped in hot water and wiped dry between each cut to get clean, professional slices that show off the 5-inch height. This cake pairs wonderfully with a side of fresh berries, similar to the presentation of our fruit-cake, which adds a pop of natural acidity to balance the sweet icing. A light sparkling cider or a floral herbal tea also makes the perfect accompaniment for a birthday afternoon.
The Sweet Truth
You don’t need to spend all day in the kitchen to give Mom a cake that looks like a masterpiece. By focusing on moist textures and quick artistic techniques, you can deliver a professional-grade dessert even on the busiest schedule. For more inspiration on creating beautiful designs with minimal stress, check out our succulent-fruit-fusion ideas. If you are looking for even more creative ways to celebrate her special day, visit the Wilton birthday guide for extra inspiration. Don’t forget to share your beautiful creations with us on Pinterest, Instagram, and Facebook. Happy baking!


