During my early training in London, I was obsessed with the hot milk sponge—a technique that uses heat to stabilize the crumb and create a superior mouthfeel. It is the architectural foundation of a reliable celebration cake, providing the structural integrity needed to support rich frostings while remaining impossibly soft. This method requires precision, as the temperature of the milk affects the final emulsion and the delicate rise of the sponge.

This particular Cake For Birthday relies on the interaction between scalded milk and aerated eggs to achieve a texture that is both sturdy for stacking and exceptionally tender. By incorporating a small amount of vegetable oil alongside high-quality butter, we achieve a fat profile that remains moist even after refrigeration. It is the ultimate expression of my philosophy: precision in technique leads to the most beautiful textural outcomes.
Structure Meets Texture
The true beauty of this recipe lies in the hot milk method, which differs significantly from the standard creaming method used in most household bakes. Instead of beating air into butter, we aerate whole eggs and sugar to a thick ribbon stage, then stabilize that foam with a hot liquid emulsion. This creates a cake for birthday celebrations that is remarkably fine-grained and resilient, meaning it won’t crumble when you slice into those thin, elegant layers.
Furthermore, the frosting is a masterclass in cocoa suspension. By using hot water to bloom the cocoa powder, we release the full depth of the chocolate flavor while creating a silky consistency that spreads with minimal resistance. This balance of a structured sponge and a meltingly soft frosting creates a sensory experience that is far more sophisticated than your average store-bought treat. It is a triumph of pastry science that yields a stunning, professional result every time.
Print
Cake For Birthday
- Total Time: 1 hour
- Yield: 12-14 servings
- Diet: Vegetarian
Description
This sophisticated celebration cake employs the hot milk sponge method to produce a remarkably fine-grained and sturdy crumb. Paired with a deep cocoa-bloomed frosting, it offers a professional-quality texture and rich flavor profile perfect for any special occasion.
Ingredients
- 4 large eggs, room temperature
- 397g granulated sugar
- 240g King Arthur Unbleached All-Purpose Flour
- 1 1/4 teaspoons salt
- 2 teaspoons baking powder
- 227g whole milk
- 57g unsalted butter
- 67g vegetable oil
- Vanilla extract
- Cocoa powder (Natural or Dutch-process)
- 1/3 cup hot water
- Confectioners’ sugar
- Softened butter
Instructions
- Preheat the oven to 325°F (163°C) and grease two 8-inch or 9-inch round pans, lining the bottoms with parchment paper for a clean release.
- In a stand mixer with a whisk attachment, beat the eggs and granulated sugar on medium-high speed for 5 to 8 minutes until the mixture reaches the thick ribbon stage.
- Whisk together the flour, salt, and baking powder, then sift the mixture and gently fold it into the egg foam in three separate stages using a spatula.
- Heat the milk and 57g of butter in a small saucepan until simmering, then remove from heat and stir in the vegetable oil and vanilla extract.
- Temper the batter by whisking one cup of the egg and flour mixture into the hot milk liquid before gently folding the combination back into the main bowl.
- Divide the batter evenly between the prepared pans and bake for 30 to 35 minutes until the tops spring back and a skewer comes out clean.
- Prepare the frosting by blooming the cocoa powder in hot water and vanilla, then beat into a mixture of softened butter and confectioners’ sugar until glossy and stable.
Notes
For the most successful rise, ensure your eggs are truly at room temperature before whisking, as this allows the proteins to trap more air. When folding the dry ingredients and the tempered milk mixture, use a slow, figure-eight motion to prevent deflating the delicate egg foam architecture.
- Prep Time: 25 mins
- Cook Time: 35 mins
- Category: Dessert
- Method: Hot Milk Sponge
- Cuisine: British
The Technical Foundation

To achieve the perfect Cake For Birthday, every ingredient must be chosen for its structural contribution. We are looking for high-quality components that behave predictably under heat and mechanical stress.
- King Arthur Unbleached All-Purpose Flour (240g): This flour is chosen for its consistent 11.7% protein content. This specific protein level provides the necessary skeletal structure to hold the cake’s height without becoming tough or bready.
- Large Eggs (Room Temperature): Eggs are our primary leavening agent here. At room temperature, the proteins are more elastic, allowing for maximum air entrapment during the whisking phase.
- Whole Milk (227g): The fat and lactose in whole milk contribute to the tender crumb and the golden Maillard reaction on the crust. Skim milk lacks the necessary lipids for the best mouthfeel.
- Unsalted Butter (57g) & Vegetable Oil (67g): This combination is a precision choice. Butter provides the traditional British flavor, while the oil—liquid at room temperature—guarantees the cake feels moist on the tongue, even the next day.
- Cocoa Powder (Natural or Dutch-process): Natural cocoa provides a sharp, acidic chocolate punch that pairs well with the sweetness, while Dutch-process offers a darker, mellower profile with a smoother finish. Both work, but Dutch-process will yield a more structurally dense frosting.
The Method
Step 1: Prepare the Architecture
Preheat your oven to 325°F (163°C) with the rack positioned in the center. This lower temperature is vital; it allows the cake to rise evenly and prevents the edges from setting before the center has fully expanded. Lightly grease two 8-inch or 9-inch round pans. For the most professional finish, line the bottoms with parchment paper. This provides a clean release, which is essential for maintaining the sharp, structural lines of the cake layers.
Step 2: Aerate the Egg Foundation
In a stand mixer fitted with the whisk attachment, combine the 4 large eggs and 397g of granulated sugar. Beat on medium-high speed for about 5 to 8 minutes. You are looking for the “ribbon stage”—when the mixture is pale, thick, and falls back into the bowl in a slow, defined trail that sits on the surface for three seconds before disappearing. This trapped air is what gives the sponge its lift.
Step 3: Sift and Fold the Dry Elements
Whisk together the 240g of flour, 1 1/4 teaspoons of salt, and 2 teaspoons of baking powder. Sifting these together is not just about removing lumps; it is about aerating the flour so it incorporates into the egg foam without deflating it. Gently fold the dry ingredients into the egg mixture in three stages using a large spatula. Work slowly to maintain the structural air pockets you have just created.
Step 4: Scale and Emulsify the Hot Liquid
In a small saucepan over medium heat, combine the 227g of milk and 57g of butter. Heat until the butter is completely melted and the milk is just beginning to simmer (about 160°F or 71°C). Remove from heat and stir in the 67g of vegetable oil and the extracts. The oil must be fully integrated into the hot milk to create a stable emulsion.
Step 5: Temper the Batter
Slowly pour about one cup of the egg and flour batter into the hot milk mixture, whisking constantly. This is called tempering; it brings the temperatures closer together so you don’t shock the egg proteins or deflate the foam when you combine everything. Once combined, gently fold this liquid mixture back into the main bowl of batter until the color and texture are perfectly uniform.
Step 6: The Precision Bake
Divide the batter evenly between the prepared pans. Bake for 30 to 35 minutes. Do not open the oven door during the first 25 minutes, as the sudden drop in temperature can cause the delicate structure to collapse. The cakes are done when the tops spring back lightly when touched and a skewer inserted into the center comes out clean. Allow them to cool in the pans for 10 minutes before transferring to a wire rack.
Step 7: Construct the Chocolate Frosting
While the cakes cool, prepare the frosting. Sift the cocoa powder and confectioners’ sugar to remove any clumps. Combine the cocoa with the 1/3 cup of hot water and vanilla to bloom the chocolate, creating a thick paste. In a separate bowl, beat the softened butter until pale and voluminous, then gradually add the sugar and cocoa paste. Beat until the frosting is glossy and stable enough to hold its shape.
Precision Secrets

To achieve the most beautiful texture, pay close attention to the “ribbon stage” during the egg whisking process. If the eggs are not sufficiently aerated, the cake will be dense and heavy. Conversely, if you over-whisk, the protein structure may become brittle. Always use a timer to keep your process consistent. Another vital secret is the temperature of your butter for the frosting; it should be around 65°F (18°C)—pliable but still holding its shape. If the butter is too warm, the frosting will be greasy; if it is too cold, it will be lumpy.
For those looking to expand their repertoire with complex textures, mastering the moisture balance in this recipe is a great precursor to trying our snickers-cake, which uses similar principles of fat-based stability. Remember that the humidity in your kitchen can affect how the flour absorbs the liquid, so always trust your tactile feedback. The batter should be smooth and pourable, like heavy cream. If you find your cake layers are doming too much in the oven, consider using cake strips to keep the edges cool, resulting in a perfectly flat surface for decorating.
Technical Tweaks
While this Cake For Birthday is designed for the classic chocolate-on-vanilla profile, the physics of the sponge allow for several modifications. You can replace the vanilla extract with almond or citrus extracts for a different aromatic profile. If you prefer a more colorful presentation, you might look at the layering techniques used in our lemon-rainbow-cake, applying those visual principles to this hot milk sponge base. The structure is strong enough to handle the addition of finely chopped nuts or mini chocolate chips, provided they are tossed in a tablespoon of flour first to prevent sinking.
For a more adult profile, you can soak the cooled sponge layers in a simple syrup infused with a touch of cognac or espresso. This adds a layer of moisture and a sophisticated flavor bridge between the sweet sponge and the bittersweet cocoa. If you choose to use Dutch-process cocoa in the frosting, be aware that it has a higher fat content than natural cocoa, which may require you to whip the frosting for an extra two minutes to achieve the desired lightness and stability.
Presentation Precision

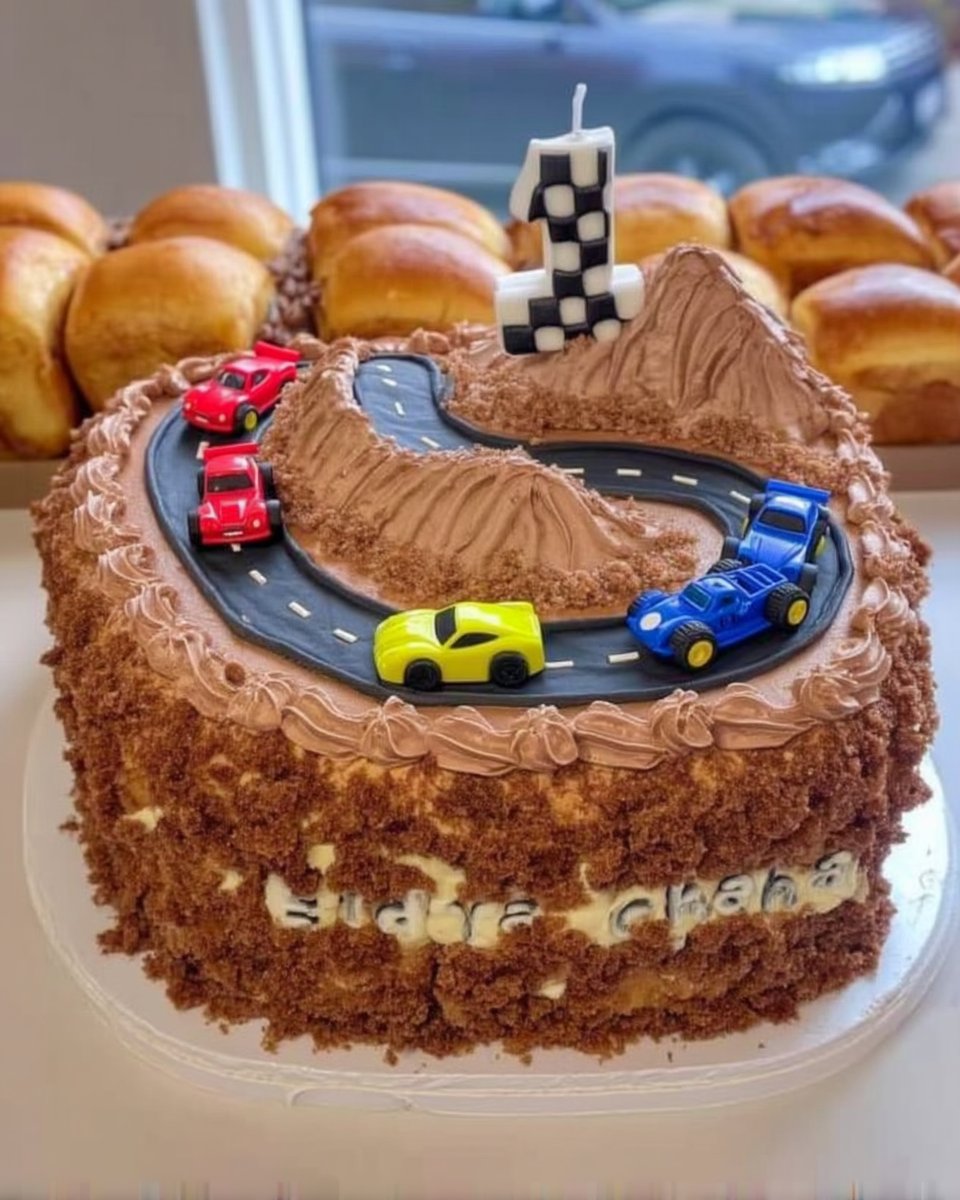
For the cleanest slices, chill the frosted cake for at least 30 minutes before serving. Use a long, thin serrated knife dipped in hot water and wiped dry between each cut. This prevents the frosting from dragging through the sponge and maintains the beautiful definition of the layers. If you are preparing a themed event, this sponge is the perfect density for carving into shapes, much like the structural work required for our car-cake.
Serve each slice at room temperature to allow the butter in the frosting and sponge to soften slightly, which maximizes the melt-in-your-mouth quality. A dollop of unsweetened whipped cream or a handful of fresh tart berries can provide a beautiful textural contrast to the rich chocolate frosting. For more inspiration on classic celebration aesthetics, you can see how professionals handle large-scale builds at the Milk Bar birthday cake resource. Always remember that the presentation should celebrate the precision of the build.
Master the Craft
Baking the perfect Cake For Birthday is more than just following a list of instructions; it is about understanding the science of the sponge. By mastering the hot milk method and the ribbon stage aeration, you have moved beyond simple mixing and into the realm of true pastry arts. This recipe is a proven victory for any baker who values the balance of a resilient crumb and a luxurious, chocolatey finish. It is a beautiful reminder that when we respect the technical requirements of our ingredients, the results are always spectacular.
If you enjoyed the deep cocoa profile of this frosting, you must try the rich layers in our old-fashioned-chocolate-cake. We would love to see your technical triumphs in the kitchen, so please share your results with our community of devoted bakers. Follow us on Pinterest, Instagram, and Facebook for more methodical guides to baking perfection. Keep practicing your technique, and you will find that every cake you bake becomes a more precise and exquisite expression of your skill.
