True baking asks us to wait, letting warmth and moisture slowly settle into every crumb until the texture is perfectly tender.

When we craft Classic Pumpkin Cake Pops, we are not merely assembling a quick treat; we are coaxing simple ingredients into a state of melting tenderness. The rich pumpkin puree and aromatic spices mingle with the cake crumbs, creating a velvety crumb that feels luxurious on the tongue. By allowing the rolled bites to rest and chill, we establish a firm yet delicate foundation for the smooth candy coating. This patient process yields a confection that is satisfyingly dense and deeply comforting.
The Heart of the Soak: Classic Pumpkin Cake Pops
Prep: 20 min · Serves: 28 · Difficulty: Medium
- Moist and tender crumb that melts slowly.
- Warm spices that balance the natural sweetness.
- Velvety texture that holds its shape beautifully.
- Rich pumpkin notes in every single bite.
- Fun pumpkin shapes that delight every guest.
This patient method is how I bring cozy warmth to our family dessert table. If you enjoy shaping these treats, you might also love making cake pops for other special occasions.
Get The Full Cake Recipe
Print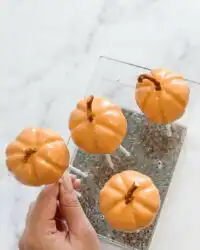
Classic Pumpkin Cake Pops
- Total Time: 1 hour 15 mins
- Yield: 28 servings
- Diet: Vegetarian
Description
These delightful pumpkin-shaped cake pops combine the warmth of seasonal spices with a moist, tender crumb for a truly comforting treat. Perfectly balanced and visually festive, they are an ideal addition to any autumn gathering or dessert table.
Ingredients
- 1 box Yellow Cake Mix
- 1 cup Pumpkin Puree
- 3 Large Eggs
- 2 tsp Pumpkin Pie Spice
- 3–4 tbsp Cream Cheese Frosting
- 12 oz Orange Candy Melts
- 2 oz Green Candy Melts
- 28 small semi-sweet chocolate chips
Instructions
- Bake the cake. Preheat your oven to 350°F, whisk together the cake mix, pumpkin puree, eggs, and spices, and bake in a 9×13-inch pan for 22 to 25 minutes.
- Cool the cake. Remove the pan from the oven and allow the cake to reach room temperature on a wire rack to ensure the proper crumb texture.
- Crumble the cake. Cut the cooled cake into chunks and process in a stand mixer on low speed until you have fine, uniform crumbs.
- Form the dough. Mix in the cream cheese frosting until the dough is pliable, smooth, and holds its shape like play-doh.
- Shape the pops. Portion the dough into one-ounce balls, roll until smooth, and use a stick to create ridges and a top indentation for the pumpkin shape.
- Secure the sticks. Melt orange candy melts, dip the tip of each treat stick into the chocolate, and insert it into the bottom of the pumpkin to anchor it.
- Coat the pumpkins. Submerge each pumpkin in the orange chocolate, allow excess to drip off, and press a chocolate chip into the top to form a stem.
- Pipe the vines. Melt the green candy melts, transfer to a piping bag, and draw whimsical vines onto the pumpkins before letting them set completely.
Notes
- Ensure the cake is completely cold before mixing to avoid a gummy, heavy dough consistency.
- Always dip the tip of your treat stick in melted chocolate before inserting into the cake ball to prevent slipping.
- Avoid overheating your candy melts, as excessive heat can cause the chocolate to become clumpy and difficult to work with.
- Trim any hard or caramelized edges off the cake before crumbling to maintain a perfectly smooth and uniform interior.
- Prep Time: 20 mins
- Cook Time: 25 mins
- Category: Dessert
- Method: Baking
- Cuisine: American
Ingredients for the Cake & the Soak
Choosing the right elements is the first step toward a velvety crumb that melts on your tongue. We combine simple pantry staples with moist pumpkin to create a dough that is perfectly pliable and rich. Each component plays a vital role in balancing the warm spices and the sweet outer shell.
- Yellow Cake Mix: This provides the golden, tender structure that absorbs the moisture of the pumpkin without becoming heavy.
- Pumpkin Puree: Pure pumpkin brings a deep, autumnal color and essential moisture that keeps the cake soft.
- Large Eggs: Kept at room temperature, these help bind the batter, contributing to a stable, light rise during baking.
- Sweet Pumpkin Pie Spice: A fragrant blend of cinnamon, nutmeg, ginger, and cloves that lends a nostalgic, comforting aroma.
- Cream Cheese Frosting: This velvety binder holds the crumbled cake together, creating a dough with a play-doh-like feel.
- Orange Candy Melts: These melt into a glossy, smooth coating that envelops each bite in a sweet, protective shell.
- Green Candy Melts: Perfect for piping delicate, decorative vines that complete the festive autumn look.
- Chocolate Chips: Placed gently on top, these represent the rustic little stems of our hand-shaped pumpkins.
| Ingredient | Why It Matters |
|---|---|
| Yellow Cake Mix | Establishes a soft, classic base for crumb structure |
| Pumpkin Puree | Infuses natural moisture and rich autumnal flavor |
| Pumpkin Pie Spice | Offers warm aromatic notes that balance the sweetness |
| Cream Cheese Frosting | Binds the crumbs into a smooth, pliable dough |
| Orange Candy Melts | Creates a glossy, protective, and sweet outer shell |
Cake, Syrup, Rest
Step 1: Prep and Bake the Pumpkin Base
Begin by preheating your oven to 350°F (175°C) and lightly spraying a 9×13-inch baking pan with non-stick spray. In a large bowl, whisk together the yellow cake mix, pumpkin puree, room-temperature eggs, and pumpkin pie spice until the batter is smooth and golden. Pour this fragrant batter into your prepared pan, smoothing the top with a spatula. Bake for 22 to 25 minutes; your kitchen will fill with the scent of warm cinnamon as the cake rises.
Step 2: Let the Cake Cool Completely
Patience is the secret to a perfect texture. Remove the baked cake from the oven and set the pan on a wire rack to cool. Allowing the cake to reach room temperature prevents the crumb from becoming gummy when you crumble it. This rest period is essential, as any trapped heat would turn the dough soggy once mixed with the frosting.
Step 3: Crumble the Golden Cake
Once the cake is completely cold, cut or tear it into large, manageable pieces. Place these golden chunks into the bowl of a stand mixer fitted with the paddle attachment. Run the mixer on low speed, watching as the blade gently breaks the cake down into fine, uniform crumbs. The texture should resemble soft sand, with no large lumps remaining.
Step 4: Form the Pliable Pumpkin Dough
Add three tablespoons of cream cheese frosting directly to the fine cake crumbs in the bowl. Mix on a low speed, allowing the sweet frosting to bind the dry crumbs into a cohesive dough. If the mixture feels a little too dry or crumbly, you can add a tiny touch more frosting, though we want to avoid making it sticky. The dough should feel exactly like play-doh: pliable, smooth, and easily shaped without sticking to your fingers.
Step 5: Shape the Classic Pumpkin Cake Pops
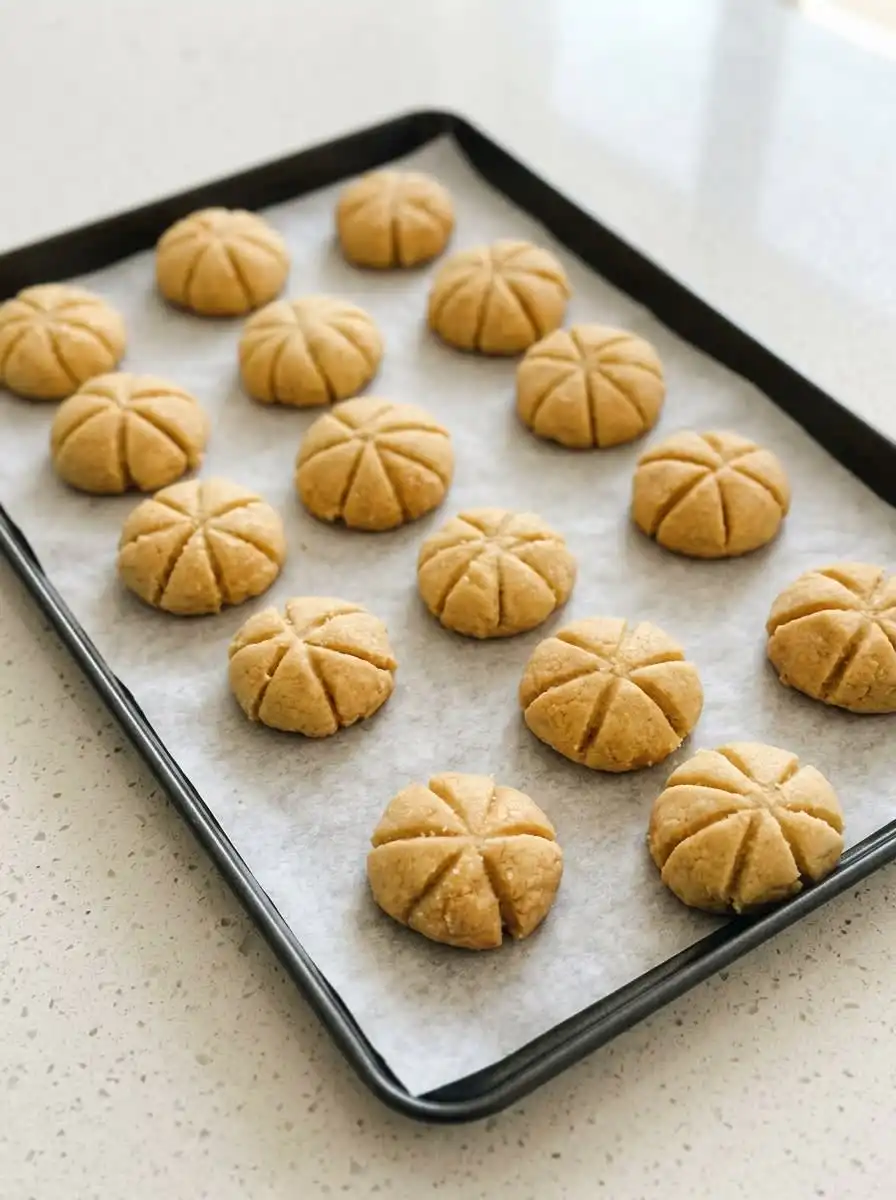
Portion the dough into one-ounce pieces, using a kitchen scale or a cookie scoop to keep them uniform. Roll each portion between your palms until it forms a smooth, round ball. Use a treat stick to gently press a cross into the top of the ball, then divide those sections again to make eight neat ridges down the sides. Slightly flatten the ball with your palm and press a small dip into the center top to mimic a real pumpkin shape.
Step 6: Secure the Treat Sticks
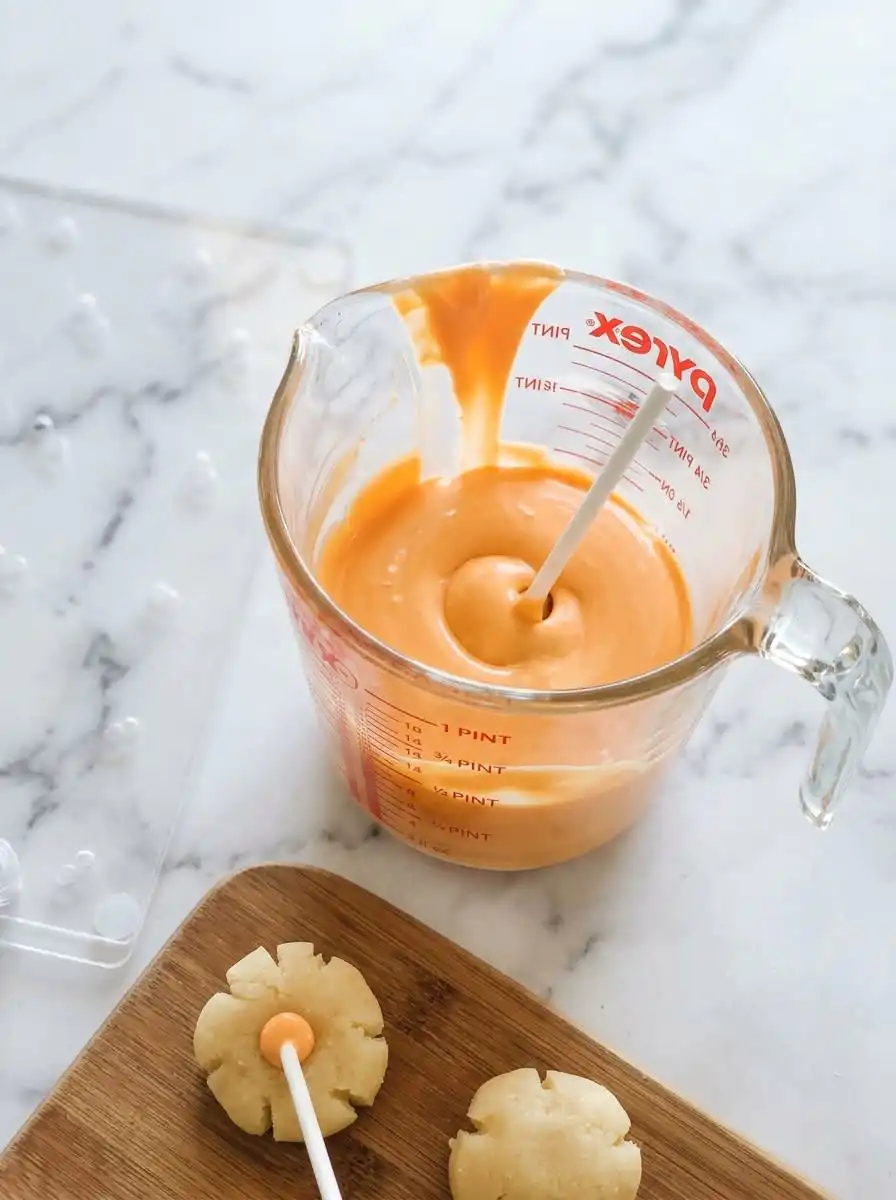
Melt your orange candy melts in a microwave-safe bowl using short, thirty-second bursts, stirring carefully between each interval. Dip the tip of a treat stick about half an inch into the warm, melted chocolate, then gently push it into the bottom of your shaped pumpkin. Set the cake pops aside on a tray lined with parchment paper for a few minutes. This step acts as a cement, guaranteeing that the cake balls remain securely anchored to the sticks when you dip them later.
Step 7: Coat in Glossy Orange Chocolate
Lower each pumpkin ball straight into the warm, melted orange chocolate until it is completely submerged. This step guarantees your Classic Pumpkin Cake Pops are fully enveloped in a glossy, festive shell. Lift the pop straight up, allowing the excess chocolate to slowly drip back into the bowl while gently tapping your wrist. While the orange coating is still wet and glossy, gently press a chocolate chip into the top indentation to form a rustic stem.
Step 8: Pipe the Delicate Green Vines
Warm the green candy melts in the same gentle manner, then transfer the glossy chocolate into a small piping bag with a tiny tip. Carefully pipe small, whimsical, squiggly vines radiating from the chocolate chip stem down the sides of the orange pumpkin. Let the finished pops rest undisturbed for about ten minutes to allow the chocolate to set completely. Once dry, the outer shell will offer a satisfying snap that yields to a tender, spice-infused interior.
Patience-Pays-Off Tips
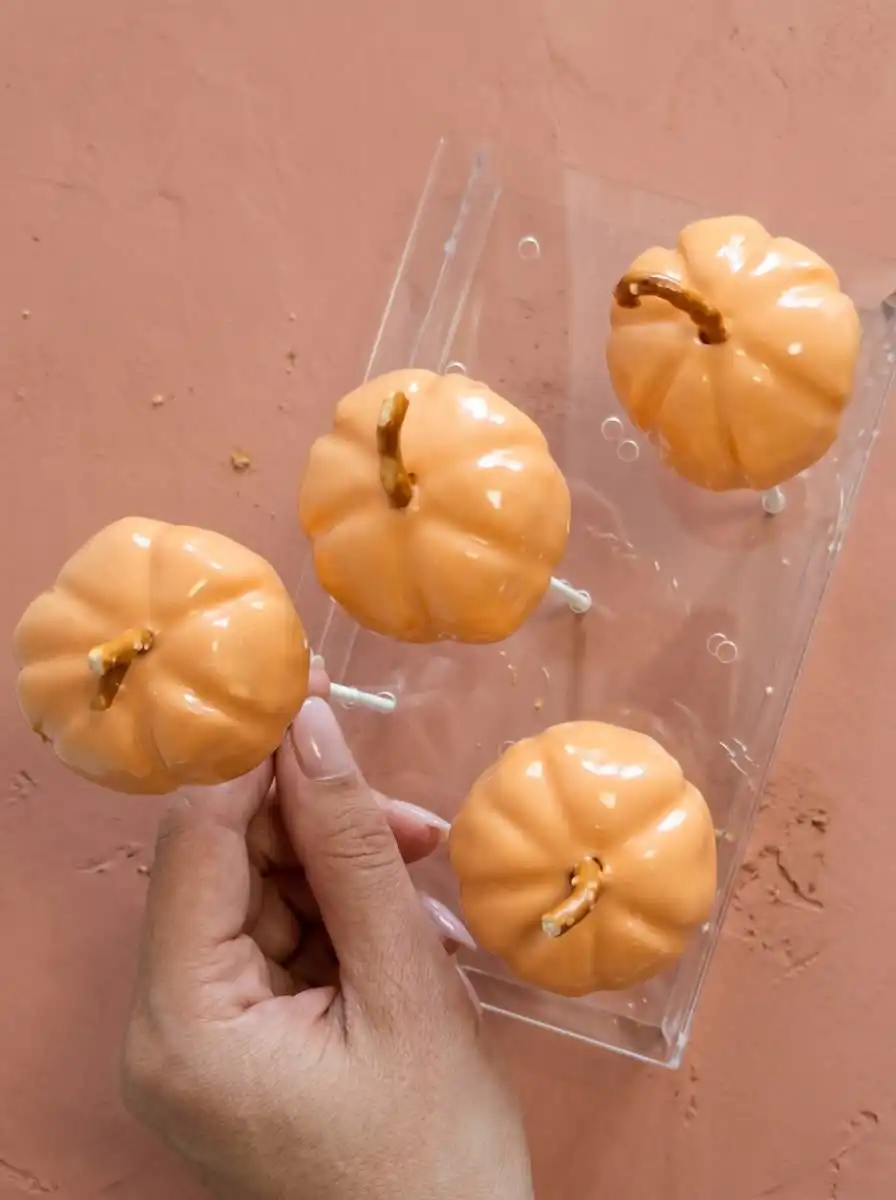
To achieve a beautifully smooth finish, make sure your candy melts are not overheated, as high heat makes the chocolate thick and clumpy. If the coating feels too thick, stir in a teaspoon of coconut oil or paramount crystals to thin it out to a silky, pourable consistency.
If your cake pops slip off the stick during dipping, the cake balls might be too warm or the dough might be too heavy with frosting. To fix this, make sure you always dip the stick in melted chocolate before inserting it, and let the pops chill in the refrigerator for fifteen minutes to firm up before the final dip.
When crumbling the cake, avoid leaving any hard edges or caramelized crusts in the bowl, as these create unsightly lumps in your dough. You can trim the outer edges of the cake before crumbling if you prefer an absolutely uniform, velvety interior like our classic vanilla cake pops.
Tap the stick gently against the edge of the bowl rather than shaking the pop, which can loosen the dough. A slow, steady tapping of your wrist is the safest way to let excess coating slide off cleanly.
Avoid using canned pumpkin pie mix instead of pure pumpkin puree, as the pre-sweetened mix contains extra moisture and sugars that will ruin the dough’s consistency.
Should the outer chocolate coating crack as it cools, the temperature difference between the chilled Classic Pumpkin Cake Pops and the warm chocolate was too extreme. Always let your chilled cake pops sit at room temperature for ten minutes before dipping them into the warm candy coating to avoid thermal shock.
Frequently Asked Questions
How to prevent Classic Pumpkin Cake Pops from cracking?
Cracking occurs when there is a major temperature difference between the cold cake dough and the hot candy coating. To prevent this, let your chilled cake pops warm up slightly on the counter for about ten minutes before dipping them. This minimizes the thermal shock that causes the candy shell to expand and crack.
What is the best frosting-to-cake ratio for cake pops?
The ideal ratio is approximately one tablespoon of frosting for every three cups of crumbled cake. For a whole 9×13-inch cake, start with three tablespoons of frosting and adjust only if the dough feels too dry to hold its shape. Adding too much frosting results in a heavy, greasy texture that will easily slide off the treat sticks.
How do you make the pumpkin shape for cake pops?
You can easily create the rustic ridges of a pumpkin by using a standard treat stick or toothpick to press gentle indentations into the rolled dough ball. Press a cross into the top, then divide those sections to form eight distinct segments running down the sides. Finish by flattening the top slightly and creating a tiny central dip for the stem.
Can you use a box mix for cake pops?
Yes, using a high-quality yellow or spice cake mix is an excellent shortcut that saves time and guarantees a consistent, tender crumb. We modify the boxed mix by adding pure pumpkin puree and warm spices, which enhances both the flavor and moisture level of the final cake pops.
How do you make the stems and vines for pumpkin cake pops?
To make the rustic stems, place a single chocolate chip upside down on the top center of each orange-dipped pop while the coating is still wet. Once the orange layer has set, pipe curly green candy melt lines radiating from the stem using a small piping bag with a tiny tip. This simple method yields beautiful, recognizable pumpkin shapes.
What is the best way to coat cake pops smoothly?
The secret is to dip the cake pop in one single, smooth motion without stirring or swirling it in the chocolate. Submerge the cake ball entirely until it touches the stick, then pull it straight out and tap your wrist gently to release the excess coating. This technique guarantees a smooth, bubble-free finish every single time.
How long should cake pops be chilled before dipping?
The shaped cake balls should be chilled in the refrigerator for at least two hours or in the freezer for fifteen minutes before you secure the sticks. Chilling helps the dough firm up so it retains its shape when submerged in the warm candy coating. However, avoid freezing them solid, as this leads to cracked shells.
Can cream cheese frosting be used in pumpkin cake pops?
Using cream cheese frosting is the perfect pairing for pumpkin because its slight tang balances the sweetness of the cake and the candy shell. It provides the ideal binding texture without making the dough feel overly heavy. Just be sure to use it sparingly to maintain a pliable, play-doh-like consistency.
Flavor Swaps
While the traditional pumpkin spice and yellow cake base is a timeless pairing for Classic Pumpkin Cake Pops, you can introduce a richer depth by substituting a chocolate cake base. The deep cocoa notes complement the earthy pumpkin puree beautifully, offering a decadent contrast. You can also experiment with different coatings, such as a rich dark chocolate dip with a dusting of cinnamon sugar instead of orange candy melts.
For those who enjoy a brighter flavor profile, adding a teaspoon of fresh orange zest to the cake batter before baking cuts through the sweetness beautifully. The citrus notes pair wonderfully with the warm pumpkin pie spice, reminiscent of classic Mediterranean holiday treats. This method also works wonderfully when adapting the dough from our pumpkin spice cake recipe into these bite-sized treats.
If you want to try other seasonal variations, you can find brilliant decoration inspiration and alternative spice ratios in this excellent pumpkin cake pops tutorial. Substituting white chocolate infused with maple syrup for the outer shell creates an incredibly cozy flavor that feels like a crisp autumn morning.
Coffee & Cake Pairings
Serving these Classic Pumpkin Cake Pops is an opportunity to slow down and savor the changing seasons. I love placing these beautiful orange pumpkins on a rustic wooden platter alongside a scattering of raw pistachios and cinnamon sticks. The contrast between the sleek, glossy candy shell and the natural wood creates an inviting table setting that beckons guests to gather round.
To complement the warm spices and rich texture of the cake pops, serve them with a strong, unsweetened beverage that balances the sweetness. A small cup of traditional Turkish coffee or a robust espresso offers a beautiful contrast to the velvety pumpkin filling. For a lighter pairing, a cup of hot black tea infused with a slice of orange peel makes each bite feel like a quiet afternoon in the sun.
If you are hosting a larger gathering, these pops look beautiful arranged next to a classic pumpkin layer cake or other seasonal sliced cakes. Guests will appreciate having both bite-sized confections and grander desserts to choose from as they linger over conversation. The key is to keep the presentation simple, elegant, and unhurried, letting the rich flavors speak for themselves.
Let It Rest, Then Slice
There is a deep satisfaction in the slow craft of shaping and dipping these Classic Pumpkin Cake Pops. Each pumpkin you roll is a small testament to the patience that makes home baking so rewarding. Sharing these sweets with friends and family brings a touch of warmth to the cooler autumn days, reminding us of the joy found in simple, handmade gifts.
If you find yourself with leftover cake or want to try different flavor profiles next time, you can also discover our guide on making red velvet cake pops for a rich and colorful alternative. Whichever path you choose, remember to let the dough rest, take your time with the chocolate pour, and let each bite melt slowly on your tongue.
Please share your beautiful baking creations with us on our social channels; we love seeing how your kitchen turns out. You can find more inspiration and connect with our baking community on Pinterest, Facebook, and Telegram. Take your time, enjoy the process, and let the sweetness linger.