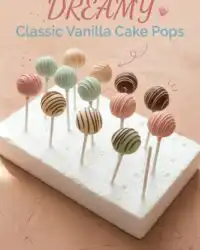
When that 9 p.m. sweet tooth strikes, these sweet bites deliver a luscious, creamy bite that instantly satisfies your craving.

These gorgeous, scratch-made Classic Vanilla Cake Pops offer a fast and luscious texture win with their tender vanilla buttercream centers that melt in your mouth. While many traditional recipes rely on boxed cake mixes, baking this base completely from scratch brings a rich flavor that makes every bite feel like a true bakery luxury. You get that signature dense, moist texture without having to spend hours managing a complicated pastry school curriculum or dealing with finicky steps. They are a wonderful way to bring a little interactive sweetness into your kitchen, whether you are preparing for a party or treating yourself on a quiet weekend.
What Makes These Classic Vanilla Cake Pops Quick & Luscious
Prep: 120 min · Serves: 40 · Difficulty: Medium
- Velvety texture that melts under your teeth.
- Scratch-baked base provides rich vanilla flavors.
- Zero boxed cake mixes are required here.
- Creamy buttercream binds each ball smoothly.
- Crowd-friendly sizing makes sharing really fun.
Making these sweet treats is a wonderful afternoon project. You will easily master these cake pops on your first attempt.
Get The Full Cake Recipe
Print
Classic Vanilla Cake Pops
- Total Time: 156 mins
- Yield: 40 cake pops
Description
These decadent, scratch-made cake pops feature a dense, moist vanilla sponge bound with silky buttercream and finished in a glossy candy shell. They are a delightful, bite-sized treat perfect for parties or satisfying a sweet craving at home.
Ingredients
- 1 1/2 cups all-purpose flour
- 1 teaspoon baking powder
- 1/4 teaspoon baking soda
- 1/4 teaspoon salt
- 1/2 cup unsalted butter, softened
- 3/4 cup granulated sugar
- 1 large egg, room temperature
- 2 teaspoons pure vanilla extract
- 1/2 cup whole milk
- 1/2 cup softened butter (for frosting)
- 1 cup confectioners’ sugar
- 2 tablespoons heavy cream
- 12 ounces candy melts
Instructions
- Prepare oven and pan. Preheat your oven to 350°F (177°C) and grease a 9-inch springform pan thoroughly.
- Combine dry staples. Whisk together the flour, baking powder, baking soda, and salt in a medium mixing bowl.
- Cream butter and sugar. Beat the softened butter and granulated sugar in a large bowl for three minutes until pale and fluffy.
- Mix wet elements. Add the room temperature egg and vanilla extract, beating until smooth and uniform.
- Incorporate dry ingredients. Alternate adding the flour mixture and milk to the wet ingredients, mixing until just combined.
- Bake the sponge. Bake for 30 to 36 minutes until a toothpick comes out clean, then let the cake cool completely.
- Shape cake pops. Beat the frosting ingredients, crumble the cooled cake into the bowl, mix to form a dough, and roll into balls.
- Chill cake balls. Place the balls on a parchment-lined sheet and refrigerate for two hours or freeze for one hour.
- Dip and decorate. Dip a lollipop stick into melted candy, insert it into a cake ball, submerge the ball in the coating, and stand upright to harden.
Notes
- Ensure your egg and butter are at room temperature to achieve the smoothest batter consistency.
- Let the cake cool entirely before crumbling to prevent the buttercream from becoming greasy or melting.
- Adjust the amount of frosting added to the cake crumbs slowly to reach the perfect playdough-like consistency.
- Dip the tip of the stick into the melted candy before inserting it into the ball to anchor it securely.
- Use a styrofoam block or a prepared cardboard box to stand the pops upright while the coating hardens.
- Prep Time: 120 mins
- Cook Time: 36 mins
- Category: Dessert
- Method: Baking
- Cuisine: American
Quick-Bake Lineup
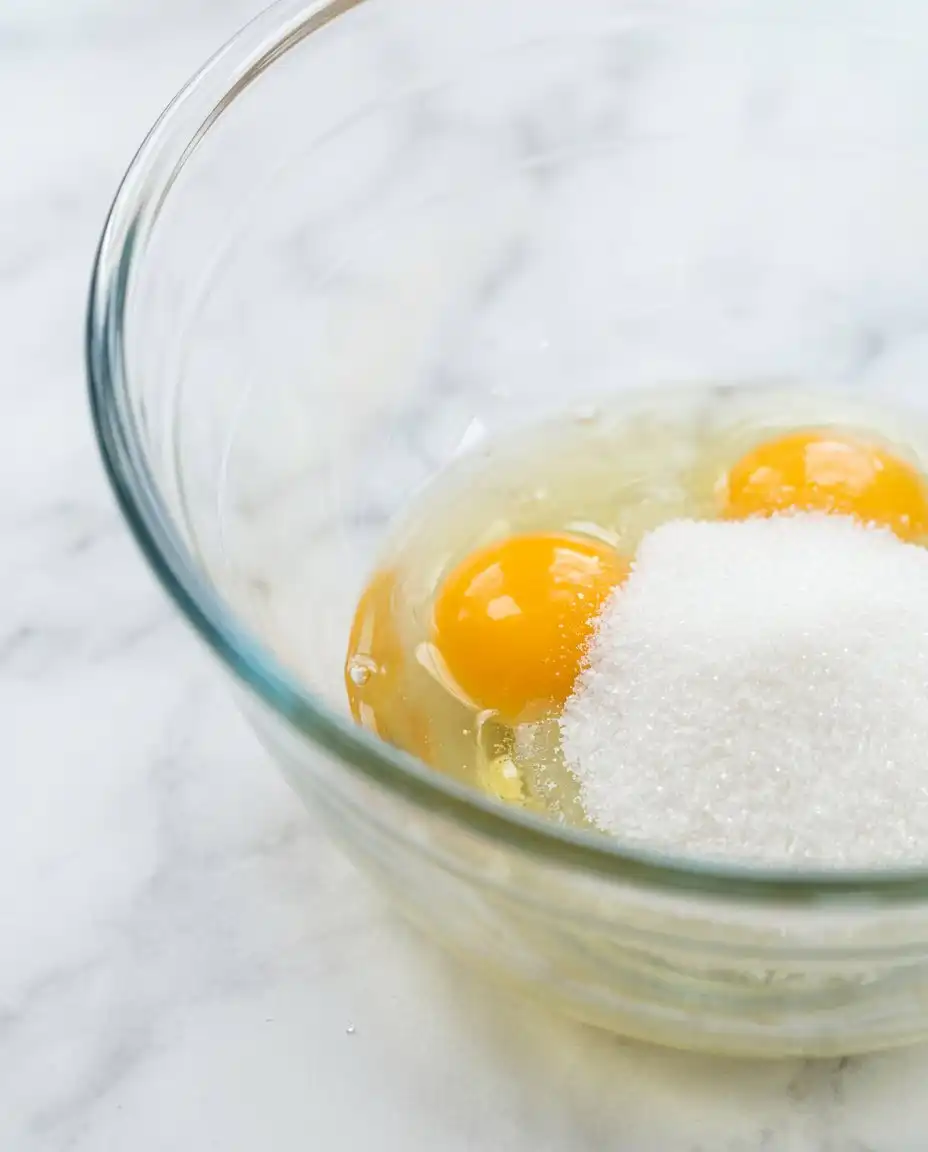
Creating these custom treats from scratch requires only a few basic baking staples that you likely already keep in your pantry. We avoid any processed mixes or canned frostings to guarantee that the pure taste of real vanilla shines through every single bite. By focusing on quality fats and a precise ratio of moisture, we set the stage for a wonderfully tender crumb.
- All-Purpose Flour: This ingredient provides the essential structure of the sponge cake, ensuring it holds together when crumbled and combined with buttercream. We scoop and level it to keep the base light rather than dense. When measured properly, it forms a soft crumb that absorbs the frosting beautifully without becoming heavy.
- Unsalted Butter: Using softened butter at room temperature allows us to cream it thoroughly with the sugar, trapping air to create a soft, melt-in-the-mouth texture. It also adds a rich flavor that oil-based cakes cannot match. It serves as the flavorful foundation for both the baked sponge and the creamy frosting.
- Granulated Sugar: This sweetens the sponge while retaining moisture, preventing the crumb from drying out during the baking process. It also helps to tenderize the gluten network. By bonding with the water in the batter, sugar makes sure that your cake remains soft and easy to crumble.
- Whole Milk: Adding this liquid keeps the crumb wonderfully tender and adds a delicate richness that water or lighter milks cannot replicate. It helps the batter come together smoothly. The fat content in whole milk is key to achieving that velvety consistency we want in the center of every sweet bite.
- Confectioners’ Sugar: This fine sugar dissolves smoothly into the whipped butter to form a silky, smooth frosting. It makes sure there is no gritty texture in your final bites. Because it is finely ground, it binds smoothly with the butter to create a sturdy glue for our crumbs.
- Candy Melts: These melting wafers provide a smooth, reliable coating that sets quickly without the temperamental nature of standard white chocolate bars. They seal in the moisture of the sweet center. They also provide a beautifully glossy finish that serves as the canvas for your favorite decorative sprinkles.
| Ingredient | Why It Matters |
|---|---|
| All-Purpose Flour | Builds the structural sponge base |
| Unsalted Butter | Creates a velvety, tender texture |
| Whole Milk | Keeps the baked crumb moist |
| Confectioners’ Sugar | Produces a silky binding buttercream |
| Candy Melts | Forms a hard, glossy outer shell |
The Quick Method
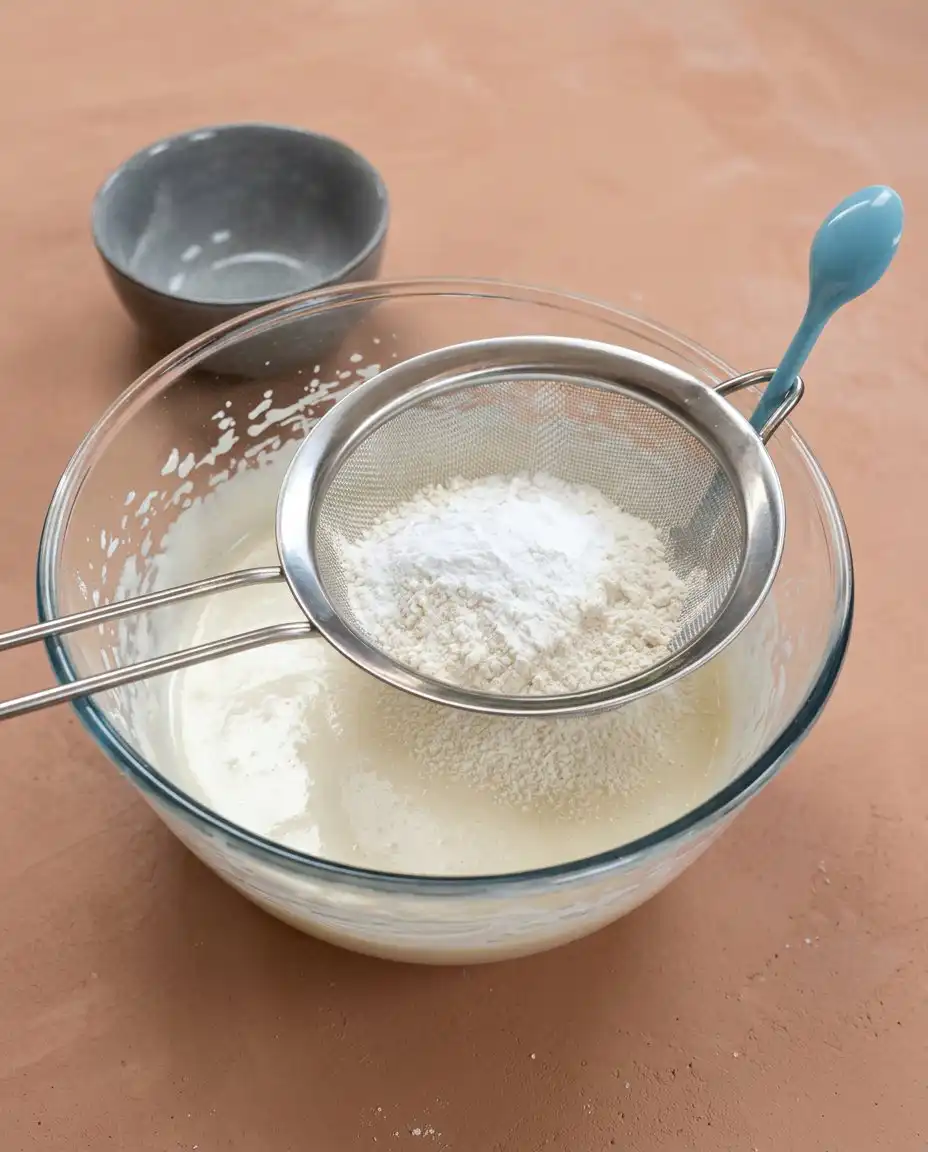
Step 1: Prep Your Oven and Pan
Before mixing your batter, preheat your oven to 350°F (177°C) so it reaches the proper baking temperature. Take a 9-inch springform pan and grease it thoroughly to prevent the delicate cake from sticking to the bottom. Preparing your workspace early allows you to transition smoothly from mixing to baking without losing any momentum. A well-greased pan guarantees that the edges of your cake remain soft and do not develop a hard crust.
Step 2: Combine the Dry Staples
In a medium mixing bowl, whisk together the measured all-purpose flour, baking powder, baking soda, and salt. Whisking these dry ingredients guarantees that the leavening agents are distributed evenly throughout the flour. This simple step prevents any large pockets of baking soda from spoiling the clean, sweet flavor of your finished sponge. It also aerates the flour, helping to create a light and uniform crumb.
Step 3: Cream the Butter and Sugar
Place your softened unsalted butter and granulated sugar into a large mixing bowl or the bowl of a stand mixer. Beat them together on medium-high speed for approximately three full minutes until the mixture looks pale, fluffy, and light. This process creates tiny air pockets that will expand in the oven, yielding a remarkably soft crumb that crumbles beautifully. You will know it is ready when the yellow butter turns a beautiful ivory color.
Step 4: Mix in the Wet Elements
Add the room temperature egg and two teaspoons of pure vanilla extract directly into the creamed butter. Beat the mixture on high speed until it becomes uniform and smooth, scraping down the sides of the bowl to incorporate everything. The kitchen will instantly begin to fill with the warm, comforting scent of sweet vanilla. Make sure the egg is at room temperature so it incorporates smoothly without curdling the butter.
Step 5: Incorporate Dry Ingredients and Milk
Alternate adding the dry flour mixture and the whole milk into your wet ingredients, mixing on low speed. Stir the thick batter gently with a silicone spatula at the end to make sure no pockets of dry flour remain hidden. Pour the finished batter into your prepared springform pan and spread it into a smooth, even layer. The batter should look thick, velvety, and completely uniform before it goes into the heat.
Step 6: Bake and Cool the Sponge
Bake the cake for 30 to 36 minutes until a toothpick inserted in the center comes out clean and free of wet crumbs. The kitchen will smell wonderfully rich as the top turns a light golden-brown color. Set the hot pan onto a wire cooling rack and allow the cake to cool completely before proceeding. Crumbling a warm cake will cause the frosting to melt, resulting in a greasy texture.
Step 7: Shape Your Classic Vanilla Cake Pops
Prepare a quick vanilla buttercream by beating softened butter, confectioners’ sugar, heavy cream, and vanilla extract until light and fluffy. Crumble the cooled cake directly into the bowl with the frosting, making sure there are no large or hard pieces left. Mix on low speed until a cohesive dough forms, then scoop tablespoon-sized portions and roll them into smooth balls. The mixture should feel like soft playdough and hold its shape wonderfully when squeezed.
Step 8: Chill the Cake Balls
Arrange the rolled portions onto a baking sheet lined with parchment paper and place them in the refrigerator. Chill them for at least two hours, or place them in the freezer for one hour, to set their shape firmly. This chilling period is crucial because cold cake balls hold together much better when dipped in warm candy coating. If they are too warm, they will fall apart during the dipping stage.
Step 9: Dip and Decorate
Melt your candy melts in a deep measuring cup, then dip the tip of each lollipop stick into the coating before inserting it halfway into a chilled ball. Submerge the entire ball into the warm coating, gently tapping the stick to remove any excess chocolate before adding colorful sprinkles. Stand the finished treats upright in a foam block to let the outer shells harden into a flawless, glossy glaze. The coating will set within an hour, creating a satisfyingly crisp outer shell.
Keep It Luscious
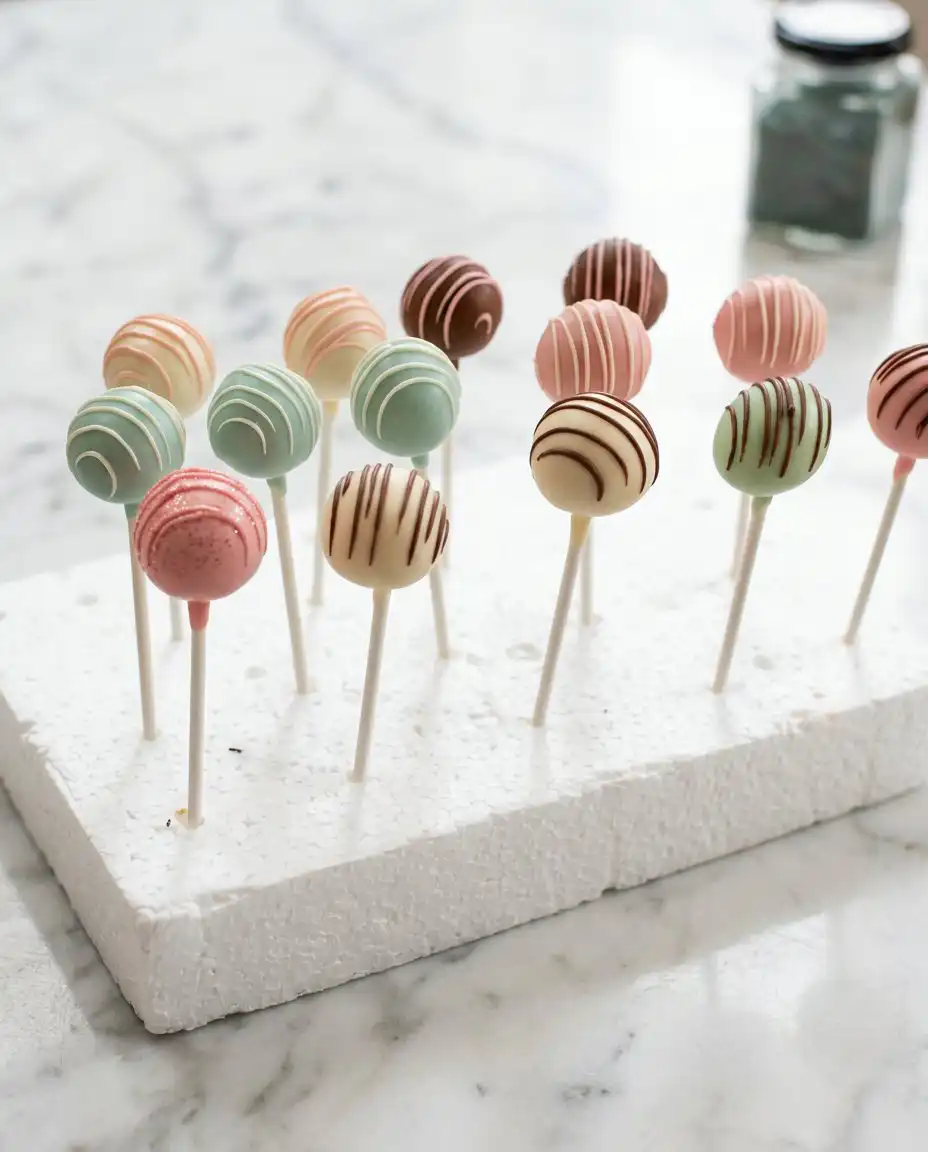
Temperature harmony between your cake balls and the warm candy coating is the essential secret to success. If your Classic Vanilla Cake Pops crack, here is why and how to fix it: the cake balls were too cold or the coating was too hot, causing a rapid temperature change that fractures the outer shell. To fix this, let your chilled cake balls sit at room temperature for about ten minutes before dipping them, and make sure your melted candy coating is warm rather than hot. Allowing the coating to cool slightly prevents it from shocking the chilled cake core.
To ensure your cake balls have the ideal texture, avoid overworking the mixture when combining the crumbs with the frosting. If you want to compare textures or practice your sponge-making skills, you can read our guide on how to bake a classic vanilla cake. Over-mixing can make the interior dense and gummy instead of light and melt-in-the-mouth. Work the mixture just until it holds together, keeping that delicate crumb structure intact.
Always dip the tip of your lollipop stick into the melted candy coating before inserting it into the cake ball. This step acts as a culinary glue, securing the stick inside the cake crumb as it cools and solidifies. Without this step, your treats are highly likely to slide off their sticks when you submerge them in the coating. It creates a secure anchor that can withstand the weight of the dipping process.
When dipping your treats, submerge them in a single, smooth motion rather than stirring them around in the liquid. Stirring creates air bubbles and exerts lateral pressure on the cake ball, which can cause it to break apart in the cup. Lift the treat straight up and gently tap your wrist to help the excess coating slide off naturally. This technique guarantees a smooth, professional finish with zero lumps or air pockets. Express doesn’t mean dry.
Pay close attention to the moisture level of your cake crumb before adding all of the frosting. If your sponge turned out exceptionally moist, you may not need the entire batch of buttercream to bind the crumbs together. Add the frosting in small increments until the mixture holds its shape like cookie dough without feeling greasy. Too much frosting will make the cake balls heavy, causing them to slip right off their sticks.
Prepare your drying station before you melt a single piece of candy coating. A thick block of styrofoam or a cardboard box punched with small holes makes the ideal stand for holding the wet sticks upright. If you lay the wet treats flat on a tray, they will develop unsightly flat spots on their beautiful round heads. Setting up your stand beforehand makes sure a smooth, stress-free workflow once you start dipping.
Frequently Asked Questions
Why are my Classic Vanilla Cake Pops cracking?
Cake pops crack because of a sudden temperature difference between the cold cake ball and the warm candy coating. When the cold interior warms up, it expands slightly, which puts pressure on the hardened outer shell and causes it to fracture. To prevent this, let your chilled cake balls rest on the counter for ten minutes before dipping them so they are not freezing cold. Additionally, make sure your candy coating is warm and fluid, not piping hot.
Why are my Classic Vanilla Cake Pops falling off the sticks?
This common issue usually happens when the cake balls are too heavy, too warm, or when you omit the crucial step of dipping the stick in melted candy before inserting it. If your cake balls are too warm, they lose their structural integrity and slide down the stick easily. Always make sure to chill the balls thoroughly and use a small amount of melted candy on the tip of each stick to glue it in place. Be careful not to make your balls larger than one tablespoon.
How long do they last, and how should I store them?
These treats store beautifully in an airtight container inside the refrigerator for up to one week. If you need to store them longer, you can freeze the dipped or undipped cake balls for up to six weeks. When you are ready to serve them, let them thaw slowly overnight in the refrigerator to prevent condensation from ruining the smooth coating. Serve them cold or at room temperature depending on your preference.
Can I use store-bought frosting?
Yes, you can use store-bought frosting if you are looking to save time on a busy afternoon. However, canned frosting tends to be much sweeter and thinner than homemade buttercream, so you should add it in very small increments. Using our scratch-made buttercream yields a much richer vanilla flavor and a more predictable texture that binds the crumbs wonderfully. Start with just a couple of tablespoons and add more only if needed.
Should I use real chocolate or candy melts?
Candy melts are highly recommended for beginners because they melt smoothly and set into a durable, shiny shell without requiring tempering. Real white chocolate contains cocoa butter, which can be temperamental to work with and may turn streaky or soft at room temperature. If you prefer the flavor of real chocolate, you can add a half-teaspoon of vegetable oil to help thin it out and make dipping easier. This simple trick makes real chocolate much more manageable.
Can I make the sponge cake a day in advance?
Absolutely, baking the sponge a day ahead is a fantastic way to break up the preparation process. Once the cake cools completely, wrap it tightly in plastic wrap and keep it at room temperature overnight. This actually makes the crumb slightly easier to crumble and mix with your buttercream the following day. You can also freeze the rolled, undipped cake balls for up to six weeks before coating them.
Fast Flavor Swaps
For a fun twist on the classic flavor profile, you can swap the vanilla sponge for chocolate or funfetti. Adding colorful rainbow sprinkles directly into the cake dough creates a festive birthday cake variation. If you enjoy experimenting with different cake styles, you might also like trying our mini vanilla layer cakes for your next gathering. This swap keeps the same convenient bite-sized format while offering a completely different flavor experience.
Another delicious option is to incorporate finely crushed freeze-dried strawberries or raspberries into the vanilla buttercream. This adds a bright, tangy fruit flavor that cuts through the sweetness of the candy shell. To master advanced coating techniques, you can review this helpful guide on scratch-made baking techniques to elevate your dipping skills. The natural acidity of the berries contrasts beautifully with the rich, creamy vanilla core.
If you want an elegant touch, flavor your white candy coating with a drop of high-quality almond extract or coconut flavoring. You can also drizzle melted dark chocolate over the white shell to create a sophisticated marble effect. Top them with crushed toasted almonds or a pinch of sea salt to balance the sweet vanilla interior. This variation elevates the humble treat into a gourmet dessert perfect for upscale parties.
Bring It to the Table Fast
These adorable hand-held treats are ideal for parties, showers, or a casual weeknight dessert. Presenting them upright is the key to a beautiful display, so consider placing them in a decorative container filled with colorful sugar crystals, dried rice, or glass beads. This holds the sticks firmly in place while allowing your guests to easily grab a sweet bite as they mingle. It transforms a simple plate of sweets into a stunning centerpiece for any celebration.
If you are hosting a themed event, you can easily customize the color of the candy melts and sprinkles to match your decor. They look incredibly striking when arranged alongside other bite-sized delicacies like our delicious cake balls on a multi-tiered dessert stand. The contrast between different shapes and coatings will make your dessert table look highly professional. You can even mix and match colors for a bright, rainbow effect.
For a fun, interactive experience, you can serve these sweet treats alongside a warm cup of coffee or a cold glass of milk. The rich, creamy vanilla center melts delightfully when paired with a warm beverage, offering a luxurious contrast of temperatures. They also make wonderful party favors when wrapped individually in small cellophane bags tied with a pretty ribbon. Your guests will love having a portable dessert to enjoy on their way home.

Save This Shortcut
Mastering these sweet Classic Vanilla Cake Pops is a fun and rewarding kitchen project that always brings smiles to the table. By ditching the boxed mixes and utilizing a rich, scratch-baked sponge, you get an unparalleled vanilla flavor that stands out in every single bite. If you love this rich flavor profile, be sure to check out our recipe for the classic vanilla bean layer cake for your next big celebration. It shares the same pure vanilla notes in a majestic, towering format.
These cake pops prove that you do not need hours of advanced pastry training to create something truly delicious and visually stunning. Once you get the hang of the dipping technique, you will find yourself making these for every birthday, holiday, and casual Tuesday craving. Grab your ingredients, preheat your oven, and enjoy the process of crafting these whimsical treats. There is a quiet joy in watching the smooth coating shell over each little sphere.
We would love to see how your beautiful treats turn out, so please share your creations with us online. Tell us about your favorite sprinkle combinations and color schemes in the comments below. Follow us on Pinterest, Facebook, and TikTok for more quick, luscious dessert inspiration. Let us know if you find any fun flavor combinations of your own!