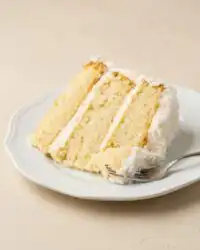
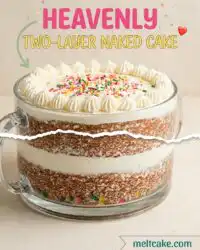
Get ready for a fast and luscious cake that delivers a tender, buttery crumb in under an hour, proving you do not need all day to create a gorgeous dessert.

When you need a spectacular dessert without spending hours in the kitchen, a rustic Two-Layer Naked Cake is the ideal stress-free solution. We are talking about fluffy buttermilk layers paired with a silky vanilla buttercream that slides onto the layers in minutes. You get that coveted bakery look with minimal effort, making this the ideal centerpiece for a celebration. Grab your mixing bowls and let us make this beautiful, moist cake together right now.
Why Fast Doesn’t Mean Dry with a Two-Layer Naked Cake
Prep: 15 min · Serves: 15 · Difficulty: Easy
- Buttermilk guarantees a moist and tender texture.
- Minimal frosting means fast decoration and cleanup.
- Simple pantry ingredients yield bakery-quality results.
- Versatile design fits any celebration or event.
- Fast assembly gets you to the table quickly.
This stunning showpiece proves that you do not need hours of tedious decorating to impress your guests. By starting with a moist two layer buttermilk cake, you build a reliable foundation that tastes as good as it looks. You will pull off a stunning centerpiece before your guests even arrive.
The beauty of this rustic style is how forgiving it is for decorators of all skill levels. You do not have to worry about flawless smooth edges or spotless corners because the exposed crumb is the star of the show. It is an approachable way to bring bakery elegance right to your kitchen table.
Get The Full Cake Recipe
Print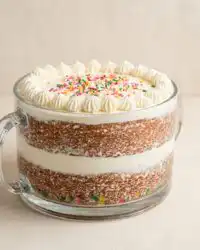
Two-Layer Naked Cake
- Total Time: 45 mins
- Yield: 15 servings
- Diet: Vegetarian
Description
This rustic two-layer naked cake features a tender, buttery buttermilk crumb finished with a silky vanilla buttercream. It is the perfect stress-free dessert that delivers bakery-quality elegance in less than an hour.
Ingredients
- 2 1/2 cups cake flour
- 2 teaspoons baking powder
- 1/2 teaspoon baking soda
- 1/2 teaspoon salt
- 1 cup buttermilk
- 1/2 cup vegetable oil
- 1 tablespoon vanilla extract
- 1 cup unsalted butter, softened
- 1 1/2 cups granulated sugar
- 3 large eggs
- 3 cups powdered sugar
- 2 tablespoons milk
Instructions
- Preheat your oven. Heat the oven to 350°F and grease and flour three 8-inch round cake pans.
- Whisk dry ingredients. In a medium bowl, combine the cake flour, baking powder, baking soda, and salt.
- Mix wet components. Briefly whisk together the buttermilk, vegetable oil, and vanilla extract in a separate container.
- Cream butter and sugar. Beat the softened butter and sugar in a stand mixer on medium speed for four minutes until pale and fluffy.
- Incorporate the eggs. Add the eggs one at a time, mixing well after each addition until fully combined.
- Alternate dry and wet. Add one-third of the flour mixture followed by half the buttermilk mixture, repeating until all ingredients are incorporated.
- Bake the layers. Divide batter between pans and bake for 25 to 30 minutes, or until a toothpick comes out clean.
- Prepare the buttercream. Whip butter with half the powdered sugar, milk, and vanilla until smooth and spreadable.
- Stack the cake. Spread buttercream between cake layers, stacking them carefully on a pedestal or cake board.
- Apply crumb coat. Use a bench scraper to apply a thin layer of frosting over the top and sides for a rustic semi-naked finish.
- Create top spiral. Optionally, use an offset spatula to create a decorative spiral pattern on the top of the cake.
Notes
- Chill your cake layers in the refrigerator before frosting to ensure a firmer structure and fewer crumbs in your icing.
- Use a digital scale to measure batter into each pan to guarantee uniform height without the need for trimming.
- Maintain a consistent room temperature for your butter to ensure the emulsion does not curdle during the creaming process.
- Keep your frosting bowl covered with a damp towel while decorating to prevent a dry crust from forming on the buttercream.
- Prep Time: 15 mins
- Cook Time: 30 mins
- Category: Dessert
- Method: Baking
- Cuisine: American
Quick-Bake Lineup
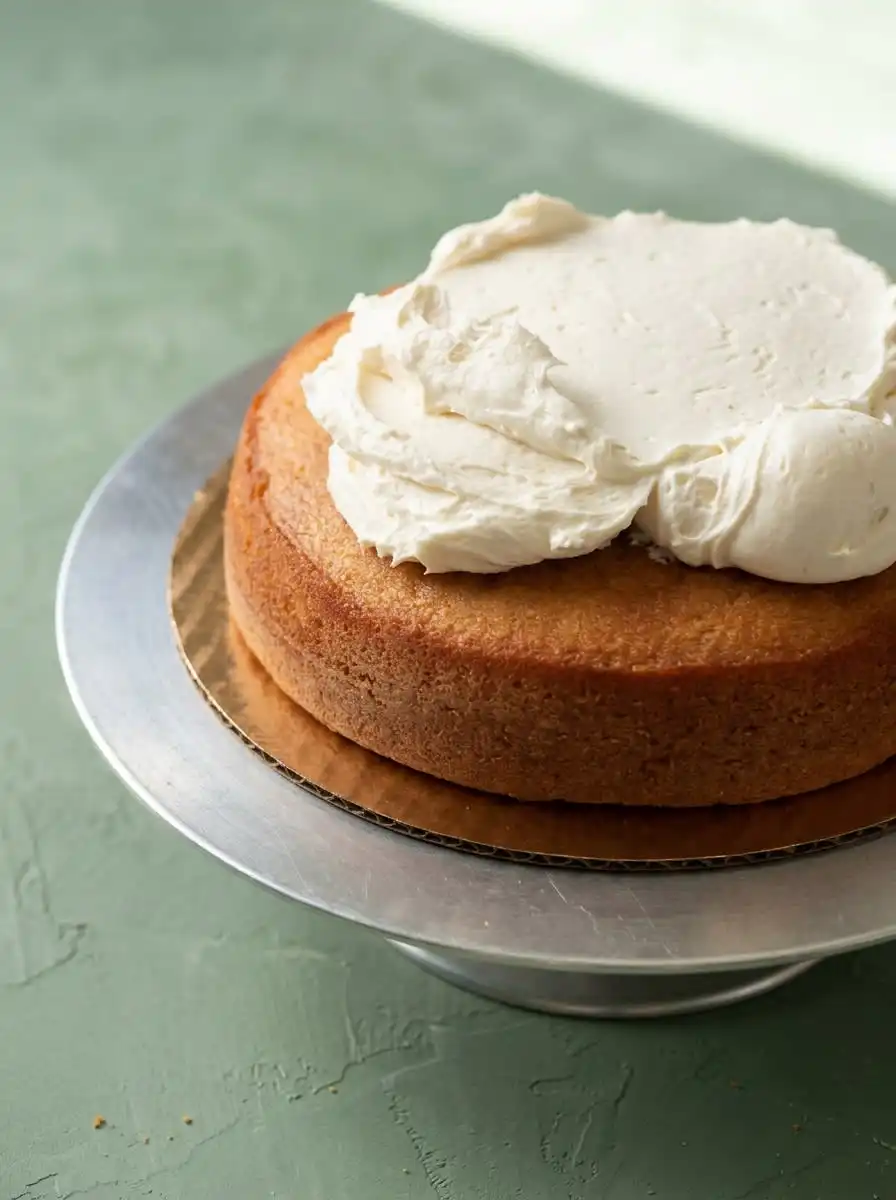
This gorgeous cake relies on simple cupboard staples that work together to create a light, tender crumb. By combining acidic buttermilk with soft cake flour, we create a chemical reaction that guarantees moisture. Here is a breakdown of the key elements that make this recipe succeed every time.
- Cake Flour: Low-protein flour is essential here because it creates a delicate, melt-in-your-mouth crumb texture that keeps the cake light. By spooning and leveling your flour, you avoid packing too much into the cup, which prevents the layers from becoming dense.
- Buttermilk: This cultured milk provides an acidic environment that weakens gluten strands, guaranteeing each bite remains incredibly soft. It also reacts with the baking soda to create tiny air pockets, helping the layers rise beautifully in the oven.
- Vegetable Oil: Adding a splash of oil keeps the crumb moist for days on end. It works in tandem with the butter to provide both rich flavor and long-lasting softness.
- Unsalted Butter: Creaming soft butter with sugar provides the essential structural base and a rich, traditional flavor. It traps tiny air bubbles that expand during baking for a beautiful rise.
- Eggs: These bind the batter together while adding structural richness and a beautiful golden color. Adding them individually helps maintain a smooth, emulsified batter.
- Vanilla Extract: High-quality vanilla gives the cake and buttercream their comforting, nostalgic aroma. It ties all the sweet dairy flavors together beautifully.
- Powdered Sugar: This forms the base of our sweet, spreadable vanilla frosting. It dissolves easily into the butter to make a velvety, clump-free buttercream.
| Ingredient | Why It Matters |
|---|---|
| Cake Flour | Creates a fine, delicate crumb structure |
| Buttermilk | Adds moisture and tenderizes the cake |
| Vegetable Oil | Keeps the layers soft and delicious |
| Butter | Adds traditional rich flavor and structure |
| Powdered Sugar | Thickens the frosting to a smooth consistency |
| Vanilla Extract | Infuses nostalgic warmth into every single bite |
| Eggs | Bind the batter while adding structural richness |
The Quick Method
Step 1: Prep Your Pans and Whisk Dry Ingredients
Start by heating your oven to 350 degrees Fahrenheit so it is hot when your batter is ready. Grease and flour three eight-inch round cake pans to prevent any sticking during the baking process. In a medium mixing bowl, whisk together your cake flour, baking powder, baking soda, and salt. You want this dry mixture to look uniform and light before setting it aside.
Step 2: Combine the Wet Elements
In a separate bowl, measure out your buttermilk, vegetable oil, and rich vanilla extract. Whisk these wet ingredients briefly until the oil breaks into tiny droplets throughout the milk. This step allows the liquids to incorporate evenly into the batter later on. You should smell the sweet aroma of vanilla blooming in the buttermilk.
Step 3: Cream the Butter and Sugar
Place your softened butter into the bowl of your stand mixer fitted with the paddle attachment. Turn the mixer to medium speed and beat the butter until it looks smooth and creamy. Slowly pour in the white sugar, then continue mixing for about four minutes. The mixture should turn pale yellow and look wonderfully light and fluffy.
Step 4: Incorporate the Eggs One by One
With your mixer running on low, add your large eggs to the creamed butter one at a time. Mix after each addition until the yellow yolk fully disappears into the batter. This slow addition keeps the emulsion stable so your batter does not curdle. The mixture will look thick, glossy, and smooth once all the eggs are in.
Step 5: Alternate Adding Dry and Wet Ingredients
Turn your mixer to its lowest speed to avoid splashing flour all over your counter. Add one-third of your whisked dry ingredients, followed by half of your buttermilk mixture. Repeat this pattern, finishing with the last portion of flour to prevent the batter from separating. Mix only until the last streaks of flour disappear to keep the texture tender.
Step 6: Bake the Golden Layers
Divide your smooth cake batter evenly between the three prepared round baking pans. Slide them into the hot oven and bake for twenty-five to thirty minutes. You will know they are ready when a toothpick inserted in the center comes out clean. The tops should look golden brown and feel slightly springy to a gentle touch.
Step 7: Whip the Vanilla Buttercream
While your baked layers cool, whip the cool butter in your clean mixer bowl until smooth. Slowly add half of your powdered sugar along with a splash of milk and vanilla. Beat on medium speed for four minutes until the frosting turns white and fluffy. If the consistency is too thick, add a drop more milk to make it spreadable.
Step 8: Stack the Buttercream Layers on Your Two-Layer Naked Cake
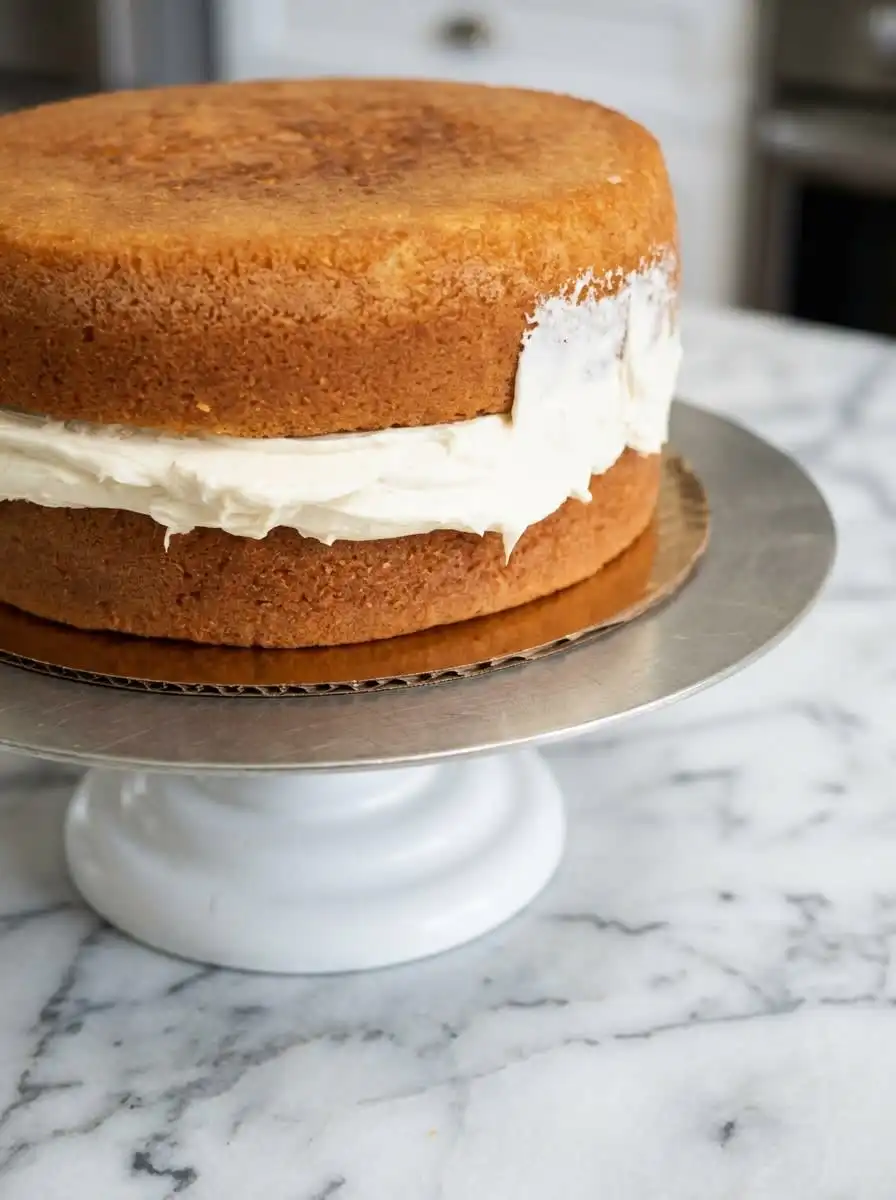
Place your first cooled cake layer onto a sturdy pedestal or cake board. Spread a generous, even layer of vanilla buttercream over the top using an offset spatula. Place the second cake layer directly on top, pressing down gently to secure it in place. Make sure the layers are cleanly centered to prevent any leaning later.
Step 9: Apply the Crumb Coat
Apply a very thin layer of frosting all over the top and sides of the assembled cake. Use a metal bench scraper to smooth the frosting, removing any excess as you rotate the stand. This creates the signature semi-naked look where the golden cake layers peek through. The thin coating helps seal in the moisture while maintaining a rustic aesthetic.
Step 10: Create the Top Spiral
As an optional but highly rewarding step, spread a smooth layer of remaining buttercream over the very top of the cake. While rotating your cake stand slowly, gently press the tip of an offset spatula into the center of the frosting. Gradually spiral outward toward the edge with each full rotation of the turntable. This simple technique leaves a gorgeous, professional swirling pattern that instantly completes your presentation.
Keep It Luscious
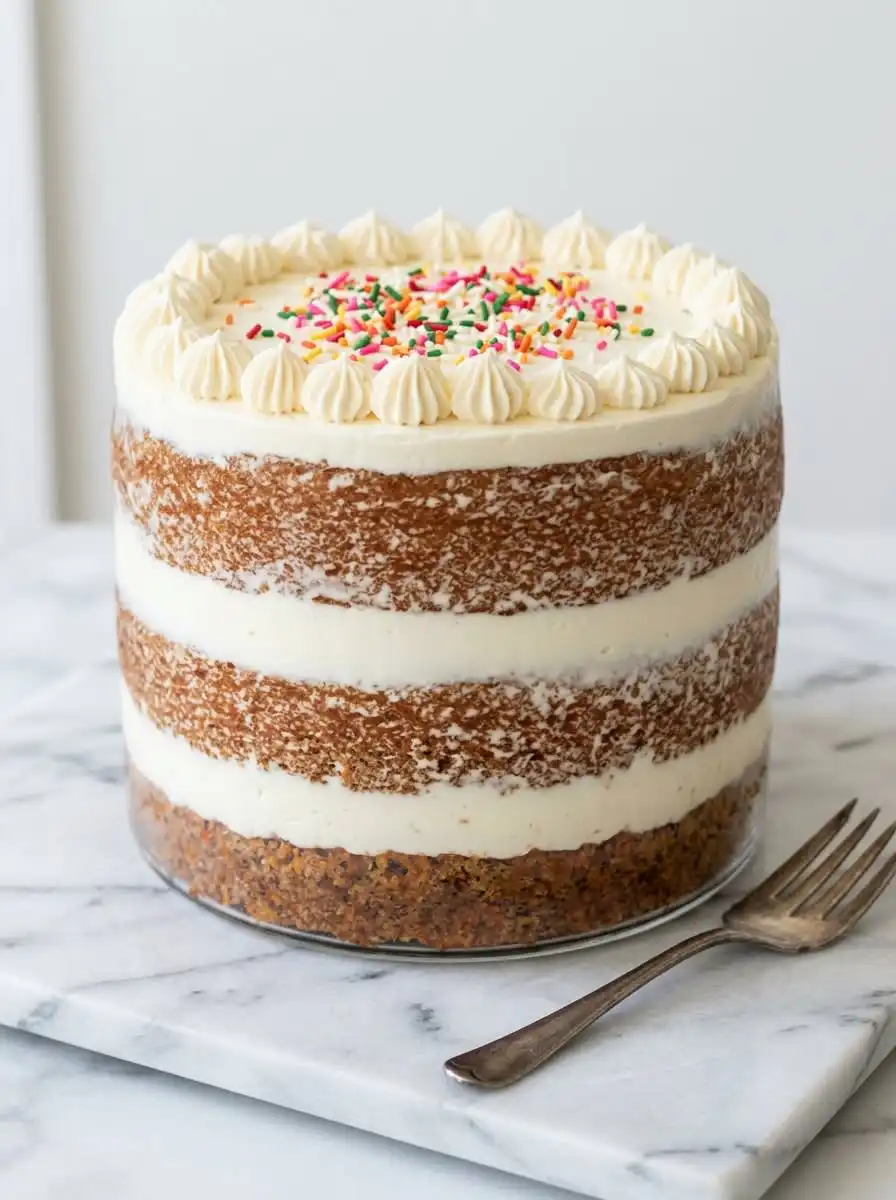
When aiming for a beautiful nude cake aesthetic, chilling your baked layers before assembly is crucial. Cold layers are firmer and release fewer loose crumbs into your white frosting. This trick keeps your thin exterior coat looking clean and professional instead of messy.
If your buttercream starts to separate or looks curdled, the butter was likely too cold or too hot. To fix this common issue, easily wrap a warm, damp towel around the base of your mixing bowl. Continue beating on low speed until the frosting magically comes back together into a smooth cream.
To get flawless, even layers without using a knife, weigh your cake pans on a digital kitchen scale before baking. Pouring the exact same weight of batter into each pan guarantees they rise to the identical height. This eliminates the need to trim the tops, saving you valuable time during assembly.
Always use a metal bench scraper rather than a spatula to scrape the sides of your Two-Layer Naked Cake. Hold the scraper at a forty-five-degree angle against the spinning turntable for the cleanest finish. You can learn more about this scraping technique in this detailed naked cake decorating tutorial. This tool effortlessly removes the excess frosting to reveal the gorgeous cake layers beneath.
If you do not have fresh buttermilk in your fridge, you can easily create a quick kitchen substitute. Pour one tablespoon of white vinegar or lemon juice into a liquid measuring cup. Fill the rest of the cup with whole milk, stir, and let it sit for five minutes before baking.
Keep your frosting covered with a damp paper towel while you work to prevent a dry crust from forming. Buttercream dries out quickly when exposed to the open air of a warm kitchen. This simple step keeps your icing wonderfully soft and spreadable until the very last swipe.
If your layers have domed significantly during baking, trim them while they are still slightly warm. A warm cake cuts more cleanly than one that has cooled completely and developed a crust. Use a gentle sawing motion with a long serrated bread knife for the flattest surface.
Frequently Asked Questions
How do you keep a naked cake from drying out?
Since this style has minimal frosting on the sides, the exposed cake layers can dry out faster than fully frosted cakes. To prevent this, wrap the assembled cake in plastic wrap or store it in an airtight container until serving. You can also brush the layers with a simple sugar syrup before frosting to lock in extra moisture.
What is the difference between a naked cake and a semi-naked cake?
A completely naked cake has absolutely no frosting on its outer sides, leaving the baked layers fully exposed. A semi-naked cake features a very thin, translucent layer of buttercream scraped across the exterior. This scraped method keeps the cake moister while still showcasing the beautiful natural crumb of the layers.
How do you get straight, even layers on a naked cake?
The secret lies in leveling your cake layers before you begin the stacking process. Use a long serrated knife or a wire cake leveler to gently slice off any domed tops. This guarantees each layer sits flawlessly flat, preventing your finished dessert from leaning or sliding.
What is the best frosting for a naked cake?
A sturdy buttercream made with butter and powdered sugar is the best choice for this assembly style. It holds its shape beautifully and scrapes away cleanly without tearing the delicate crumb. Avoid whipped cream or soft cream cheese frostings, as they tend to slide too much when scraped.
How do you decorate a Two-Layer Naked Cake?
You can keep the design simple by crowning the top layer with fresh berries or edible flowers. A light dusting of powdered sugar over the top also adds an elegant, rustic touch. For a more dramatic finish, let a few drips of caramel or chocolate ganache run down the sides.
Can I freeze the cake layers before assembling them?
Yes, you can bake and freeze the round layers up to three months in advance. Wrap each cooled layer tightly in two sheets of plastic wrap and a layer of foil. Thaw them in the refrigerator overnight before stacking and applying your buttercream.
Can I make this cake recipe with gluten-free flour?
You can swap the cake flour for a high-quality, one-to-one gluten-free baking blend. Look for a blend that contains xanthan gum to help replicate the traditional structure of wheat flour. Be sure not to overmix the batter to keep the finished cake light and tender.
How far in advance can I frost the cake?
You can frost the entire cake up to twenty-four hours before your party or event. Keep it stored in a cool place or refrigerate it to allow the frosting to set firmly. Bring it back to room temperature about two hours before serving for the best texture.
Switch Up the Flavor
If you want a rich cocoa twist, you can easily turn this Two-Layer Naked Cake design into a chocolate dream. Easily swap the vanilla layers for a decadent classic chocolate layer cake base. The dark chocolate layers contrasted against white vanilla buttercream create an eye-catching rustic design that guests will love.
For a bright citrus note, add the fresh zest of two lemons directly into your cake batter. You can also splash a tablespoon of fresh lemon juice into the buttercream to cut through the sweetness. This pairing creates a sunny, refreshing treat that is ideal for afternoon tea or warm spring days.
To introduce a warm, spiced element, fold two teaspoons of ground cinnamon and a pinch of nutmeg into your dry flour mixture. Pair these cozy spiced layers with a rich brown butter frosting instead of traditional vanilla. It is a comforting option that brings a rustic charm to your autumn gatherings.
Spoon It While It’s Warm
This gorgeous dessert shines brightest when served alongside simple, elegant accompaniments. Arrange a bowl of fresh, tart raspberries and sliced strawberries next to the cake stand for guests to spoon over their slices. The bright acidity of the fresh fruit cuts through the rich, sweet buttercream beautifully. It adds a natural pop of color that looks stunning on any dessert table.
If you are hosting a seasonal gathering, consider dressing the top with a stunning display of naked cake fall flowers like pansies or marigolds. This simple botanical touch turns a quick weeknight bake into a gorgeous center attraction. Pair each slice with a hot cup of black tea or a dark roast coffee to balance the sweet vanilla flavors. The warm steam from the cups complements the cool, creamy texture of the buttercream.
For the ultimate texture contrast on your Two-Layer Naked Cake, serve each slice slightly cool but not ice-cold. Let the cake sit at room temperature for about thirty minutes before you slice into it. This brief rest allows the butter in the cake and frosting to soften, restoring that melt-in-your-mouth feel. A clean, warm knife will yield flawless slices that display the elegant layers beautifully.
Bake It Tonight
Baking a beautiful dessert does not have to be a stressful, all-day project. With this straightforward method, you can skip the tedious decorating steps and still serve a gorgeous masterpiece. It is the ideal reminder that we can have bakery-style treats any day of the week. You do not need professional training to create something that looks this sophisticated.
If you love the simple elegance of this style, check out our guide on creating a classic vanilla layer cake for your next gathering. This recipe is designed to be approachable and delicious, helping you build confidence in the kitchen. Gather your loved ones, slice up some joy, and enjoy every single bite. The process is quick, but the sweet memories will last far longer.
We would love to see your beautiful creations, so please share your baking success with us. Follow us on Pinterest, Facebook, and TikTok for more quick, luscious dessert inspiration. You can also join our community on Telegram to chat with fellow home bakers and get fresh recipes daily.