Growing up near the Mediterranean, the sea was our constant companion—a shifting canvas of turquoise and deep indigo that promised adventure. This cake captures that vibrant spirit, bringing the magic of the ocean to your table. While it steps away from my traditional syrup-soaked pastries, it shares the same heart: a celebration of texture, color, and the joy of gathering family around something beautiful.

Underneath the playful waves of blue buttercream lies a tender, buttermilk-enriched sponge that melts in your mouth. We layer it with sweet strawberry jam for moisture and finish it with a textured “sand” of crushed biscuits. It is a centerpiece that looks spectacular but relies on patience and simple assembly rather than complex fondant work.
A Visual and Textural Delight
You will love this recipe because it balances whimsy with genuine flavor. The buttermilk sponge provides a dense, tender crumb that stays moist for days, ensuring the cake tastes as good as it looks.
The decoration is where the fun begins. Instead of stiff, sugary fondant, we use luscious buttercream swirled to mimic crashing waves. The “sand” made from crushed granita biscuits adds a necessary crunch, contrasting beautifully with the soft sponge and smooth icing. It is a sensory experience—creamy, crunchy, and sweet.
Print
Moana Cake
- Total Time: 1 hour 25 mins
- Yield: 12 servings
- Diet: Vegetarian
Description
Bring the magic of the ocean to your dessert table with this stunning layered cake featuring a tender buttermilk sponge and vibrant blue buttercream waves. Accented with crushed biscuit sand and playful toppers, it is the perfect centerpiece for any tropical-themed celebration.
Ingredients
- 3 layers of buttermilk sponge cake
- 1 jar strawberry jam
- 4 batches of vanilla buttercream icing
- 1 packet granita biscuits, crushed
- Blue food colouring
- Chocolate fingers
- Toy sea animals and Moana cake toppers
Instructions
- Secure the first cake layer to the board using five blobs of buttercream as glue to prevent sliding.
- Spread a generous layer of strawberry jam over the sponge, leaving a 1cm border, then pipe a buttercream ring around the edge to seal.
- Repeat the layering process with the second sponge and more jam, then place the final sponge layer on top.
- Apply a thin crumb coat of buttercream over the top and sides of the cake and refrigerate for 30 minutes to set.
- Tint two-thirds of the remaining buttercream with blue food colouring and apply to the cake using a palette knife to create textured wave patterns.
- Use the remaining white buttercream to create a beach area, pressing the crushed granita biscuits into the icing to mimic sand.
- Finish by positioning the chocolate fingers and Moana toppers on the cake, using small dabs of icing to secure them in place.
Notes
For the best results, ensure your sponge layers are completely cool before assembling to prevent the buttercream from melting. If the blue waves start to lose their shape during decorating, simply return the cake to the fridge for 15 minutes to firm up the icing.
- Prep Time: 45 mins
- Cook Time: 40 mins
- Category: Dessert
- Method: Assembly
- Cuisine: International
The Foundation of Flavor

To create this ocean-inspired treat, we focus on ingredients that offer both structural integrity and melt-in-your-mouth texture.
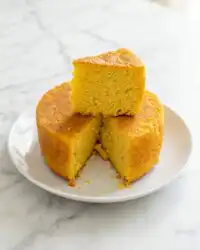
- Buttermilk Sponge: You will need three layers of a reliable buttermilk cake (like Nigella’s famous base). The buttermilk is the secret to a tender crumb that isn’t too airy to stack.
- Strawberry Jam: This acts as the sweet glue between layers, adding a fruity tartness that cuts through the rich buttercream.
- Buttercream Icing: You need a generous amount—3 to 4 batches. This is your paint and your plaster. Quality butter makes a difference here.
- Granita Biscuits: These are crushed to create the beach. They possess a coarse, sandy texture that does not turn to mush instantly.
- Blue Food Colouring: To create the deep, inviting tones of the Pacific Ocean.
- Decorations: Chocolate fingers (for borders or palm trunks), toy sea animals, and Moana toppers bring the theme to life.
How to Build the Island
Step 1: Secure the Foundation
Texture starts with stability. Place five generous blobs of buttercream on your cake board—one in each corner and one in the center. This acts as your “glue.” Gently press the first layer of your buttermilk sponge onto this base. This ensures the cake does not slide while you work.
Step 2: Layering the Moisture
Cover the first sponge layer generously with strawberry jam. Patience is key here; do not spread it right to the edge. Leave a border of about 1cm (0.4 inches) to prevent the jam from bleeding out. Pipe a ring of buttercream over the jam, also leaving a small border, to create a seal. Place the second cake layer on top and repeat this process.
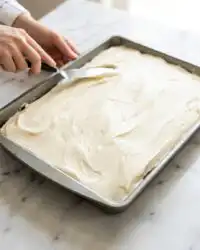
Step 3: The Crumb Coat
Place the final third layer on top. Now, you must seal in the moisture and crumbs. Using a palette knife, spread a thin layer of buttercream over the top and sides. We call this the “dirty icing” or crumb coat. It does not need to be perfect. Once covered, place the cake in the fridge for 30 minutes. This chilling step is non-negotiable for a professional finish.
Step 4: Creating the Ocean
Take about two-thirds of your remaining buttercream and mix in the blue food colouring until you achieve a vibrant sea blue. Apply this to the top and sides of the cake, using your palette knife or a piping bag to create swirls and peaks that resemble crashing waves. Leave a section empty for your beach.
Step 5: The Beach and Toppers
Use the remaining white buttercream to build up the beach area. Press the crushed granita biscuits into this white icing to create a sandy texture. finally, position your Moana toppers and sea animal toys, using extra blobs of icing at their bases to secure them against the “tide.”
Mehmet’s Secrets for Success

The secret to a great layered cake is temperature control. Ensure your cakes are completely cool before you even think about icing them, or the buttercream will slide right off. When applying the blue waves, if the icing feels too soft, pop the piping bag in the fridge for ten minutes.
For the “sand,” do not crush the biscuits into a fine powder; keep some larger crumbs for a better mouthfeel. If you are looking for more creative ways to use color in your baking, try our lemon rainbow cake for another vibrant option. Also, for additional topper ideas and crafting tips, I admire the creativity shown in this Moana birthday cake guide.
Mediterranean Twists and Themes
While this cake celebrates the Pacific, you can easily adapt the flavors to suit a Mediterranean palette. Try brushing the sponge layers with a light citrus syrup before adding the jam for extra moisture.
- Lemon & Curd: Swap the strawberry jam for lemon curd to give the cake a zesty, refreshing kick that pairs wonderfully with the vanilla sponge.
- Nutty Texture: Mix finely chopped pistachios into the “sand” mixture for a nod to Turkish desserts.
- Different Themes: If the ocean isn’t your destination today, you can use the same structural techniques for other themes. Our car cake uses similar assembly methods for a completely different visual result.
Sharing the Joy

This cake is rich and substantial, so slice it with a knife that has been dipped in hot water and wiped dry. This ensures clean cuts through the buttercream and sponge, revealing the beautiful layers inside.
Serve this cake with a glass of cold milk for the children, or a strong tea for the adults to balance the sweetness. If you are serving a larger dessert spread, a fresh option like our succulent fruit fusion offers a nice, light contrast to the rich cake.
The Sweetest Horizon
Baking is about creating memories, and this Moana cake promises a celebration your loved ones will not forget. It combines the comfort of a classic buttermilk sponge with the excitement of an island adventure.
Whether you are making a traditional fruit cake or this colorful masterpiece, the secret is always love and patience. We would love to see your creations! Share your photos with us on Pinterest, Instagram, Facebook, or TikTok.

