My early days in a professional British kitchen taught me that even the most playful desserts require a foundation of absolute precision. While this vibrant creation might seem purely whimsical, the success of a surprise-inside structure relies on the exact density of the sponge and the stability of the crumb. We are building a vessel for joy, and that requires a methodical approach to cake architecture to prevent a structural collapse.

This Candy Cake is a masterclass in combining soft, moist yellow sponge with a hidden cache of crunchy, chocolatey treasures. By using a specific stacking technique, we create a hollow chamber that releases a cascade of sweets the moment the first slice is removed. It is a dessert that balances the nostalgia of childhood treats with the technical discipline of a multi-tiered build, resulting in a perfect melt-in-your-mouth experience.
The Architecture of a Sweet Surprise
Precision is the difference between a cake that stands proud and one that fails under its own weight. This recipe focuses on the structural beauty of the four-layer stack, making sure each tier provides the support needed for the central cavity. The contrast between the tender, vanilla-scented crumb and the sudden burst of crisp candy shells creates a mouthfeel that is both surprising and deeply satisfying.
You will master the art of the hollow-core cake, a technique that allows for endless creative expressions in your future baking endeavors. This method is about more than just aesthetics; it is about managing the physics of the crumb. A cake that is too light will compress, while one that is too dense will lose that delicate melt we strive for. By following this methodical process, you achieve a professional-grade triumph that is as sturdy as it is delicious.
Print
Candy Cake
- Total Time: 2 hours 45 mins
- Yield: 12 servings
- Diet: Vegetarian
Description
This architecturally stunning four-layer yellow cake hides a playful secret: a hollow center filled with a vibrant explosion of pastel candies and chocolate eggs. It is a technical masterpiece that balances a soft, moist crumb with a delightful crunch, making it the ultimate centerpiece for any festive occasion.
Ingredients
- 2 boxes yellow cake mix
- Water, vegetable oil, and eggs (as required by cake mix)
- Pastel chocolate candies
- Mini chocolate eggs
- 2 containers (16 oz each) vanilla frosting
- Gel food colors (pink, yellow, green)
- Pastel baking chips
- Assorted pastel sprinkles
Instructions
- Preheat oven to 350°F (175°C) and grease two 8-inch round cake pans, lining the bottoms with parchment paper.
- Prepare the first cake mix according to package directions, beat for two minutes, and bake for 28-33 minutes until a toothpick comes out clean.
- Cool the cakes in the pans for 10 minutes before transferring to wire racks, then repeat the process with the second cake mix to create four layers total.
- Once fully cooled, trim the tops of all four layers to be perfectly flat; use a 4-inch round cutter to remove the centers of two layers.
- In a bowl, toss together the candies, mini eggs, baking chips, and a portion of the sprinkles.
- Place a solid cake layer on a serving plate, spread with frosting, then stack the two ring layers with frosting in between.
- Fill the center cavity with the candy mixture, then top with the final solid cake layer to seal the surprise inside.
- Divide remaining frosting into three bowls, tint with gel colors, apply a crumb coat and chill for 20 minutes before adding the final decorative frosting and sprinkles.
Notes
Ensure all cake layers are completely room temperature before attempting to cut the center rings to prevent the sponge from tearing. For the best spill effect when the cake is cut, avoid over-packing the candy reservoir and use a mix of different sized candies to create movement.
- Prep Time: 45 mins
- Cook Time: 1 hour
- Category: Dessert
- Method: Baking
- Cuisine: American
The Technical Foundation of Ingredient Precision

To achieve the perfect balance of structure and melt, every component must be chosen for its specific properties. We are not just mixing ingredients; we are creating a stable medium for our candy fillings. Each element plays a role in the final structural integrity of the dessert.
- Yellow Cake Mix: We use two boxes to provide a consistent, fine crumb that holds its shape when cut and carved. The protein content in these mixes is calibrated for a reliable rise.
- Pastel Candies and Mini Eggs: These provide the essential crunch factor and a splash of seasonal color. Their hard shells offer a necessary textural deviation from the soft sponge.
- Betty Crocker Rich & Creamy Vanilla Frosting: Its specific viscosity is vital for acting as the mortar between our cake layers. It must be thick enough to support the weight of the tiers.
- Gel Food Colors: We use gel rather than liquid to maintain the frosting’s structural integrity. Liquid dyes can thin the frosting, leading to sliding layers.
- Pastel Baking Chips: These add a creamy, white-chocolate-style melt that complements the sharper snap of the candy coatings.
- Vegetable Oil and Eggs: These are the hydration and binding agents. Precise measurement of the oil guarantees a moist crumb that does not crumble prematurely.
The Method of Technical Construction
Step 1: Prep Your Ingredients and Environment
Begin by heating your oven to 350°F (175°C), or 325°F (160°C) if using dark or nonstick pans. Precision in temperature is vital to prevent over-browning or uneven rising. Lightly spray the bottoms and sides of two 8-inch round pans with cooking spray. I recommend lining the bottoms with parchment paper rounds for a clean release, which preserves the structural edges of the sponge.
Step 2: Mixing for Homogeneity
In a large bowl, combine the first box of cake mix with the exact measurements of water, oil, and eggs specified on the package. Beat with an electric mixer on medium speed for exactly two minutes. Use a silicone spatula to scrape the bowl to achieve a truly homogenous batter. Divide the batter equally between the pans—use a kitchen scale for absolute accuracy—to guarantee uniform height.
Step 3: The Baking Phase and Cooling
Bake for 28 to 33 minutes. You are looking for the toothpick stage—the moment a tester inserted into the center comes out clean with no wet crumbs. Allow the layers to cool in the pans for 10 minutes to let the structure set before transferring to wire racks. Repeat this entire process with the second box of mix to produce four identical cake tiers. Cooling completely—at least one hour—is non-negotiable for structural stability.
Step 4: Engineering the Cavity
Once cooled, use a serrated knife to trim the rounded tops off all four layers until they are perfectly flat. This makes sure the cake doesn’t lean. Select two of the layers to be your middle tiers. Using a 4-inch round cutter, remove the center from these two layers. These rings will form the walls of your candy chamber. Handle these rings with care to avoid fractures in the crumb.
Step 5: Preparing the Candy Reservoir
In a small bowl, combine the pastel chocolate candies, mini eggs, baking chips, and half a cup of the sprinkles. This mixture must be dry and free of moisture to maintain the crunch once sealed inside the cake. This is the heart of our textural contrast. Mixing them beforehand allows for a random, beautiful distribution during the reveal.
Step 6: Assembly and Sealing
Place one solid cake layer on your serving plate. Apply a thin, even layer of frosting. Top with one of the ring layers, followed by another thin layer of frosting and the second ring layer. Pour your candy mixture into the central hole until it is level with the top ring. Crown the cake with the final solid layer. This creates a sealed, structural vault of sweets. The frosting between the rings acts as a seal to keep the candy in place.
Step 7: Decorative Finish
Divide your remaining frosting into three bowls. Use the gel food colors to create soft pink, yellow, and green hues. Gel colors are superior because they provide intense pigment without altering the frosting’s texture. Apply the frosting in a smooth crumb coat first, chill for 20 minutes to set the exterior, and then apply your final decorative layer and the remaining sprinkles.
Jordan’s Techniques for Structural Wisdom

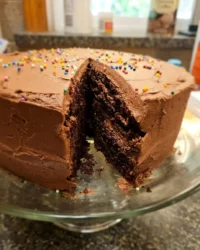
One of the most important factors in a tall, layered cake is the temperature of your frosting. If it is too warm, the layers will slide; if it is too cold, it will tear the delicate crumb of the yellow cake. Aim for a room temperature consistency that feels like softened butter. Always chill your cake for at least 30 minutes after the initial assembly but before the final frosting stage. This sets the structure and makes the final application much easier. For those looking to master other complex builds, understanding the balance of moisture is key—much like the techniques used in our old-fashioned-chocolate-cake. Remember to use a piping bag to create a dam of frosting around the rings to prevent candy from sticking to the outer walls. This precision makes sure that when you cut the cake, the candy spills out freely rather than clumping against the sponge.
Technical Variations and Advanced Options
While the pastel theme is perfect for spring, you can modify the surprise for any season or celebration. For a richer profile, consider using dark chocolate chunks or even small pieces of chopped gourmet candy bars. If you prefer a more intense fruit flavor profile, you might look at the techniques for fruit integration found in our raspberry-white-chocolate-cake. You could also substitute the yellow cake mix for a white cake mix if you want a more stark contrast against the colorful candies inside. Another advanced variation involves soaking the cake layers in a light simple syrup—apply sparingly with a pastry brush—to boost moisture without compromising the strength of the ring layers. Always make sure your fillers are of a similar size to maintain a consistent pour when the cake is sliced.
Presentation and Slicing Precision

To achieve the maximum visual triumph, the first slice is critical. Use a long, thin serrated knife that has been dipped in hot water and wiped dry. This allows the blade to glide through the frosting and sponge without compressing the layers. Cut a generous wedge to allow the candy to spill out naturally. If you enjoy desserts with a high visual impact and complex layers, you should also try our lemon-rainbow-cake. Serve each slice with a small spoonful of the spilled candy to guarantee every guest gets the full textural experience of the soft cake and the brittle candy shell. This balance of smooth and crunchy is the hallmark of a well-executed Candy Cake.
Master the Craft of Precision
Building a cake with a hidden center is a triumph of pastry engineering. It proves that with the right method and a bit of patience, you can create a dessert that is as structurally sound as it is beautiful. This Candy Cake is a testament to the fact that precision in the kitchen leads to spectacular results that delight the senses. For more decadent inspiration that focuses on texture and weight, do not miss our snickers-cake which also celebrates the marriage of candy and sponge. I would love to see your successful reveals—please share your progress on our social channels! For further technical guidance and recipes, check out the original inspiration at Betty Crocker.
Follow us for more technical tips:


