In my early years of training in London, I learned that the integrity of a no-bake dessert depends entirely on the stability of the fat-and-protein emulsion within the dairy. This Easy American Flag Cake No-Bake Cheesecake celebrates that structural precision, using a stabilized cream cheese base that maintains its form even in the peak of summer heat. We achieve a superior mouthfeel by carefully balancing the density of the cheese with the aeration of whipped cream.

Constructing a patriotic showstopper requires more than just aesthetics; it demands a firm graham cracker foundation and a velvety filling. This method ensures the layers remain distinct and the fruit topping stays exactly where you place it for a perfect finish. By following these technical cues, you will create a dessert that is as structurally sound as it is visually spectacular.
Structural Integrity Meets Summer Ease
The beauty of this recipe lies in the technical balance between the rich, tangy cream cheese and the light, airy texture of stabilized whipped cream. Unlike baked versions that can often become dense or crack, this no-bake method preserves a delicate, melt-in-your-mouth quality while providing the structural strength needed to support a heavy fruit topping. It is the definitive solution for those seeking a professional-grade dessert without the thermal variables of an oven.
Precision in temperature is our greatest ally here. By ensuring the cream cheese is perfectly softened and the heavy cream is kept at a near-freezing temperature, we create a suspension that is both firm and creamy. This contrast in textures—the crunch of the buttery graham cracker crust against the smooth, lemon-brightened filling—is what makes this particular version a triumph of pastry logic. It is a reliable, tested method that guarantees a clean slice every single time.
Print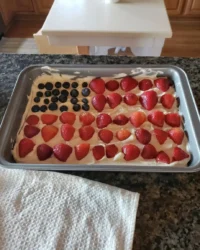
Easy American Flag Cake No-Bake Cheesecake
- Total Time: 6 hours 30 mins
- Yield: 15 servings
- Diet: Vegetarian
Description
A stunning, patriotic no-bake cheesecake featuring a buttery graham cracker crust and a velvety smooth, stabilized cream cheese filling. This festive dessert uses vibrant cherry and blueberry toppings to create a classic flag design that is perfect for summer celebrations.
Ingredients
- 2 cups graham cracker crumbs
- 1 cup unsalted butter, melted
- 3 blocks (24 oz total) cream cheese, softened
- 1/2 cup granulated sugar
- 1/2 cup sour cream
- 3 tablespoons lemon juice
- 1 1/4 cups heavy whipping cream, chilled
- 1/2 cup powdered sugar
- 1 teaspoon vanilla extract
- 1 can blueberry pie filling
- 1 can cherry pie filling
- White edible star sprinkles
Instructions
- In a medium bowl, combine graham cracker crumbs and melted butter, then press the mixture firmly into the bottom of a 13×9 inch pan to create a level base.
- In a large mixing bowl, beat the softened cream cheese, sour cream, lemon juice, and granulated sugar until the texture is smooth and creamy.
- In a separate chilled bowl, whip the heavy cream, vanilla, and powdered sugar until stiff peaks form.
- Gently fold the whipped cream into the cream cheese mixture using a spatula, being careful not to deflate the air, until no streaks remain.
- Spread the filling evenly over the crust and refrigerate for at least 4 to 6 hours, or overnight, to allow the structure to set properly.
- Use a toothpick to score a flag pattern on the surface, then fill the marked areas with blueberry and cherry fillings and finish with star sprinkles.
Notes
For the smoothest texture, ensure your cream cheese is completely at room temperature before mixing to prevent lumps. If you are serving this at an outdoor event, keep the cheesecake chilled until the last possible moment to maintain its structural integrity against the heat.
- Prep Time: 30 mins
- Cook Time: 0 mins
- Category: Dessert
- Method: No-Bake
- Cuisine: American
The Technical Foundation of Ingredient Precision
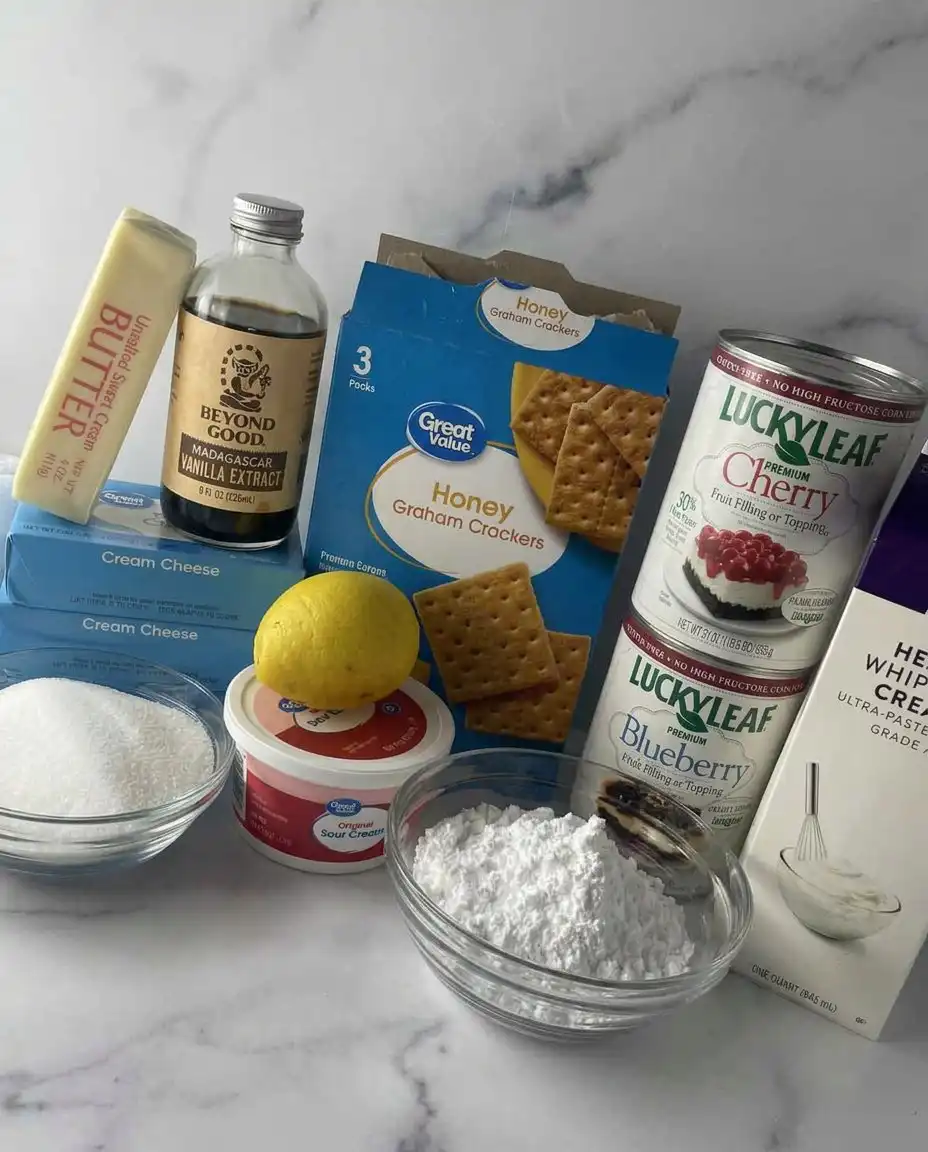
To achieve a professional result, every component must serve a specific structural purpose. We are not merely mixing ingredients; we are building a foundation that must support the weight of the fruit and the geometry of the flag design.
- Graham Cracker Crumbs (2 cups): These provide the skeletal structure of the dessert. The crumbs must be uniform to ensure even butter absorption and a firm compression.
- Unsalted Butter (1 cup, melted): Butter acts as the primary binding agent. Using unsalted butter allows us to control the seasoning precisely, while the high fat content ensures the crust sets firmly in the refrigerator.
- Cream Cheese (3 boxes, 24 oz total): This is the heart of the structure. I recommend full-fat blocks for the highest protein and fat content, which leads to a more stable set. It must be softened to room temperature to prevent lumps.
- Heavy Whipping Cream (1 1/4 cups, chilled): This provides the aeration. It must have at least 36% milk fat to reach the necessary stiff peaks required for a light but sturdy texture.
- Lemon Juice (3 tablespoons): Beyond flavor, the acidity in the lemon juice reacts with the dairy proteins, helping to tighten the structure and achieve a cleaner set.
- Fruit Toppings (Lucky Leaf Cherry and Blueberry Filling): These provide the vibrant colors for our flag. Their viscosity is ideal for staying in place without bleeding into the white cheesecake base.
- White Edible Star Sprinkles: These add the final geometric detail, representing the stars with precision and flair.
The Technical Process of Construction
Step 1: Engineering the Foundation
Combine your 2 cups of graham cracker crumbs with the sugar and 1 cup of melted unsalted butter in a medium bowl. Use a silicone spatula to ensure every crumb is coated in fat, which is vital for moisture resistance. Transfer the mixture to a 13×9 inch pan and press down with significant force, using the flat bottom of a measuring cup to achieve a level, compacted surface. This compaction is what prevents the crust from crumbling when sliced.
Step 2: Emulsifying the Cream Cheese Base
In a large mixing bowl, beat the softened cream cheese, sour cream, lemon juice, and granulated sugar. You are looking for a completely smooth, homogenous state. This step is about removing every trace of graininess; the mixture should look like polished marble. Do not over-beat at high speeds, as we want to avoid incorporating too much air at this stage, which could lead to structural bubbles.
Step 3: Aeration and Stiff Peaks
In a separate, chilled bowl, combine the heavy whipping cream, vanilla extract, and powdered sugar. Using a whisk attachment, beat the mixture until you reach the stiff peak stage—where the cream stands straight up when the whisk is lifted. This is the mechanical aeration that gives the cheesecake its lift and lightness. If the peaks are too soft, the cheesecake will lack the integrity to hold the fruit toppings.
Step 4: The Delicate Fold
Using a large rubber spatula, gently fold the whipped cream into the cream cheese mixture. This must be done with a light hand to preserve the air bubbles you just created. Use a ‘cut and turn’ motion: cut through the center, scrape the bottom, and fold over. Continue until no white streaks remain. Spread this batter over your prepared crust, using an offset spatula to create a perfectly level horizon.
Step 5: Thermal Setting
Cover the pan tightly and refrigerate for a minimum of 4 to 6 hours, though overnight is preferred for the best structural results. This chilling period allows the butter in the crust to solidify and the dairy proteins to form a stable matrix. A premature exit from the refrigerator will result in a soft, difficult-to-cut texture.
Step 6: Mapping the Flag Design
Before applying the fruit, use a toothpick to lightly score the design on the surface of the chilled cheesecake. Mark a rectangle in the top left for the blue field and lines for the red stripes. Carefully spoon the blueberry filling into the rectangle and the cherry filling along the lines. Finish by placing the edible star sprinkles onto the blueberry section for a sharp, professional appearance.
Precision Secrets for Perfect Texture

For the cleanest possible presentation, I always suggest wiping your knife with a warm, damp cloth between every single cut. This prevents the fruit filling from dragging into the white cheesecake layer, preserving the sharp contrast of the flag design. If you find your cream cheese is still slightly cool, you can submerge the sealed foil blocks in warm water for ten minutes to reach the ideal temperature for mixing. This prevents the ‘beading’ effect where tiny pockets of fat remain un-emulsified. For those interested in more fruit-forward textures, our strawberry-cheesecake guide offers deep insights into managing fruit moisture in no-bake bases. Always remember that the quality of your fruit filling, such as the Lucky Leaf brand mentioned in the original inspiration, determines the vibrancy of your final display.
Technical Tweaks and Advanced Options
While the classic flag design is a summer staple, you can adjust the structural elements for different occasions. If you prefer a more traditional European profile, replace the graham crackers with crushed digestive biscuits for a slightly saltier, more complex base. You might also consider a strawberry-icebox-cake approach by layering thin wafers within the cheesecake batter to create a more ‘cake-like’ interior structure. For a more intense citrus note, you can double the lemon zest, but be mindful that excessive acidity can occasionally over-tighten the proteins, leading to a firmer, less creamy mouthfeel. If you are serving a smaller group, this recipe can be halved and set in a springform pan for a taller, more vertical presentation that emphasizes the thickness of the layers.
Presentation Precision and Textural Balance

When serving this dessert at a patriotic gathering, presentation is paramount to the guest experience. I recommend serving the slices on chilled plates to maintain the temperature of the cheesecake as long as possible. A side of lightly sweetened, stiff-peaked Chantilly cream can provide a soft textural contrast to the dense, fruity topping. For a truly masterful display, consider pairing this with our flag-cake to offer guests a choice between a traditional bake and this creamy no-bake alternative. The contrast between the two will highlight your technical range as a baker. Ensure the slices are uniform in size, which not only looks professional but ensures the fruit-to-cream ratio is consistent for every guest.
Master the Craft of Patriotic Pastry
Mastering the Easy American Flag Cake No-Bake Cheesecake is a testament to your understanding of dairy stability and structural layering. By focusing on the mechanics of the whip and the compression of the crust, you have created a dessert that stands as a pillar of summer entertaining. For more inspiration on festive bakes, look at our red-white-and-blue-cake for further technical challenges. I encourage you to share your results and join our community of precision-focused bakers. You can follow my latest technical breakthroughs on Instagram, Pinterest, and Facebook to continue your journey in the art of pastry.
Keep practicing the method, and remember that every degree of temperature and every second of whipping contributes to the perfect melt.