During my early years of British pastry training, I learned that the distinction between a simple sponge and a true pastry cake lies in the structural integrity of the crumb. Achieving a melt-in-the-mouth texture without the use of eggs requires a methodical approach to chemistry, specifically the interaction between acidity and leavening agents. This recipe represents a triumph of precision over tradition, proving that technical mastery can replicate the most delicate professional results in a domestic kitchen.

This particular pastry cake is a refined version of the classic Black Forest gateau, scaled for technical perfection and intense flavor concentration. We use a high-fat cocoa base balanced with a precise buttermilk saturation to create a dessert that is robust enough to layer but light enough to dissolve instantly on the palate. By following these exact measurements and temperature cues, you will produce a pastry that rivals the finest European patisseries.
Structure Meets Texture
The allure of this pastry cake is found in its dual nature: the cake remains structurally sound while offering a luxurious mouthfeel that is neither heavy nor dry. Unlike standard sponges that rely on egg proteins for lift, this version uses a precise ratio of buttermilk and baking soda to create micro-pockets of air. This results in a uniform crumb that absorbs the cherry syrup without becoming unstable or soggy.
Furthermore, the integration of cornstarch into the flour blend lowers the overall protein content just enough to prevent gluten toughness. This technical tweak guarantees a tender bite that supports the weight of the stabilized whipped cream. It is a spectacular victory for any baker seeking to master the art of eggless pastry through scientific understanding rather than guesswork.
Print
Eggless Black Forest Pastry Cake
- Total Time: 38 mins
- Yield: 8 servings
- Diet: Vegetarian, Egg-Free
Description
Master the art of eggless baking with this refined Black Forest pastry cake, featuring a tender cocoa crumb and stabilized whipped cream. This technical recipe uses a scientific approach to acidity and leavening to achieve a professional patisserie texture without eggs.
Ingredients
- 1 cup all-purpose flour
- 1 tablespoon cornstarch
- 1/2 cup unsweetened cocoa powder (high-fat)
- 1/2 teaspoon baking soda
- 1/4 teaspoon salt
- 1/2 cup granulated sugar
- 1/3 cup vegetable oil
- 1 teaspoon chocolate extract
- 2/3 cup buttermilk
- 1 cup heavy whipping cream
- 2 tablespoons powdered sugar
- 1/4 teaspoon cream of tartar
- 1/2 cup maraschino cherries, sliced
- 1/4 cup water
- 2 tablespoons sugar
- Chocolate shavings for garnish
Instructions
- Preheat oven to 350°F (175°C) and line a 9.5×5-inch baking pan with parchment paper.
- Sift together flour, cocoa powder, cornstarch, baking soda, and salt in a medium bowl to aerate.
- In a stand mixer, whisk oil, sugar, and chocolate extract on medium speed until combined.
- Alternately add the dry ingredients and buttermilk to the wet mixture, beginning and ending with the dry ingredients, mixing just until combined.
- Pour batter into the pan, tap to release air bubbles, and bake for 15-18 minutes until a toothpick comes out with moist crumbs.
- Boil water and 2 tablespoons sugar in a saucepan, add sliced cherries, and simmer for 4-5 minutes to create a concentrated syrup.
- Whisk chilled heavy cream, powdered sugar, and cream of tartar until stiff peaks form.
- Halve the cooled cake horizontally, soak the bottom layer with cherry syrup, top with cream and cherries, then repeat with the top layer and garnish with chocolate shavings.
Notes
To ensure the most stable whipped cream, chill your mixing bowl and whisk attachment in the freezer for at least 15 minutes before starting. Additionally, allow the cherry syrup to cool completely before applying it to the cake layers to prevent the whipped cream from melting upon contact.
- Prep Time: 20 mins
- Cook Time: 18 mins
- Category: Dessert
- Method: Baking
- Cuisine: German-inspired
The Technical Foundation

Success in pastry arts begins with ingredient precision; every component in this pastry cake serves a specific structural purpose. We do not simply mix; we calibrate for the perfect final bite.
- All-Purpose Flour and Cornstarch: This blend creates a DIY cake flour. The cornstarch inhibits gluten development, resulting in a finer, softer texture.
- Unsweetened Cocoa Powder: Choose a high-quality cocoa with at least 20% fat content. This provides the deep chocolate flavor and contributes to the richness of the crumb.
- Buttermilk: The acidity is the catalyst for the baking soda. It also provides the moisture necessary for the ‘melt’ factor.
- Cream of Tartar: This is non-negotiable for the whipped cream. It acts as a stabilizer, preventing the cream from weeping and losing its sharp edges over time.
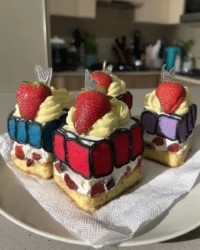
- Maraschino Cherries: These provide both the visual contrast and the essential syrup for saturation. The syrup is boiled to a specific viscosity to ensure it penetrates the cake without collapsing the cells.
The Method
Step 1: Prep and Dry Ingredient Calibration
Preheat your oven to 350°F (175°C). Prepare a 9.5 x 5-inch baking pan by greasing it and lining it with parchment paper. Sift together the all-purpose flour, cocoa powder, cornstarch, baking soda, and salt. Sifting is vital here; it aerates the dry mix and removes any cocoa clumps that could create uneven pockets in the final pastry cake.
Step 2: Emulsifying the Wet Base
In the bowl of a stand mixer, combine the oil, sugar, and chocolate extract. Whisk on medium speed until the sugar begins to dissolve into the oil. While oil doesn’t provide the aeration of creamed butter, it guarantees a moister mouthfeel that remains soft even when the cake is refrigerated.
Step 3: Incorporating the Batter
Alternately add the sifted dry ingredients and the buttermilk to the wet base. Start and end with the dry ingredients. Mix only until the last streaks of flour disappear. Over-mixing at this stage will develop gluten, turning your delicate pastry into a bread-like texture. We want a smooth, flowing batter that indicates a well-aerated structure.
Step 4: Precision Baking
Pour the batter into the prepared pan and tap it firmly on the counter twice to release large air bubbles. Bake for 15-18 minutes. The visual cue for completion is when a toothpick inserted into the center comes out with a few moist crumbs. Do not wait for it to come out dry, or the cake will be parched. Let it cool in the pan for 10 minutes before transferring to a wire rack.
Step 5: The Cherry Saturation Syrup
While the cake cools, combine the water and sugar in a small saucepan. Bring to a boil, then add the sliced cherries. Simmer on low for 4-5 minutes. This reduces the water content and concentrates the sugar, creating a syrup that will properly bond with the cake fibers rather than simply running off.
Step 6: Stabilized Whipped Cream
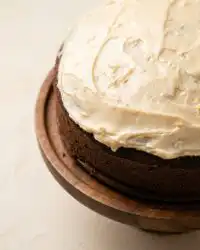
Chill your bowl and whisk attachment for 30 minutes prior to starting. Combine the heavy cream, powdered sugar, and cream of tartar. Whisk until stiff peaks form. Stiff peaks mean the cream holds its shape perfectly when the whisk is lifted; this is the structural support for your pastry layers.
Step 7: Final Assembly
Divide the cooled cake into two equal horizontal layers. Place the bottom layer on your serving plate and generously spoon the cherry syrup across the entire surface. Apply a thick layer of whipped cream, followed by a layer of sliced cherries. Top with the second cake layer, repeat the syrup saturation, and finish with a smooth layer of cream and chocolate shavings.
Precision Secrets

To achieve the cleanest possible edges, always chill the assembled pastry cake for at least two hours before slicing. This allows the fats in the whipped cream and the moisture in the syrup to set, providing the structural stability needed for a professional finish. If you find your cake is too crumbly when cutting, it may be due to a lack of moisture in the initial bake; refer to our velvet crumb collection for more insights on moisture control in eggless sponges. Always use a hot, dry knife for each cut, wiping the blade clean between every single slice to maintain the visual integrity of the layers.
Technical Tweaks
For those looking for a more traditional European profile, you can replace half of the water in the cherry syrup with Kirsch (cherry brandy). This adds a sophisticated depth of flavor without compromising the syrup’s viscosity. If you prefer a more intense chocolate experience, try incorporating dark chocolate chips into the batter, though be mindful that this will slightly alter the weight of the crumb. For a different flavor profile altogether, you might consider the techniques used in our old-fashioned chocolate cake to create a richer, denser base for this pastry.
Presentation Precision

When serving this pastry cake, temperature is your most important variable. The cream must be cold enough to hold its shape, but the cake itself is best enjoyed just slightly below room temperature to allow the cocoa fats to soften. Pair each slice with a sharp fruit coulis to cut through the richness of the cream. For those who enjoy a variety of fruit profiles, this technique also works exceptionally well when following the principles of our raspberry white chocolate cake. Use a palette knife to create professional swoops in the cream for a beautiful finish.
Master the Craft
Mastering the pastry cake is a significant milestone for any serious baker. It requires a devotion to the small details—the sifting, the siphoning of syrup, and the stabilization of cream—that transform a simple dessert into a work of art. As you become more confident with these techniques, you can apply the same structural principles to other classics, such as our fruit cake. I encourage you to share your technical triumphs with our community of devoted bakers. Follow us on Pinterest, Instagram, and Facebook to see more precision-based recipes and share your beautiful creations.


