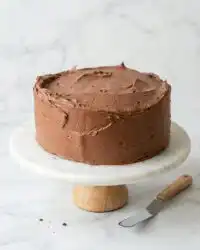
In Mediterranean kitchens, we know that true luxury resides in the quiet marriage of warmth and moisture, a philosophy that finds its peak in this deeply tender crimson crumb.

Baking this classic Red Velvet Layer Cake is a lesson in patience, texture, and the quiet beauty of a cake that melts in the mouth. We achieve this velvety crumb not by chance, but through the deliberate blending of buttermilk-like acidity, hot milk, and soft unsalted butter. The result is a crumb that feels almost weightless, holding its shape just enough to support a decadent blanket of whipped cream cheese frosting. Set the table, brew a warm drink, and prepare to share a slice that carries the gentle warmth of an afternoon sun.
Why This Red Velvet Layer Cake Melts the Way It Does
Prep: 60 min · Serves: 12 · Difficulty: Medium
- The fork should glide through like butter with every slice.
- Hot milk and butter create exceptional moisture throughout.
- The gentle cocoa flavor remains beautifully balanced and light.
- Silky cream cheese offers a tangy, rich contrast.
- Patience during chilling yields clean, gorgeous cake slices.
This is the beloved recipe from our Velvet Crumb Collection that will redefine how you view classic baking.
Get The Full Cake Recipe
Print
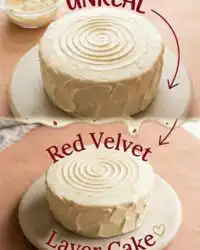
Red Velvet Layer Cake
- Total Time: 1 hour 40 mins
- Yield: 12 servings
Description
This classic Red Velvet Layer Cake features a tender, crimson-hued crumb achieved through a unique hot milk infusion. Finished with a silky cream cheese frosting, this cake offers a perfectly balanced, velvety texture that melts in the mouth with every bite.
Ingredients
- All-purpose flour
- Baking soda
- Baking powder
- Salt
- Fine cocoa powder
- Granulated sugar
- Eggs
- Vegetable oil
- Cold whole milk
- White vinegar
- Vanilla extract
- Red gel paste coloring
- Hot whole milk
- Unsalted butter
- Cream cheese
Instructions
- Prepare the pans. Coat two eight-inch round baking pans with butter and line with parchment paper, then preheat the oven to 330ºF (165ºC).
- Combine dry ingredients. Whisk together the flour, baking soda, baking powder, salt, cocoa powder, and sugar in a large bowl until uniform.
- Mix wet emulsion. Whisk the eggs, oil, cold milk, vinegar, vanilla, and red gel paste in a separate bowl until the color is deep and consistent.
- Blend the batter. Pour the wet mixture into the dry ingredients and stir gently with a spatula until just combined and smooth.
- Infuse hot liquid. Slowly temper the batter by stirring in the hot milk and melted butter until the mixture is thin, smooth, and fragrant.
- Bake the cakes. Divide the batter evenly between the prepared pans and bake for 35 to 40 minutes, or until the center bounces back when pressed.
- Cool and trim. Allow the cakes to cool completely before removing from pans and trimming the domed tops, reserving the crumbs for decoration.
- Assemble and frost. Place one layer on a plate, frost, add the second layer, and apply a crumb coat before finishing with a final layer of frosting and reserved crumbs.
Notes
- Use a kitchen scale to ensure the precise weight of ingredients for the best possible crumb structure.
- Always ensure your cream cheese is slightly cool when mixing to maintain a firm, spreadable frosting consistency.
- Baking at a slightly lower temperature prevents the edges from hardening before the middle of the cake is fully set.
- Chill your assembled cake before the final frosting step to ensure a clean, professional finish without loose crumbs.
- Prep Time: 60 mins
- Cook Time: 40 mins
- Category: Dessert
- Method: Baking
- Cuisine: Mediterranean
From the Mediterranean Pantry

To bake an elegant Red Velvet Layer Cake that yields to the fork with complete grace, we must select ingredients that work in quiet harmony. This recipe relies on the chemical dance between mild cocoa, gentle acids, and a unique hot milk infusion that softens the flour. Each component must be weighed precisely, as even a small deviation can disturb the delicate balance of moisture and crumb structure.
- All-purpose flour: We use standard flour here because we want a stable structure that can absorb the generous liquid without becoming gummy or collapsing.
- Hot whole milk: Pouring hot milk into the batter blooms the cocoa powder, releasing its subtle, earthy fragrance and melting the fats for a more uniform crumb.
- White vinegar: This mild acid reacts with the baking soda to create tiny air bubbles, which are responsible for the cake’s characteristic light and airy texture.
- Gel paste red coloring: A concentrated gel delivers that classic, deep crimson hue without watering down the batter or introducing unwanted moisture.
- Cream cheese: Tangy and substantial, this cold cheese balances the sweetness of the sugar and provides a velvety body for the frosting.
- Unsalted butter: Melted into the warm batter and whipped into the frosting, it provides richness and a luxurious mouthfeel that lingers softly on the tongue.
Let us organize these essentials to show how each element supports the final, melting texture.
| Ingredient | Why It Matters |
|---|---|
| Hot Milk & Butter | Blooms cocoa and creates a tender, melting crumb |
| White Vinegar | Reacts with baking soda for a light rise |
| Cocoa Powder | Adds deep, earthy undertones without drying |
| Cream Cheese | Provides a tangy, silky contrast to the sweetness |
| Gel Paste Color | Gives the classic crimson shade without excess liquid |
Cake, Syrup, Rest

Step 1: Prepare Your Baking Pans and Oven
Begin by coating the bottoms of your two eight-inch round baking pans with a thin, even layer of softened butter before applying parchment liners. Preheat your oven to 330ºF (165ºC), allowing the heat to become steady and soft. This gentle baking temperature prevents the cake from domeing excessively, keeping the layers flat and even. Taking this extra moment of preparation prevents sticking and guarantees a clean release.
Step 2: Combine the Dry Elements
In your largest mixing bowl, combine the all-purpose flour, baking soda, baking powder, salt, fine cocoa powder, and granulated sugar. Whisk these dry ingredients thoroughly until the mixture is uniform in color, with no white pockets of flour remaining. This step aerates the flour, which prevents clumps and lays the foundation for a tender crumb. Set this bowl aside while you prepare the wet components.
Step 3: Mix the Wet Emulsion
In a separate bowl, whisk together the eggs, vegetable oil, cold whole milk, white vinegar, vanilla extract, and red gel paste coloring. Blend these elements steadily until the color is deep, rich, and entirely uniform throughout the liquid. This acid-heavy mixture is what will react with our leaveners to give the cake its classic velvet lift. Keep whisking until the oil is fully integrated and no streaks of red color remain.
Step 4: Blend the Batter
Pour the wet ingredients into the dry mixture, stirring gently with a rubber spatula until a smooth, thick batter forms. Do not overmix here; you only want to combine the ingredients until the flour is hydrated. Overworking the gluten at this stage can make the final cake tough and dense. The batter should look glossy, thick, and beautifully maroon.
Step 5: Infuse the Hot Milk and Butter
Pour your hot whole milk and melted unsalted butter into a small saucepan over medium heat until it starts to simmer gently. Slowly pour one-third of this hot liquid into your cake batter, stirring constantly to temper the eggs and prevent scrambling. Once integrated, stir in the remaining hot liquid until the batter is smooth, thin, and fragrant. This hot liquid blooms the cocoa and softens the flour proteins, producing an incredibly delicate texture.
Step 6: Bake the Red Velvet Layer Cake to Perfection
Divide the thin batter evenly between your two prepared pans, pouring about 695 grams into each for balanced layers. Bake at 330ºF (165ºC) for 35 to 40 minutes, checking the progress by gently pressing the center of the cake. It should bounce back lightly, and a wooden toothpick inserted into the center should emerge clean or with a few moist crumbs. Let the hot pans rest on a wire rack until they are cool enough to handle.
Step 7: Cool and Trim the Layers
Once the cakes have cooled completely, run a thin spatula around the edges of the pans to release the sides, then flip them onto a flat surface. For a professional finish, use a long serrated knife to trim the domed tops of the cakes so they are flat and even. Keep these dry cake crumbs in a small bowl, as we will dry them in the oven and crush them to create a classic decorative finish.
Step 8: Assemble and Frost the Cake
Place your first cake layer on a serving plate and spread a generous layer of cream cheese frosting evenly over the top. Gently place the second layer on top, then apply a thin crumb coat of frosting over the top and sides to seal in any loose crumbs. Chill the cake for twenty minutes before applying the thick final coat of rustic, swooping frosting. Decorate the edges with your reserved, toasted cake crumbs for a beautiful, nostalgic finish.
Patience-Pays-Off Tips

To master this recipe, we must treat the temperature of our ingredients with the same respect we show a delicate syrup pour. When whipping your cream cheese frosting, the butter must be softened to room temperature, but the cream cheese should remain slightly cool. If the cream cheese is too warm, the frosting will become soupy and lose its structure, making it difficult to spread. If this happens, place the frosting in the refrigerator for twenty minutes to restore its firm, spreadable body.
When baking a classic Red Velvet Layer Cake, liquid food coloring can introduce excess water to the batter, which can dilute the cocoa and alter the reaction of the baking soda. Gel paste provides a concentrated color that remains stable during baking without changing the delicate balance of dry and wet ingredients. You can read more about this chemical balance in this detailed guide on authentic red velvet crumb structures.
When baking, remember that slow heat is your ally. Baking at 330ºF (165ºC) rather than the standard 350ºF (177ºC) prevents the edges from drying out before the center has risen. This gentle environment keeps the crumb uniform and moist from the outer edge to the very heart of the cake. Patience is the secret to avoiding hard, crusty edges.
If your cake layers turn out dense and heavy, it is likely because the hot milk mixture was added too quickly or the batter was overmixed after its addition. The hot liquid must be eased into the batter in a slow, steady stream while whisking. This gradual tempering keeps the eggs stable and prevents the gluten from seizing up.
For a truly spectacular finish, take the time to toast your trimmed cake crumbs. Baking the crumbs at 300ºF (149ºC) for fifteen minutes dries them out, turning them into a crispy, beautiful red sand. This contrast of crunchy crumbs and silky frosting is a wonderful treat for the senses.
Make sure you allow the baked layers to rest in the refrigerator for at least two hours before assembling. Warm cake will melt the butter in your cream cheese frosting, causing the layers to slide and tilt. A chilled cake is much easier to trim, frost, and slice cleanly. For more elegant baking ideas, browse our curated guides in the Decadent Occasions category.
Frequently Asked Questions
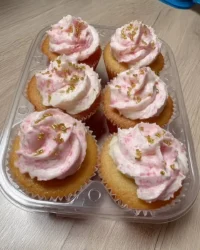
Can I use this recipe for red velvet cupcakes?
Yes, this versatile batter makes wonderful cupcakes. Line a muffin tin with paper liners and fill each cup about two-thirds full of batter. Bake them at 350ºF (177ºC) for 18 to 20 minutes until the tops spring back when lightly touched. Be sure to let them cool completely before applying the cream cheese frosting.
Can I bake it with 9-inch cake pans instead of 8-inch pans?
You can use nine-inch pans, but the cake layers will be slightly thinner. Because the batter will be spread thinner, you must reduce the baking time to 28 to 32 minutes to prevent the cakes from drying out. Keep a close eye on the oven and test the centers early with a toothpick.
How much of this recipe should I make for a 6-inch cake?
To make a smaller six-inch three-layer cake, you can use this exact recipe without altering the ingredient quantities. The batter will fill three six-inch pans beautifully, creating taller, dramatic layers. Bake them at 330ºF (165ºC) for approximately 30 to 35 minutes, checking often for doneness.
Why don’t you use cake flour for this Red Velvet Layer Cake?
We prefer all-purpose flour here because it provides a stronger structural foundation to support the rich cocoa, hot milk, and oil. Cake flour contains less protein, which can lead to a crumb that is too fragile and prone to collapsing under the weight of heavy cream cheese frosting. All-purpose flour achieves the ideal balance of tenderness and strength.
Can I make this recipe with a stand mixer?
While you can use a stand mixer with the paddle attachment on low speed, a simple hand whisk and spatula work best for the batter. Whisking by hand prevents overmixing, which is the most common cause of a tough, dry cake. A stand mixer is, however, highly recommended for whipping the cream cheese frosting to a beautifully fluffy consistency.
Do all the ingredients need to be at room temperature?
Yes, having your eggs, milk, and butter at room temperature is crucial for proper emulsification. When ingredients are at different temperatures, the batter can break or curdle, resulting in an uneven bake and a dense texture. The only exception is the cream cheese, which should remain slightly cool to keep the frosting stable.
How should I store this assembled cake to keep it fresh?
Store the cake in the refrigerator, wrapped gently in plastic wrap or placed inside a cake keeper, for four to five days. Because of the cream cheese frosting, it must remain chilled to stay safe and fresh. For the best flavor and texture, let your slice sit at room temperature for fifteen minutes before serving so the butter can soften.
Can I freeze the cake layers before frosting them?
You can freeze the baked, cooled, and trimmed cake layers for up to three months. Wrap each individual layer tightly in two layers of plastic wrap and a layer of aluminum foil to protect them from freezer burn. Thaw the layers overnight in the refrigerator before assembling and frosting.
Flavor Swaps
While the classic combination is timeless, you can adapt this recipe to suit different tables across the Mediterranean. One elegant variation is to infuse your cream cheese frosting with a few drops of orange blossom water. This gentle floral note cuts through the richness of the cheese and pairs beautifully with the mild cocoa undertone of the cake. To discover more floral baking inspirations, take a look at our Succulent Fruit Fusion recipes.
Another wonderful adaptation is to brush the baked cake layers with a light, warm syrup before frosting them. A simple syrup infused with a strip of orange peel and a cinnamon stick adds a layer of moisture that keeps the cake soft for days. This technique mirrors the traditional soaking methods of our syrup cakes, ensuring every bite is meltingly tender.
If you prefer a nuttier texture, you can fold finely ground toasted pistachios into the cake crumbs used for decoration. Pressing these green, earthy nuts along the bottom edge of the frosted cake creates a stunning visual contrast against the deep red crumbs and white frosting. The subtle, savory note of the pistachio balances the sweet frosting beautifully.
Coffee & Cake Pairings
To serve this magnificent Red Velvet Layer Cake, place it on a wide ceramic platter that highlights its rustic, crimson-flecked beauty. Presenting it on a simple, dark dish allows the snowy white frosting and deep red crumbs to stand out as a feast for the eyes. This is a cake made for long, slow afternoons when time stretches out and conversation flows easily.
The rich, tangy sweetness of the cream cheese frosting pairs wonderfully with a small, strong cup of Turkish coffee. The deep bitterness of the coffee cuts through the richness of the cake, while the cake’s subtle cocoa notes bring out the roasted warmth of the beans. If you prefer tea, a strong black tea served hot and without milk provides an equally beautiful balance.
For a truly memorable experience, serve each slice with a small bowl of fresh raspberries or blackberries on the side. The bright, sharp acidity of the fresh fruit cleanses the palate between bites of the sweet, melting cake. To discover more delightful pairings and serving inspiration, check out our guides in the Petite Indulgences section.

Let It Rest, Then Slice
Baking this heirloom Red Velvet Layer Cake is an act of love, requiring a steady hand and a patient heart. When you pull those warm, fragrant pans from the oven, you are participating in a timeless tradition of sweet hospitality. Let the layers cool, let the frosting whip until it is as light as a cloud, and let the finished cake rest in the cold before you take your first slice. The fork should glide through like butter, bringing a moment of pure, quiet joy to your table.
We invite you to share this slow-baked masterpiece with those who appreciate the quiet art of a fine dessert. Let us know how your bake turned out, and tell us about the quiet moments you shared around the table. For more recipes that celebrate the beauty of slow, patient baking, browse our Cocoa Dream Lab where chocolate is treated with the respect it deserves. We must remember that patience is the secret to a cake that is truly memorable.
Do not forget to share your crimson creations with our global baking community. You can connect with us and share your photos on Pinterest, join our discussions on Facebook, or follow our daily baking rhythms on Telegram. Let us keep the spirit of slow, joyful baking alive, one beautiful slice at a time.


