My training focused on the science of crumb structure. This cake balances lipids perfectly to create a stable yet tender sponge that melts on the tongue with every bite.
 Cake 10")
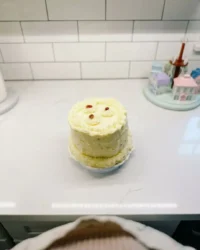
This recipe delivers exceptionally soft vanilla and chocolate biscuit layers. Finished with a silk-smooth Oreo buttercream, it is the ultimate cookies and cream experience for any baker.
Structure Meets Texture
When we discuss The Softest Oreo (Cookies & Cream) Cake, we are looking at a triumph of moisture management. The marriage of fats—butter for structural flavor and oil for a persistent soft mouthfeel—produces a crumb that remains tender even after refrigeration. This isn’t a dry, crumbly sponge; it is a meticulously balanced cake designed to cradle the crunch of chocolate biscuits within a velvet-like matrix.
The technical beauty lies in the contrast. You have the yielding softness of the sponge against the structural snap of crushed biscuits. By using the creaming method followed by a gentle folding technique, we protect the air cells we’ve worked so hard to create. The result is a cake that stands proud on a pedestal but feels like a cloud when sampled. Bakers seeking a victory in texture will find this recipe provides the perfect canvas for professional-grade results.
Print Cake 11")
The Softest Oreo (Cookies & Cream) Cake
- Total Time: 1 hour 15 mins (active)
- Yield: 14 servings (Two 8-inch layers)
Description
This recipe is engineered for superior texture, combining butter and oil to create an exceptionally soft, melt-in-your-mouth vanilla and chocolate sponge. It features crushed Oreo pieces integrated into the batter and finished with a silk-smooth, intensely flavored Oreo buttercream frosting.
Ingredients
- 300g All-Purpose Flour
- 25g Cornstarch
- 1 tsp Baking Soda
- 1 tsp Baking Powder
- 1/2 tsp Salt
- 113g Unsalted Butter, room temperature (for batter)
- 105g Vegetable Oil
- 350g Granulated Sugar (estimated)
- 3 Large Eggs, room temperature
- 2 tsp Vanilla Extract
- 1 tsp White Vinegar
- 337g Buttermilk, room temperature
- 14 Oreos, roughly chopped (for batter)
- 14 Oreos, finely processed (for frosting)
- 250g Unsalted Butter, room temperature (for frosting)
- 500g Icing Sugar (estimated)
- 3–4 tbsp Milk (estimated)
- 3 Oreos, crushed (for garnish)
Instructions
- Preheat your oven to 160°C (320°F) with the fan function active. If your oven lacks a fan, increase the temperature to 175°C (347°F). Grease and line two 8-inch cake tins with high-quality parchment paper or a professional cake release. Roughly chop 14 Oreos into medium chunks.
- In a large bowl, sift together the 300g of flour, 25g of cornstarch, baking soda, baking powder, and salt. Use a whisk to distribute the leavening agents.
- In the bowl of your stand mixer, combine the room temperature butter, vegetable oil, and granulated sugar. Using the paddle attachment, cream these together on medium-high for exactly 2 minutes until light, pale, and creamy.
- Add the three large eggs one at a time, mixing for 10-15 seconds after each addition to allow the fats and liquids to emulsify properly. Continue mixing until the mixture is uniform and smooth.
- Incorporate the vanilla extract, white vinegar, and the first 112g of your buttermilk. Mix on low speed just until combined. Set aside the electric mixer.
- Add half of your dry ingredients to the wet mixture. Use a silicone spatula to gently fold the flour in using a figure-eight motion. Once just combined, pour in the remaining 225g of buttermilk and fold again. Finish by adding the rest of the dry ingredients. Stop as soon as the last streak of flour disappears.
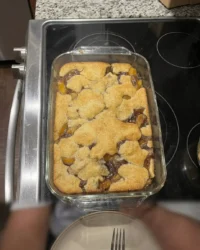
- Add the chopped Oreos and give the batter two or three final folds to distribute them. Divide the batter evenly between the two tins. Bake for approximately 33 minutes. The cake is done when a toothpick inserted into the center comes out clean or with a few moist crumbs.
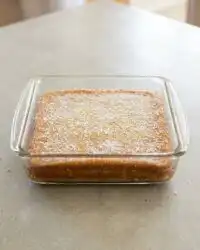
- Allow the layers to rest in their tins for 15-20 minutes. Turn them out onto a wire rack to cool completely.
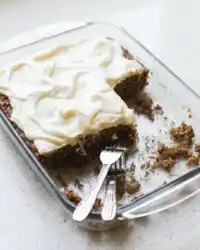
- Creating the Silk-Smooth Frosting: Pulse 14 Oreos in a food processor until they are fine crumbs. In your stand mixer, beat the butter, icing sugar, vanilla, and milk on low for a minute, then increase to medium-high and whip for 10 full minutes. Fold in the Oreo crumbs at the very end.
- Final Assembly: Place the first layer on a stand. Spread a generous layer of Oreo buttercream. For extra texture, crush three Oreos and sprinkle them over the frosting. Top with the second cake layer. Smooth the remaining buttercream over the top and sides. Use a cake scraper for sharp edges and pipe swirls on top if desired.
Notes
To ensure the best structural outcome, it is advisable to weigh all ingredients using a digital scale, especially the flour and liquids, as volume measurements can introduce significant errors. This dual-fat sponge benefits significantly from overnight cooling before frosting, allowing the crumb structure to fully stabilize and lock in moisture. For high-altitude baking, consider reducing the baking soda slightly to prevent a rapid, unstable rise.
- Prep Time: 30 mins
- Cook Time: 35 mins
- Category: Dessert
- Method: Bake
- Cuisine: American
The Technical Foundation
 Cake 12")
To achieve the specific texture of The Softest Oreo (Cookies & Cream) Cake, ingredient precision is paramount. We use a high-fat liquid ratio that requires exact measurements to keep the emulsion stable.
- All-Purpose Flour and Cornstarch: This combination mimics cake flour by lowering the overall protein content. This prevents excessive gluten formation, which would otherwise toughen the sponge. If you have it, 325g of professional cake flour is a superior substitute.
- Unsalted Butter (113g) and Vegetable Oil (105g): Butter provides the essential structure and traditional flavor, while the oil keeps the cake moist. This dual-fat approach is the secret to a melt-in-your-mouth texture.
- Buttermilk (337g): The acidity in buttermilk works with the baking soda to create a lift and a tender crumb. Always use room temperature buttermilk to prevent the butter from seizing during the mixing process.
- Oreos: You will need 14 roughly chopped for the batter and another 14 finely blended for the frosting. The size of the pieces in the batter matters; too large and they sink, too small and they disappear into the crumb.
- White Vinegar: A small amount of acid further activates the leavening agents, making certain the rise is consistent and the texture remains airy.
The Technical Process
Step 1: Prep and Oven Calibration
Preheat your oven to 160°C (320°F) with the fan function active. If your oven lacks a fan, increase the temperature to 175°C (347°F). Grease and line two 8-inch cake tins with high-quality parchment paper or a professional cake release. Roughly chop 14 Oreos into medium chunks—we want distinct pieces that provide structural contrast without overwhelming the delicate batter.
Step 2: Sifting the Dry Base
In a large bowl, sift together the 300g of flour, 25g of cornstarch, baking soda, baking powder, and salt. Use a whisk to distribute the leavening agents. Sifting is non-negotiable here; it aerates the flour and removes clumps, which is the first step toward a refined crumb structure.
Step 3: Aerating the Fats
In the bowl of your stand mixer, combine the room temperature butter, vegetable oil, and granulated sugar. Using the paddle attachment, cream these together on medium-high for exactly 2 minutes. We are looking for a light, pale, and creamy texture. This step builds the air pockets that will expand in the oven.
Step 4: Emulsifying the Eggs
Add the three large eggs one at a time. It is vital to mix for 10-15 seconds after each addition. This allows the fats and liquids to emulsify properly. If the batter looks curdled, your eggs were likely too cold; continue mixing until the mixture is uniform and smooth.
Step 5: The Initial Liquid Phase
Incorporate the vanilla extract, white vinegar, and the first 112g of your buttermilk. Mix on low speed just until combined. At this point, set aside the electric mixer. The remaining steps must be done by hand to maintain the structural integrity of the air cells and prevent overworking the gluten.
Step 6: The Folding Technique
Add half of your dry ingredients to the wet mixture. Use a silicone spatula to gently fold the flour in using a figure-eight motion. Once just combined, pour in the remaining 225g of buttermilk and fold again. Finish by adding the rest of the dry ingredients. Stop as soon as the last streak of flour disappears. Overmixing at this stage will result in a tough, rubbery cake.
Step 7: Final Incorporation and Baking
Add the chopped Oreos and give the batter two or three final folds to distribute them. Divide the batter evenly between the two tins. Bake for approximately 33 minutes. The cake is done when a toothpick inserted into the center comes out clean or with a few moist crumbs. Do not overbake, as this will dry out the delicate crumb.
Step 8: Cooling and Stabilization
Allow the layers to rest in their tins for 15-20 minutes. This allows the structure to set before you move them. Turn them out onto a wire rack to cool completely. A warm cake will melt the buttercream, ruining the textural balance we have worked to achieve.
Step 9: Creating the Silk-Smooth Frosting
Pulse 14 Oreos in a food processor until they are fine crumbs. In your stand mixer, beat the butter, icing sugar, vanilla, and milk on low for a minute, then increase to medium-high and whip for 10 full minutes. This extended whipping time creates a marshmallow-like texture. Fold in the Oreo crumbs at the very end.
Step 10: Final Assembly
Place the first layer on a stand. Spread a generous layer of Oreo buttercream. For extra texture, crush three Oreos in your palms and sprinkle them over the frosting. Top with the second cake layer. Smooth the remaining buttercream over the top and sides. For a professional finish, use a cake scraper to achieve sharp edges and pipe swirls on top with a 1M tip.
Precision Secrets
 Cake 13")
To achieve professional results with The Softest Oreo (Cookies & Cream) Cake, temperature control is your most powerful tool. Always ensure your eggs and buttermilk are at room temperature. Cold ingredients will cause the butter to clump, resulting in an uneven bake. If you find yourself in a rush, place the eggs in warm water for five minutes to take the chill off.
When folding the flour, look for the ‘windowpane’ equivalent in cake batter—once the flour is just incorporated, stop immediately. Over-mixing is the primary cause of a dense sponge. For those who want to master the art of layering, checking out my guide on oreo-cake will help you understand how to level sponges for a perfectly flat finish. Additionally, for the most accurate bake, use a digital scale; the difference between a successful cake and a dry one can be as little as 20 grams of flour. You can find more details on this precise method at this external guide.
Technical Variations
While the classic version is a masterpiece of balance, you can apply technical tweaks to suit different tastes. If you prefer a more intense chocolate profile, you can replace 30g of the flour with high-quality Dutch-processed cocoa powder. This will create a deeper color and a more robust flavor that complements the biscuits perfectly.
For an advanced textural variation, try adding a layer of chocolate ganache between the cake and the buttercream. This creates a hidden ‘melt’ factor that surprises the palate. If you are looking for a simpler construction, you might consider adapting these flavors into a cookies-and-cream-cake format using a standard sponge base. Another popular option is to substitute the Oreo crumbs in the frosting with finely chopped toasted hazelnuts for a ‘Cookies and Praline’ experience that offers a different structural crunch.
Presentation Precision
 Cake 14")
Serving The Softest Oreo (Cookies & Cream) Cake requires a clean hand to showcase the beautiful internal layers. To achieve a professional slice, use a long serrated knife dipped in hot water and wiped dry between every single cut. This prevents the buttercream from dragging and ensures the Oreo chunks inside the cake are sliced cleanly rather than being pushed through the sponge.
This cake pairs exquisitely with a glass of cold whole milk or a strong espresso to cut through the richness of the buttercream. If you are serving this at a celebration, consider placing it alongside a chocolate-layer-cake to offer guests a variety of textures. For the best mouthfeel, remove the cake from the refrigerator 30 minutes before serving. This allows the butter in the cake and frosting to soften slightly, maximizing the ‘melt’ factor.
Master the Craft
Mastering The Softest Oreo (Cookies & Cream) Cake is a significant victory for any home baker. By respecting the science of the creaming method and the gentle incorporation of dry ingredients, you have created a dessert that is as structurally sound as it is delicious. This cake proves that technical precision leads directly to a superior sensory experience. If you enjoyed this project, you might also want to try our oreo-icebox-cake for a different take on these classic flavors. We invite you to share your results with our community and continue your journey into the art of pastry. Follow us for more technical tutorials on Instagram, Pinterest, and Facebook.


