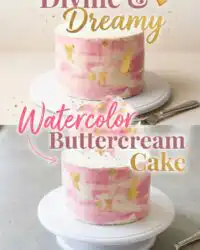
Description
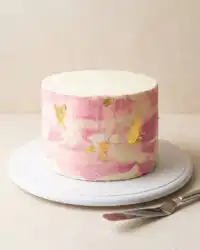
Create a stunning, professional-looking dessert with this easy watercolor buttercream technique. This method uses simple blending to turn basic frosting into an artistic masterpiece that is perfect for any occasion.
Ingredients
- Crumb-coated cake layers
- Stiff buttercream frosting
- Concentrated gel food coloring
Instructions
- Organize decorating station. Place your crumb-coated cake on a rotating stand and prepare your tinted frosting bowls and tools within easy reach.
- Tint frosting colors. Divide frosting into small bowls and stir in concentrated gel colors until combined, aiming for harmonious shades.
- Apply base layer. Cover the sides of the cake with your primary frosting color to create a stable, wet canvas for the artistic layer.
- Paint color patches. Use an offset spatula to randomly dab small amounts of tinted frosting around the sides of the cake for visual depth.
- Smooth the surface. Hold an icing smoother at a forty-five-degree angle and rotate the stand slowly to blend the colors into a soft, watercolor finish.
- Touch up details. Inspect the cake for gaps or thin spots, adding fresh dabs of frosting if needed and giving the stand one final, gentle rotation.
- Clean top edges. Use your spatula to pull excess frosting from the top edge toward the center, creating a crisp and clean finish.
- Final chill stage. Refrigerate the cake for fifteen minutes to firm the buttercream and lock the artistic design in place before serving.
Notes
- Keep the cake chilled between steps if your kitchen environment is warm to prevent the frosting from sliding.
- Always wipe your icing smoother clean after every rotation to ensure the colors remain distinct and vibrant.
- Ensure you are using gel or paste food colors only, as liquid dyes can ruin the consistency of your buttercream.
- Maintain a steady, stationary hand position while rotating the stand to achieve a smooth and professional finish.
- Prep Time: 20 mins
- Cook Time: 0 mins
- Category: Dessert
- Method: Decorating
- Cuisine: American