A single forkful yields a crumb so tender and deeply saturated with rich cocoa that it melts slowly on the tongue, leaving a quiet warmth.

This miniature Chocolate Lunch Box Cake represents the quiet beauty of small-scale baking, offering a deeply satisfying crumb that feels both intimate and indulgent. Originating as a popular trend, these petite bento cakes are designed to fit snugly inside a small container, making them the ideal personal gift or solitary treat. By using a touch of hot water to bloom the cocoa and buttermilk to tenderize the crumb, we achieve a texture that mimics the luxurious soak of a traditional syrup cake. Every layer is carefully stacked and blanketed in a smooth vanilla buttercream that balances the deep, dark cocoa notes beautifully. The process of assembling this dessert requires a gentle hand and a patient mind, making sure that each step is executed with care. As you frost the sides and smooth the edges, you will find a sense of calm in the repetitive motion. This cake is meant to be savored slowly, letting the rich chocolate notes unfold on your palate with each bite.
What Makes the Chocolate Lunch Box Cake Texture Sing
Prep: 30 min · Serves: 2 · Difficulty: Medium
- Yields an incredibly moist, melting crumb structure.
- Ideal portion size for intimate celebrations.
- Rich cocoa flavor blooms with hot water.
- Silky buttercream balances the dark chocolate notes.
- Easy to transport in small personal boxes.
When you bake this delicate treat, you are creating a moment of pure comfort that lingers long after the last bite. If you are looking for more sweet inspiration, our recipe index offers a variety of traditional and modern bakes to enjoy. The fork should glide through like butter. The beauty of this recipe lies in its simplicity, allowing the natural richness of the chocolate to stand at the forefront. Every element, from the acidity of the buttermilk to the warmth of the water, works in tandem to create a crumb that is soft yet stable enough to hold its shape. You will find that preparing this cake brings a sense of mindfulness to your kitchen, as each small gesture contributes to the final, elegant result.
This petite creation will completely redefine how you view homemade chocolate cakes.
Get The Full Cake Recipe
Print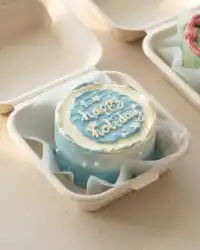
Chocolate Lunch Box Cake
- Total Time: 1 hr 55 mins
- Yield: 2 cakes
- Diet: Vegetarian
Description
A beautifully tender and moist miniature chocolate cake, delicately portioned for two and baked from scratch. This bento-style cake features a rich cocoa crumb and a silky vanilla buttercream frosting, making it an elegant personal gift.
Ingredients
- 1 cup all-purpose flour (130g)
- 1 cup granulated sugar (200g)
- 1/3 cup dark cocoa powder (30g)
- 1 tsp baking powder (4g)
- 3/4 tsp baking soda (5g)
- 1/2 tsp fine salt (3g)
- 1/2 cup hot water (120g)
- 1/2 cup buttermilk, room temperature (120g)
- 1/4 cup vegetable oil (55g)
- 1 large egg, room temperature (56g)
- 1 tsp vanilla extract (4g)
- 1 cup unsalted butter, room temperature (226g)
- 3 cups powdered sugar (375g)
- 1/2 cup heavy whipping cream, room temperature (120g)
Instructions
- Prep the oven and pans: Preheat oven to 350°F (175°C). Grease and line two 6-inch cake pans with parchment paper.
- Combine dry ingredients: Whisk together flour, sugar, cocoa powder, baking powder, baking soda, and salt in a large bowl.
- Mix wet ingredients: Whisk hot water, buttermilk, oil, egg, and vanilla extract in a separate bowl.
- Make the batter: Gently stir the wet ingredients into the dry ingredients only until incorporated. Do not overmix.
- Bake the layers: Divide batter evenly between pans. Bake for 25-28 minutes until a toothpick comes out clean. Cool completely.
- Make the buttercream: Beat butter until smooth. Add vanilla and salt, then slowly mix in powdered sugar and heavy cream until glossy.
- Assemble the cake: Slice cooled layers horizontally. Stack with buttercream on parchment paper, apply a crumb coat, and chill.
- Decorate: Frost with a final thick layer of buttercream, smooth the edges, and pipe your custom message on top.
Notes
- Use room temperature ingredients: Make sure eggs, buttermilk, and butter are at room temperature for a smooth emulsion.
- Do not overmix: Whisk the batter gently to preserve the melting, tender texture of the crumb.
- Chill before frosting: Freeze the layers for 15 minutes to make them firm and prevent crumbs from mixing into the buttercream.
- Sketch your message: Use a toothpick to lightly map out your letters before piping with frosting.
- Prep Time: 30 mins
- Cook Time: 25 mins
- Category: Cakes
- Method: Baking
- Cuisine: American
Ingredients for the Cake & the Soak
Creating this delicate crumb requires a careful selection of simple, high-quality pantry staples that work in harmony. Each element is chosen to build structure while preserving that essential moisture we crave in a fine dessert. Let us look at what makes this recipe truly special and how each component plays a vital role in the final texture.
- Dutch-Processed Cocoa Powder: This cocoa is treated to reduce its natural acidity, yielding a dark color and a smooth, mellow chocolate flavor that forms the backbone of the cake. It dissolves beautifully in hot liquid, keeping the batter completely smooth.
- Buttermilk: The mild acid in buttermilk breaks down gluten strands in the flour, producing an incredibly tender and soft crumb that melts in your mouth. It also provides a subtle tang that balances the sweetness of the frosting.
- Hot Water: Pouring hot water into the batter blooms the cocoa powder, releasing its deepest aromatic oils and intensifying the chocolate flavor. The heat also helps dissolve the sugar, creating a smoother batter.
- Vegetable Oil: Unlike butter, which solidifies when chilled, oil remains liquid at room temperature and keeps the cake layers moist for days. This keeps the cake layers soft even after refrigeration.
- Granulated Sugar: Sugar provides sweetness while locking in moisture to prevent the cake from drying out during the baking process. It also contributes to the tender structure of the crumb by interfering with gluten development.
- Room Temperature Egg: A warm egg emulsifies easily into the wet ingredients, creating a stable, uniform batter that rises evenly in the oven. It binds the ingredients together, providing just enough structure to support the delicate layers.
- Vanilla Extract: A splash of high-quality vanilla extract acts to boost flavor, rounding out the bitterness of the cocoa and adding a warm aroma. It bridges the gap between the rich cake and the sweet buttercream.
- Baking Powder and Baking Soda: These leavening agents work together to give the cake its gentle rise, keeping the crumb light and airy rather than dense. They react with the acidic buttermilk to create tiny air pockets.
| Ingredient | Why It Matters |
|---|---|
| Dutch Cocoa | Delivers a deep flavor and dark color |
| Buttermilk | Tenderizes the gluten for a soft crumb |
| Hot Water | Blooms the cocoa to release rich aromas |
| Vegetable Oil | Keeps the layers moist and soft |
| Room Temp Egg | Emulsifies the batter for an even rise |
Cake, Syrup, Rest
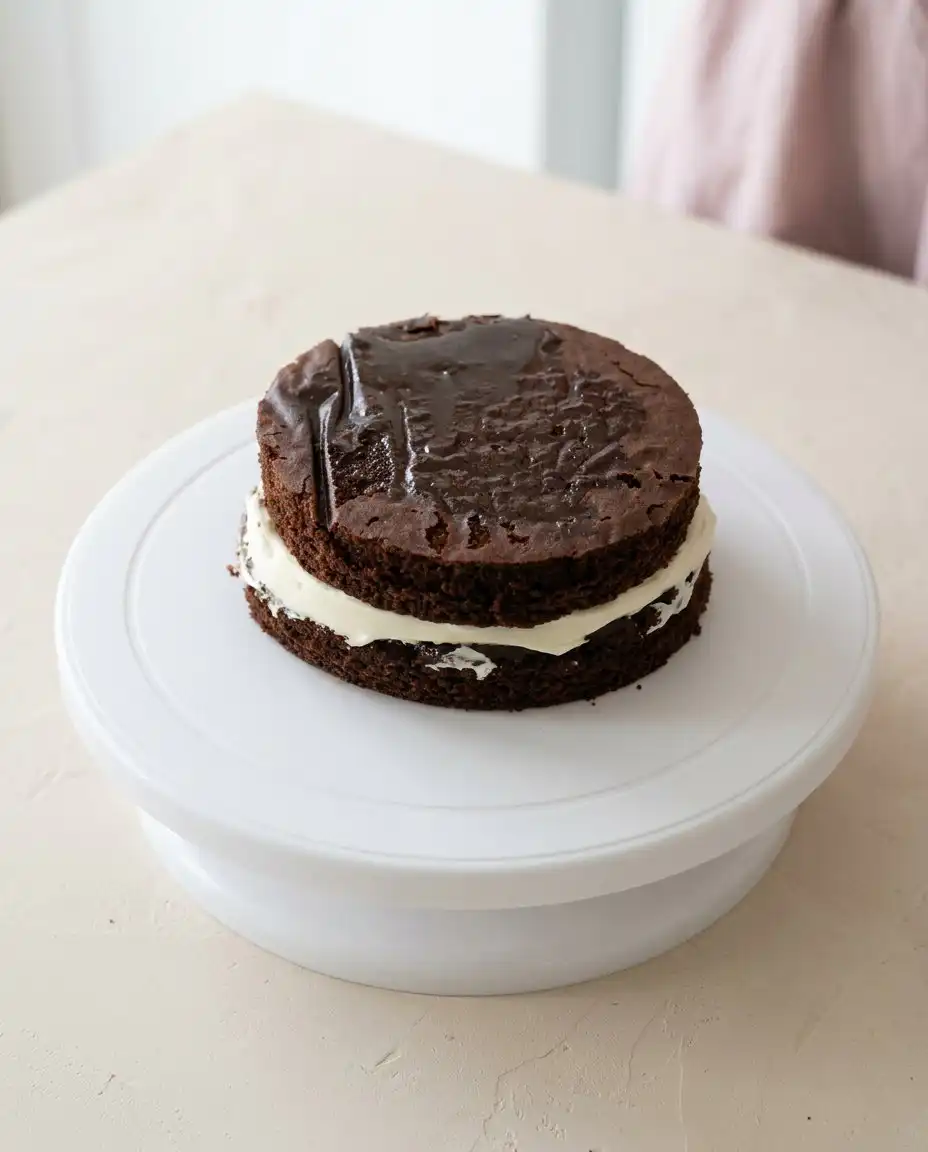
Step 1: Prepare Your Baking Pans
Set the stage. Preheat your oven to 350°F (175°C) to guarantee a steady, even bake from the moment the pans slide onto the rack. Lightly grease two six-inch round cake pans and line the bottoms with parchment paper to prevent sticking. This preparation helps the delicate layers release cleanly without tearing, preserving their smooth edges for frosting. Taking the time to line your pans properly is an easy step that guarantees a flawless finish.
Step 2: Combine the Dry Ingredients
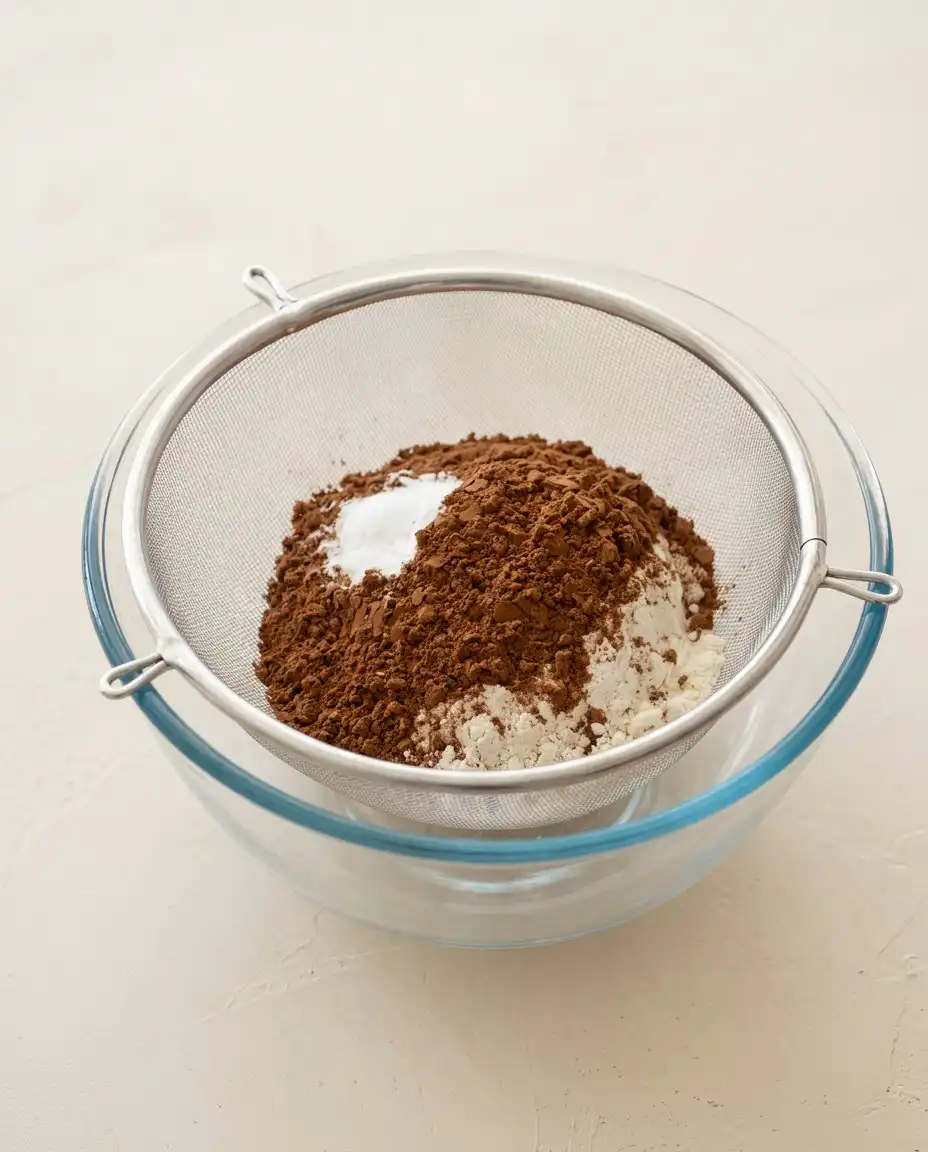
Whisk the foundation. Sift your flour, sugar, dark cocoa powder, baking powder, baking soda, and fine salt into a spacious mixing bowl. Whisking these dry elements together aerates the mixture and prevents any pockets of leavening agents from forming. You will notice the rich, earthy scent of the cocoa beginning to rise as you blend them. This uniform mixture guarantees that your cake rises evenly without any unsightly domes or dry pockets.
Step 3: Whisk the Wet Ingredients
Blend the moisture. In a separate bowl, whisk together the hot water, room temperature buttermilk, vegetable oil, egg, and vanilla extract until fully unified. The warm water helps dissolve the sugar later, while the buttermilk adds a lovely tang and tenderizes the gluten. This liquid mixture should look smooth and slightly frothy, indicating that the egg has fully emulsified with the oil. Making sure these ingredients are at room temperature prevents the batter from curdling.
Step 4: Mix the Batter Gently
Unite the bowls. Slowly pour the wet ingredients into the dry mixture, whisking gently only until the batter comes together into a cohesive stream. Overmixing at this stage develops too much gluten, which would ruin the melting tenderness of our crumb and make the cake tough. The resulting batter will be relatively thin and glossy, carrying a deep chocolate aroma that promises a rich dessert. Do not worry if it looks thinner than standard cake batter; this is key to its moisture.
Step 5: Bake the Chocolate Lunch Box Cake Layers
Watch the rise. Divide the glossy batter evenly between your prepared six-inch pans, using a kitchen scale if you prefer exact precision. Bake for twenty-five to twenty-eight minutes, or until a wooden toothpick inserted into the center emerges with a few moist crumbs attached. Your kitchen will fill with the comforting, warm scent of baking chocolate as the cakes rise gently. Let them bake undisturbed to prevent the delicate centers from collapsing.
Step 6: Cool and Torte the Cake
Let it rest. Remove the pans from the oven and let them cool on a wire rack for ten minutes before turning the layers out gently. Once the cakes are completely cool, use a sharp serrated knife to slice each layer horizontally to create four thin, delicate rounds. Slicing the layers when they are slightly chilled can help reduce crumbling and keep the cuts clean. This step allows more surface area to hold our silky frosting, balancing every bite.
Step 7: Whip the Vanilla Buttercream
Create the cloud. Beat the unsalted butter in a stand mixer for thirty seconds until smooth, creamy, and pale in color. Gradually add the vanilla, salt, and powdered sugar, pouring in the heavy cream halfway through to keep the frosting supple. Beat on low speed until you achieve a glossy, spreadable consistency that holds its shape beautifully without being stiff. This buttercream keeps the crumb moist and serves as the canvas for your decorative message.
Step 8: Assemble and Frost
Build the layers. Place a square of parchment paper down and anchor your first cake layer with a small dab of buttercream to keep it steady. Spread an even layer of frosting over the top, stack the next cake layer, and coat the entire cake in a thin crumb coat. Chill the cake for ten minutes to set the frosting before applying the final, smooth decorative layer of buttercream. Use a small offset spatula to smooth the top and sides for a clean, modern look.
Mediterranean Baker’s Notes
Always bring your dairy and eggs to room temperature before beginning your bake. Cold ingredients do not emulsify properly, which can lead to an uneven rise or a dense, heavy crumb. When butter, eggs, and buttermilk are at the same temperature, they trap air more efficiently, resulting in a lighter and more tender cake. Plan ahead by setting them on your counter at least an hour before you begin mixing.
If your cake layers sink in the middle during baking, here is why and how to fix it. This common issue usually happens when the oven door is opened too early, releasing the trapped hot air before the cake’s structure has fully set. It can also be caused by expired baking soda or baking powder, which lose their leavening power over time. To prevent this, always double-check the expiration dates on your leaveners and resist the temptation to peek into the oven until the final five minutes of baking.
For a deeper, more complex flavor profile, consider swapping the hot water for hot brewed coffee. The heat still blooms the cocoa beautifully, but the coffee notes intensify the chocolate flavor without making the cake taste like espresso. It adds a sophisticated layer of taste that makes the cocoa feel richer and more robust. If you do not want to use coffee, a strong black tea can also add an intriguing depth to the batter.
Measuring flour with a cup can pack too much into the recipe, dry out the crumb, and ruin the delicate balance of moisture. Weighing your ingredients with a digital kitchen scale is the most reliable way to achieve consistent results every time you bake. If you appreciate classic, deeply chocolate bakes, you might also enjoy our hersheys perfectly chocolate cake for larger family gatherings. Patience is the secret to getting these measurements right.
Chilling your sliced cake layers in the freezer for fifteen minutes before assembly makes them much easier to handle. Cold cake is firmer and releases fewer crumbs, allowing you to sweep on the buttercream with absolute ease and precision. This simple step prevents the dark cake crumbs from mixing into your pristine white frosting, keeping your final presentation clean. It is a professional technique that saves time and frustration during the decorating process.
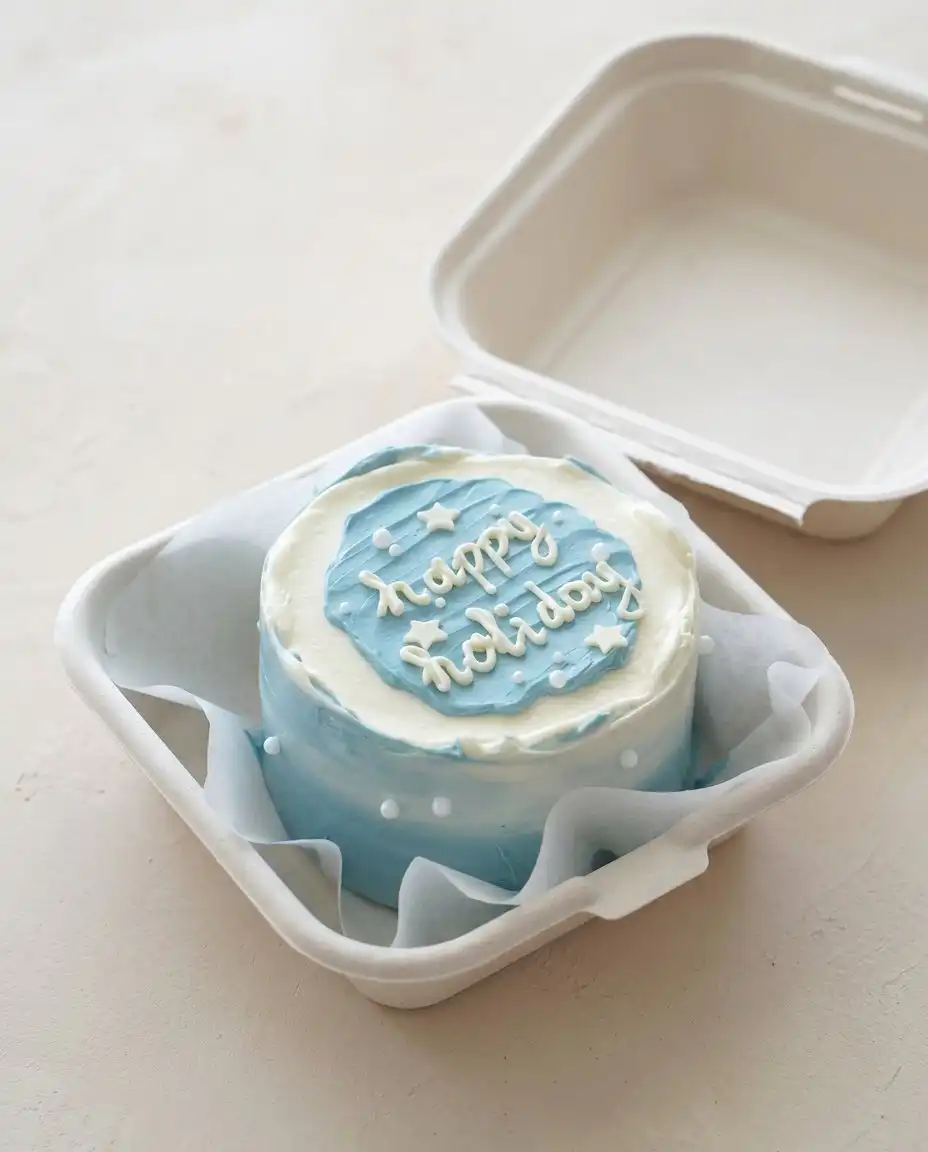
When writing your message on top of the frosted cake, use a toothpick to gently sketch the letters first. This simple guide prevents spacing mistakes and ensures your piped message sits beautifully centered on the petite surface. If you make a mistake while sketching, you can easily smooth it over with a warm offset spatula and try again. For more details on sizing and box selection, you can read about how to package bento cakes to make sure your presentation is elegant.
Frequently Asked Questions
What is a lunch box cake?
A lunch box cake, also known as a bento cake, is a miniature cake that measures about four inches in diameter. It is designed to fit inside a standard takeout container, making it a perfect personal-sized dessert.
What size is a bento lunch box cake?
These cakes are typically made using four-inch or six-inch cake pans. They are layered and frosted to sit comfortably inside an eight-inch square takeout box without touching the lid.
How many people does a lunch box cake feed?
A single six-inch lunch box cake easily serves two to three people. It is the ideal size for sharing with a loved one during a quiet anniversary or birthday celebration.
Can you make lunch box cakes from a box mix?
Yes, you can use a high-quality box mix, but making it from scratch yields a far more tender and moist crumb. Our scratch recipe uses buttermilk and hot water to ensure the chocolate flavor is incredibly rich.
What kind of box do you use for lunchbox cakes?
Typically, bakers use eco-friendly sugarcane or paper pulp clamshell boxes that measure eight inches by eight inches. Lining the box with parchment paper keeps the presentation neat and clean.
How do you keep lunchbox cakes moist?
The secret to moisture lies in using vegetable oil instead of butter in the cake batter, along with buttermilk. Storing the frosted cake in its closed box in the refrigerator also prevents the crumb from drying out.
What frosting works best for mini lunch box cakes?
A sturdy American buttercream or Swiss meringue buttercream works best because they hold their shape well at room temperature. This allows you to pipe clean, detailed messages on the small surface.
What kind of cake do you need for lunchbox cakes?
You need a cake that is sturdy enough to be sliced into thin layers but tender enough to melt in your mouth. A moist chocolate or vanilla sponge works beautifully for this style of presentation.
Flavor Swaps
Espresso Infusion. To bring a touch of the coffeehouse to your kitchen, add a teaspoon of instant espresso powder to the dry ingredients. This subtle addition deepens the chocolate notes, mimicking the rich pairing of a dark roast coffee with a sweet cake. It does not make the cake taste strongly of coffee, but rather enhances the natural bitterness of the cocoa. If you enjoy beautifully decorated chocolate bakes, try our elegant chocolate rosette cake for your next special occasion.
Salted Caramel Layering. Instead of using plain vanilla buttercream between the cake layers, spread a thin layer of rich salted caramel over the chocolate crumb before adding the frosting. The contrast between the salty caramel and the dark chocolate creates a wonderful depth of flavor that is highly satisfying. This variation adds a luxurious, gooey texture to the center of the cake, making each forkful feel like a decadent surprise. Make sure the caramel is at room temperature so it spreads easily without tearing the delicate cake.
Orange Blossom Buttercream. Infuse your buttercream with a few drops of orange blossom water instead of vanilla extract. This delicate floral note is highly traditional in Mediterranean baking and pairs beautifully with the bitter undertones of dark chocolate. It lifts the simple buttercream into something truly unique, offering a bright, fragrant contrast to the rich cake. Be careful not to use too much, as a little orange blossom water goes a long way in flavoring frosting.
Serving the Soaked Slice
Serving this petite dessert is an exercise in slow appreciation. Place the lunch box directly on a rustic wooden table, allowing your guests to open the lid and reveal the hand-piped message inside. This interactive presentation adds an element of surprise and charm to any gathering. For those who adore chocolate but want a lighter option, our double chocolate zucchini cake recipe offers a wonderful alternative for afternoon tea.
Pair a small slice of this rich cake with a warm cup of unsweetened Turkish coffee or a robust dark roast espresso. The bitterness of the coffee cuts through the sweetness of the vanilla buttercream, balancing the palate beautifully. This combination allows the deep cocoa flavors to shine without being overwhelmed by sugar. It is a traditional way to enjoy sweets, focusing on the contrast of temperatures and flavors.
To make the presentation even more special, scatter a few finely chopped pistachios or fresh raspberries around the base of the cake inside the box. This adds a beautiful touch of color and a contrasting texture that makes every bite feel like a celebration. The bright acidity of the raspberries cuts through the rich chocolate, while the pistachios offer a delightful crunch. It turns a simple box cake into an elegant, restaurant-quality dessert experience.
Let It Rest, Then Slice
Baking on a smaller scale reminds us that the best things in life often come in modest packages. This miniature chocolate creation is not merely a dessert; it is a gesture of care, designed to be shared slowly with someone special. The patience required to bake, cool, and frost these tiny layers is rewarded the moment you take your first bite. If you want to try another delicate, soft cake, our white velvet cake is an elegant choice for your next baking project.
Let the cake rest in the refrigerator for a few hours before slicing to allow the flavors to marry and the buttercream to set. This resting period is crucial, as it allows the moisture from the frosting to seep slightly into the cake, creating a cohesive texture. When you finally press your fork into the crumb, you will understand why patience is the secret to perfect baking. The fork should glide through like butter, offering a melt-in-your-mouth experience that is truly unforgettable.
We would love to see your beautiful creations and the sweet messages you pipe on top of your cakes. Share your photos with us on Pinterest, follow our updates on Facebook, or join our community on Telegram for daily baking inspiration and tips. Connecting with fellow bakers is one of the greatest joys of this craft, and we cannot wait to see how you make this recipe your own. Let us continue to bake with love, patience, and a deep appreciation for the sweet things in life.