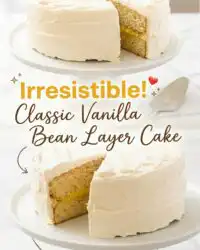
A well-constructed sponge requires a balance of protein and moisture to confirm the crumb remains tender yet capable of supporting a rich, weight-bearing pastry cream filling.

This Classic Vanilla Bean Layer Cake relies on the reverse creaming method to achieve a velvet-like texture that resists the common pitfall of being overly airy or dry. By coating the flour in fat before introducing liquids, we limit gluten development, guaranteeing every bite melts without losing its structural integrity. It is a methodical approach to a familiar dessert, bringing a standard sponge into a centerpiece defined by its aromatic depth and precise moisture levels. Structure is what makes the melt possible, and this recipe provides the blueprint for that success.
The Case for This Classic Vanilla Bean Layer Cake Method
Prep: 10 min · Serves: 16 · Difficulty: Intermediate
- Controlled gluten development through meticulous reverse creaming.
- Aromatic depth from genuine vanilla bean seeds.
- Stable Swiss meringue frosting for clean edges.
- Rich pastry cream adds a pudding-like internal layer.
- Reliable structure that allows for clean slicing.
Precision in weight and temperature produces a cake that holds its shape while remaining exceptionally soft. While some might prefer a yellow cake recipe for its density, this vanilla bean version offers a more refined, professional mouthfeel.
Get The Full Cake Recipe
Print
Classic Vanilla Bean Layer Cake
- Total Time: 3 hours
- Yield: 16 servings
- Diet: Vegetarian
Description
This professional-grade vanilla bean layer cake uses the reverse creaming method to achieve a velvety, stable crumb. It features delicate sponge layers filled with rich pastry cream and encased in a silky, foolproof Swiss meringue buttercream.
Ingredients
- Cake flour
- Granulated sugar
- Baking powder
- Salt
- Unsalted butter, room temperature
- Egg whites, room temperature
- Whole milk, room temperature
- Vanilla bean seeds
- Vanilla extract
- Almond extract
- Egg yolks
- Cornstarch
- Cream of tartar
- Vanilla bean paste
Instructions
- Prepare the pans. Preheat oven to 350°F, butter two 8-inch pans, and line the bases with parchment paper.
- Perform reverse creaming. Combine dry ingredients in a mixer, then beat in room temperature butter until the mixture resembles coarse cornmeal.
- Aerate egg whites. Whisk room temperature egg whites in a separate bowl until frothy to provide light, physical leavening.
- Emulsify the batter. Whisk vanilla and extracts into the milk, then alternate adding half the egg whites and half the milk to the flour mixture while mixing on low speed.
- Bake the layers. Divide batter into pans and bake for 25-30 minutes until a skewer inserted in the center comes out clean.
- Cool and level. Allow sponges to rest 10 minutes before cooling completely on a wire rack, then trim the tops with a serrated knife.
- Cook pastry cream. Whisk yolks, sugar, salt, milk, and cornstarch over medium-low heat until thickened, then whisk in cold butter and vanilla bean paste before chilling.
- Prepare meringue base. Whisk egg whites, sugar, cream of tartar, and salt over simmering water until the mixture reaches 160°F.
- Whip the frosting. Beat the meringue to stiff peaks and gradually whip in room temperature butter to create a stable emulsion.
- Assemble the cake. Layer cake with pastry cream, leaving a 1-inch border, apply a crumb coat, chill briefly, and finish with a final layer of frosting.
Notes
- Ensure all ingredients are at 70°F to guarantee a smooth, stable emulsion during mixing.
- Use a digital kitchen scale for all measurements to avoid the inconsistencies common with volume-based measuring cups.
- Wait until the cake layers are completely cool to the touch before leveling to prevent the delicate crumb from tearing.
- If your Swiss meringue frosting appears soupy, chill it for 15 minutes before re-whipping to help the fat set properly.
- Wipe your serrated knife with a hot, damp cloth between each slice to achieve perfectly clean, professional-looking edges.
- Prep Time: 45 mins
- Cook Time: 30 mins
- Category: Dessert
- Method: Baking
- Cuisine: American
The Working Components
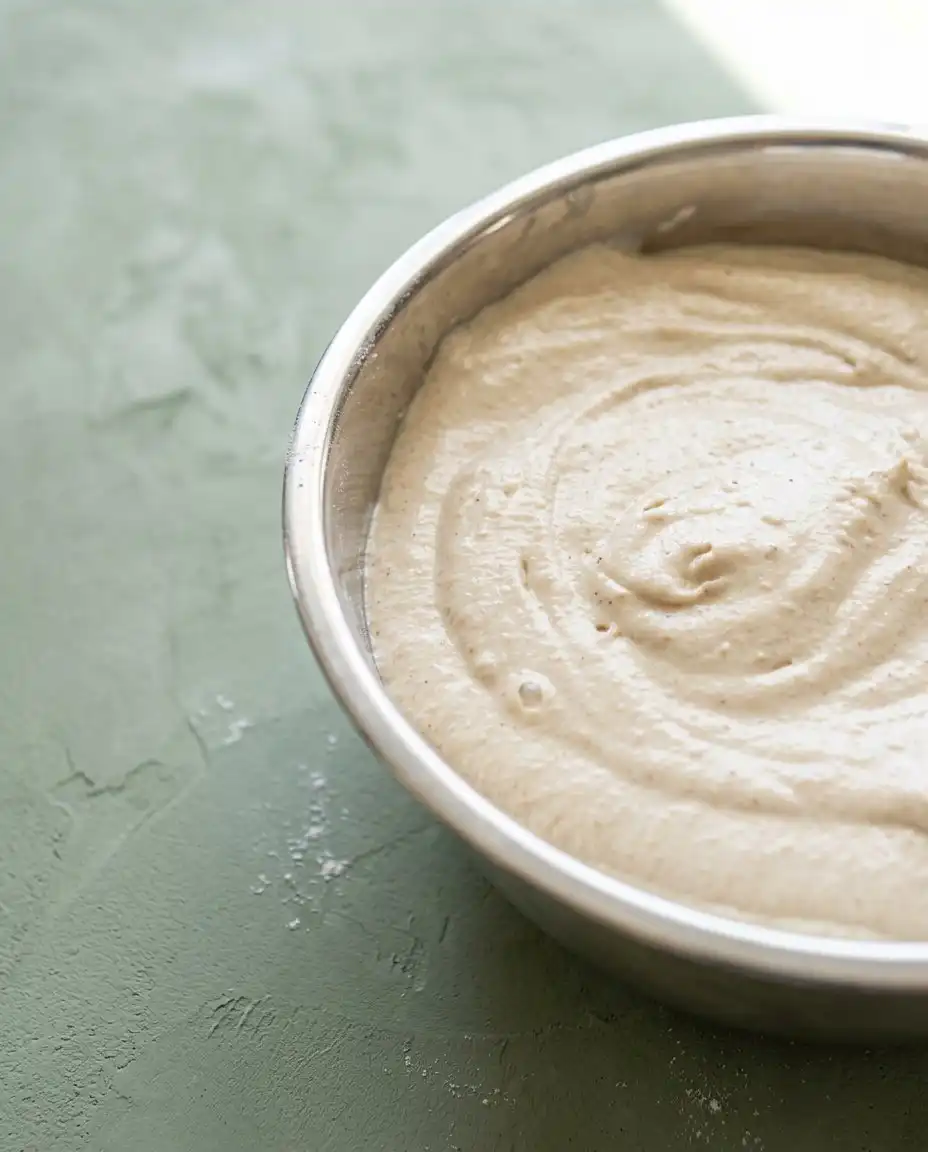
Achieving the optimal crumb requires ingredients at specific temperatures to facilitate a stable emulsion. The interaction between low-protein cake flour and the high-fat content of the butter creates the foundation for a cake that is both sturdy and delicate.
- Cake Flour: This flour contains approximately 8 percent protein, which prevents the cake from becoming tough or chewy after mixing.
- Granulated Sugar: Beyond sweetness, sugar interferes with gluten formation and assists in retaining moisture during the 30-minute bake time.
- Unsalted Butter: Using room temperature butter allows it to coat the flour particles during the reverse creaming phase, creating a waterproof barrier.
- Egg Whites: By omitting the yolks from the sponge, we achieve a lighter color and a more refined, airy texture that highlights the vanilla seeds.
- Vanilla Bean Seeds: These provide the visual speckling and a deep, floral aroma that synthetic extracts cannot replicate.
- Cornstarch: This acts as a thickening agent for the pastry cream, providing the necessary viscosity to hold the layers together without weeping.
| Ingredient | Why It Matters |
|---|---|
| Cake Flour | Provides a low-protein structure for a tender crumb. |
| Whole Milk | Supplies the necessary hydration and fat for a soft mouthfeel. |
| Cream of Tartar | Stabilizes the egg white proteins in the Swiss meringue. |
| Vanilla Bean Paste | Delivers concentrated flavor and aromatic intensity to the frosting. |
The Tested Procedure
Step 1: Prep Your Bench and Pans
Preheat your oven to 350°F (175°C) to allow the heat to stabilize before the pans enter the chamber. Lightly butter two 8-inch round cake pans, line the bases with parchment paper, and apply a second thin layer of butter over the paper. This double-layer lubrication guarantees the structural skin of the cake remains intact when unmolding. Having your digital scale and probe thermometer ready is essential for maintaining the pace required for a successful bake.
Step 2: The Reverse Creaming Process
In the bowl of an electric mixer, combine the cake flour, sugar, baking powder, and salt. Turn the mixer on its lowest setting and add the room temperature butter one tablespoon at a time, allowing 30 seconds between each addition for the fat to coat the flour. This technique, known as reverse creaming, prevents the flour from hydrating too early, which limits gluten development. Once the butter is fully incorporated, the mixture should resemble coarse cornmeal with no visible lumps of fat remaining.
Step 3: Aerating the Egg Whites
In a separate clean glass or metal bowl, whisk the room temperature egg whites for 2 minutes until they become frothy and white. This step introduces a small amount of physical leavening which, when combined with the chemical leavening of the baking powder, creates a light but structured interior. Avoid whisking to stiff peaks at this stage, as we only require the proteins to be slightly uncoiled to facilitate an easier blend into the flour mixture.
Step 4: Emulsifying the Batter
Prepare the liquid component by whisking the vanilla bean seeds, vanilla extract, and almond extract into the room temperature whole milk. With the mixer running on its lowest speed, add half of the frothy egg whites followed by half of the milk mixture. Repeat the process with the remaining halves and mix for exactly 30 seconds until the batter is smooth and fully emulsified. Over-mixing at this stage will result in a dense, rubbery cake, so stop as soon as the last streak of flour disappears.
Step 5: Baking the Classic Vanilla Bean Layer Cake
Divide the batter equally between the prepared pans, using a digital scale to confirm the weight of each to within 5 grams. Place the pans on the middle rack of the preheated oven and bake for 25 to 30 minutes. The cake is ready when a wooden skewer inserted into the center comes out clean or with a few moist crumbs attached. The internal temperature should register approximately 205°F (96°C) for the most reliable results.
Step 6: Cooling and Leveling
Remove the pans from the oven and allow the cakes to rest for 10 minutes; this allows the internal steam to redistribute, strengthening the crumb. Invert the pans onto a wire cooling rack, discard the parchment paper, and allow the sponges to reach room temperature before attempting to level them. Use a long serrated knife to remove the domed tops, creating a flat surface that allows the layers to sit flush against the pastry cream filling.
Step 7: Tempering the Pastry Cream
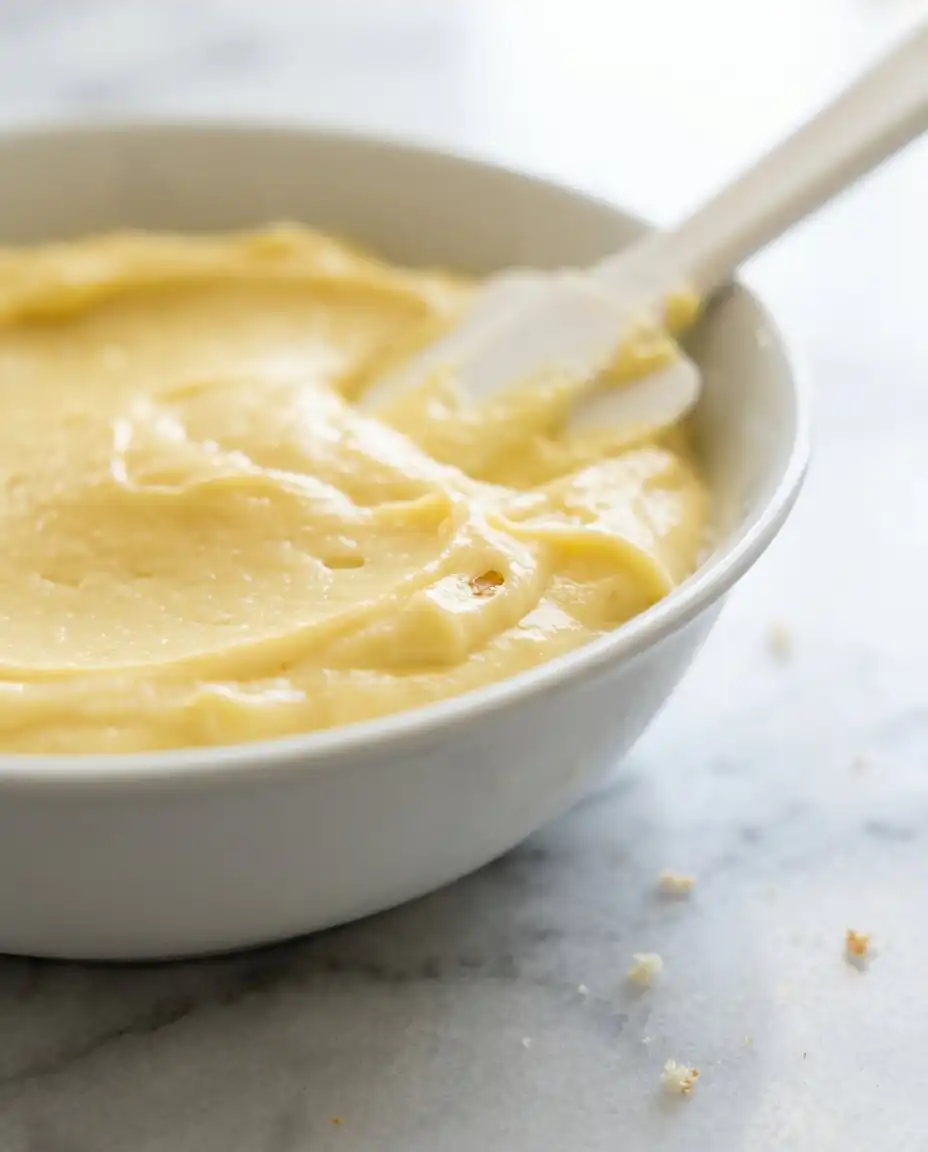
In a heavy-bottomed saucepan, whisk together the egg yolks, sugar, salt, milk, and cornstarch until the mixture is uniform. Place over medium-low heat and whisk continuously for 5 to 8 minutes as the starch undergoes gelatinisation, a process where starch granules swell and thicken the liquid. Once the mixture begins to bubble, remove it from the heat and whisk in the cold butter and vanilla bean paste. Transfer to a bowl and press plastic wrap directly onto the surface to prevent a skin from forming while it chills for 2 hours.
Step 8: Preparing the Swiss Meringue
Clean your mixer bowl thoroughly with lemon juice to remove any trace of fat before adding the egg whites, sugar, cream of tartar, and salt. Set the bowl over a pot of barely simmering water, ensuring the bottom of the bowl does not touch the liquid. Whisk constantly until the sugar has fully dissolved and the mixture reaches 160°F (71°C) on a probe thermometer. This heat treatment denatures the proteins and dissolves the sugar crystals, creating a stable base for the buttercream.
Step 9: Whipping and Emulsifying the Frosting
Transfer the bowl to the stand mixer and whip on medium-high speed for 7 to 10 minutes until the meringue reaches stiff peaks and is cool to the touch. It is vital that the meringue is at room temperature before adding the butter; if the base is too warm, the fat will melt and the frosting will collapse. Gradually add the room temperature butter one tablespoon at a time, allowing the mixer to create a permanent emulsion that is thick, silky, and capable of holding its shape.
Step 10: Final Assembly
Place the first cake layer on a serving plate and spread the chilled pastry cream over the top, leaving a 1-inch border at the edges. This border prevents the filling from squeezing out under the weight of the second layer. Place the second cake layer on top and apply a very thin layer of frosting—a crumb coat—over the entire surface. Chill the cake for 15 minutes to set this coat, then finish with the remaining frosting for a smooth, professional finish.
Technique Refinements
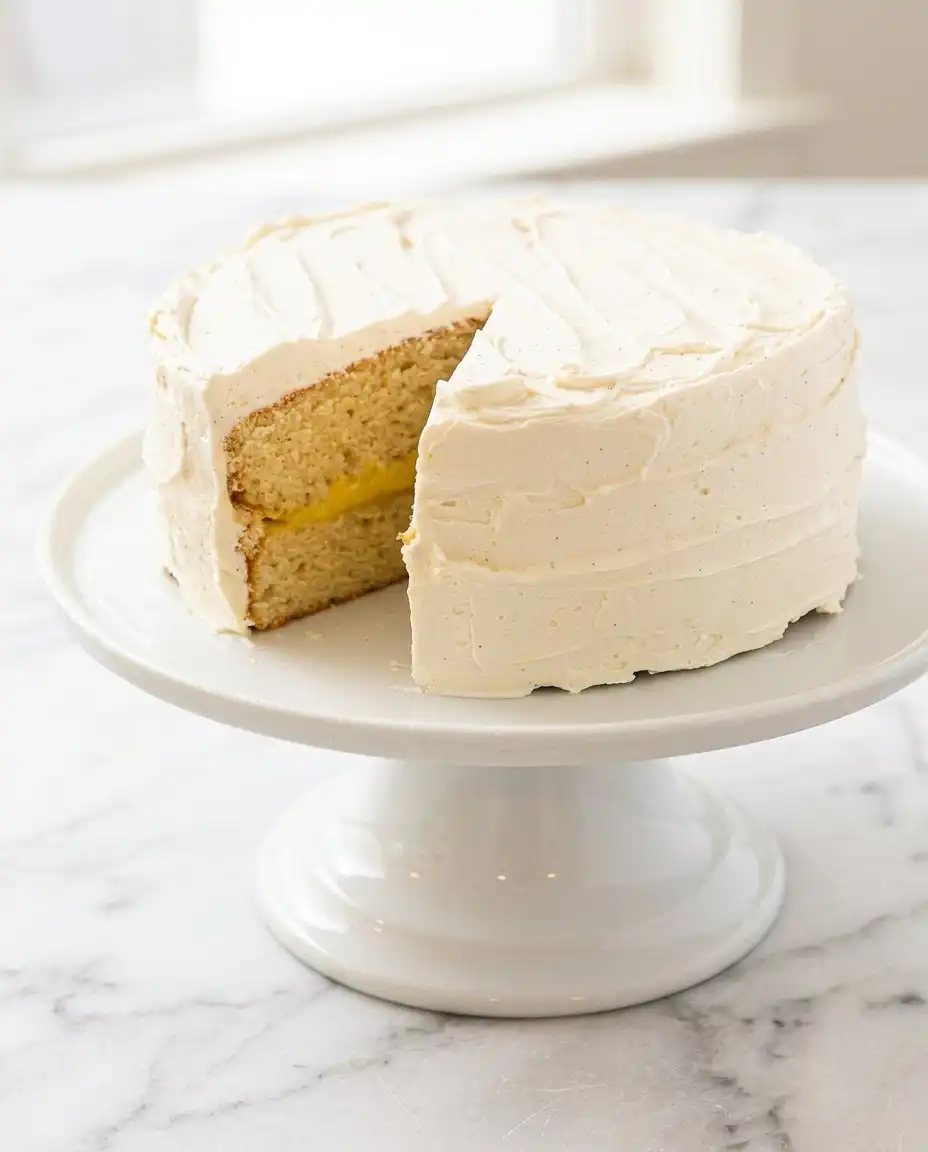
When working with a vanilla cake, temperature control is the most frequent point of failure for home bakers. Every ingredient, from the milk to the egg whites, must be at a consistent room temperature of approximately 70°F (21°C) to facilitate a proper emulsion during the mixing stage. If your liquids are too cold, the butter in the batter will seize, resulting in a curdled appearance and a greasy, uneven crumb after baking.
To achieve the most stable filling, you must understand how to stabilize vanilla bean pastry cream by properly hydrating the cornstarch. If your pastry cream remains runny after cooling, it is likely because the mixture did not reach a sufficient temperature to activate the starch’s thickening properties. Ensure the custard reaches a gentle boil for at least 30 seconds to confirm the structure is set.
If the Swiss meringue frosting appears curdled or soupy after adding the butter, do not discard it. A soupy frosting usually means the meringue was too warm; place the bowl in the refrigerator for 15 minutes before whipping again. If it looks curdled, the butter was too cold; continue whipping on high speed or use a kitchen torch to gently warm the side of the bowl until the emulsion comes together.
Precision in weighing your ingredients cannot be overstated when executing a multi-layered dessert. Using volume measurements like cups can result in up to 20 percent variance in the amount of flour used, leading to a cake that is either too dry or too fragile to handle. Invest in a digital scale and work exclusively in grams to guarantee that the ratio of fat to protein remains exactly as intended.
Leveling the cakes while they are still warm is a common mistake that leads to tearing the delicate crumb. Wait until the sponges are completely cool to the touch, or even slightly chilled, before using a serrated knife to remove the domes. This patience allows the internal structure to set fully, providing a clean surface that holds the pastry cream without crumbling.
When applying the crumb coat, use an offset palette knife to maintain even pressure across the surface. This initial thin layer of frosting acts as a structural sealant, trapping any loose crumbs and providing a smooth foundation for the final decorative layer. Skipping this step often results in a finished cake with visible specks of cake throughout the pristine white frosting.
Always use a probe thermometer when preparing the Swiss meringue base to ensure the egg whites reach 160°F. This temperature is high enough to kill any potential bacteria while ensuring the sugar is completely dissolved for a grit-free finish. Consistency in this step defines the difference between a grainy home bake and a professional-quality pastry.
Frequently Asked Questions
Can I substitute the cake flour with all-purpose flour?
While all-purpose flour can be used, the resulting crumb will be significantly tougher due to the higher protein content. If you must substitute, remove two tablespoons of flour from every cup and replace them with cornstarch to mimic the lower protein levels of cake flour. This adjustment helps maintain the delicate texture required for this specific recipe.
Why did my pastry cream turn out lumpy?
Lumps in pastry cream usually occur when the egg and starch mixture is heated too quickly or not whisked constantly. To fix this, you can pass the warm cream through a fine-mesh sieve to remove any cooked egg solids before it sets. Ensuring a slow, steady increase in temperature prevents the proteins from seizing into large clusters.
How long can I store this cake in the refrigerator?
The assembled cake will remain fresh for up to 3 days when stored in an airtight container or covered in plastic wrap. Because the frosting is butter-based, the cake will become firm when cold; always allow it to sit at room temperature for 30 to 45 minutes before serving. This ensures the butter softens, returning the cake to its intended velvet-like texture.
Is it possible to freeze the cake layers in advance?
Yes, the sponges can be baked, cooled, and wrapped tightly in multiple layers of plastic wrap before freezing for up to one month. Thaw the layers in the refrigerator overnight before assembling to prevent the crumb from becoming soggy. Freezing the layers actually makes them easier to handle and level, as the structure becomes more stable when cold.
Why did my frosting melt when I added the butter?
The most common reason for melting is adding butter to a meringue base that was still too warm. The meringue must be at room temperature, ideally below 75°F (24°C), before the fat is introduced. If this happens, chill the entire bowl for 20 minutes and then whip again until the frosting becomes thick and creamy.
Can I use vanilla extract instead of vanilla bean seeds?
You can use two teaspoons of high-quality vanilla extract as a replacement, though you will lose the visual appeal of the seeds and some aromatic complexity. Vanilla bean paste is a better substitute as it contains the seeds while being easier to measure. For a truly professional result, using the seeds from a fresh pod provides the most authentic and intense flavor profile.
Considered Adjustments
For those who prefer a more robust flavor profile, replacing the granulated sugar in the sponge with light brown sugar can offer a subtle caramel note. This change will slightly increase the moisture content of the cake, so you may need to increase the bake time by 2 to 3 minutes to confirm the center is fully set. This variation pairs exceptionally well with a salted caramel drizzle between the layers for added depth.
If you find the texture of a traditional sponge too light, you might consider a classic vanilla cake variation that incorporates two egg yolks into the batter. The added lecithin from the yolks will produce a tighter, more custard-like crumb that is reminiscent of a pound cake but still light enough for a layered format. This adjustment provides a more golden hue to the interior while maintaining the structural integrity needed for stacking.
A citrus-infused version can be achieved by rubbing the zest of two lemons or oranges into the granulated sugar before starting the reverse creaming process. The friction of the sugar crystals against the zest releases the essential oils, scenting the entire cake without altering the liquid ratios of the batter. This variation provides a bright contrast to the rich, creamy notes of the vanilla bean pastry cream and frosting.
Serving the Structure
When plating this cake, use a sharp serrated knife dipped in hot water and wiped dry between every cut. This technique melts the butter in the frosting slightly as the blade passes through, ensuring perfectly clean, sharp edges that showcase the internal layers. A clean slice allows the diner to appreciate the contrast between the pale sponge and the golden, pudding-like pastry cream center.
While this cake is an exceptional standalone dessert, it pairs beautifully with a tart berry compote or a handful of fresh raspberries to cut through the richness of the Swiss meringue. For a more traditional presentation, serve a slice alongside a cup of Earl Grey or Darjeeling tea, as the floral notes of the tea complement the vanilla bean seeds perfectly. If you are looking for a bolder contrast, a classic vanilla butter cake served with a dark chocolate sauce offers a more decadent experience.
For a formal gathering, consider plating each slice individually with a small dollop of whipped cream and a single vanilla bean pod as a garnish. The aesthetic of the cake is defined by its clean lines and minimalist color palette, so keep the presentation uncluttered. The crisp shell of the frosting protects the creamy interior, making it an ideal choice for outdoor celebrations where a standard buttercream might fail.

What the Technique Gives You
Mastering this recipe provides you with more than just a dessert; it gives you a fundamental understanding of pastry physics. The combination of the reverse creaming method and a stabilized meringue results in a cake that is as structurally sound as it is delicious. By focusing on the small details—the temperature of the butter, the weight of the flour, and the timing of the whisk—you produce a bake that far exceeds the quality of any commercial alternative.
Once you have successfully executed this vanilla version, you can apply these same structural principles to a chocolate layer cake or other flavored sponges. Structure is what makes the melt possible, and your commitment to precision on the pastry bench is what will define your success as a baker. We invite you to share your results and continue refining your technique with every batch.
Follow us for more technical guides and pastry insights on Pinterest, Facebook, and TikTok. Join our community on Telegram to discuss your bakes with fellow enthusiasts.