A muddy flavour profile or structural collapse often stems from insufficient reduction of the fruit puree, which introduces excess moisture that disrupts the delicate crumb of the sponge.

Achieving three distinct textures within one cohesive cake requires more than just mixing. This Neapolitan Anniversary Cake relies on precise fat ratios and a controlled strawberry reduction to ensure each layer provides a clean, structural bite while maintaining a lush mouthfeel. By following this method, you create a dessert that respects the classic trio of chocolate, vanilla, and strawberry through the lens of technical pastry discipline. Every gram and every minute of reduction time contributes to a final result that is stable, elegant, and balanced.
What Makes the Neapolitan Anniversary Cake Texture Right
Prep: 120 min · Serves: 14 · Difficulty: Advanced
- Balanced fat ratios create a fine velvet crumb
- Reduced fruit concentrates flavour without adding water
- Three distinct batters ensure unique structural integrity
- Bittersweet chocolate provides a sophisticated base layer
- Professional striping technique offers a clean architectural finish
Precision for the sake of mouthfeel is why this recipe remains superior for decadent occasions where presentation is vital.
Get The Full Cake Recipe
Print
Neapolitan Anniversary Cake
- Total Time: 148 mins
- Yield: 14 servings
Description
This professional-grade Neapolitan cake features distinct chocolate, vanilla, and strawberry layers engineered for structural integrity and a refined mouthfeel. By utilizing precise fruit reductions and balanced fat ratios, this dessert offers a sophisticated architectural finish perfect for elegant celebrations.
Ingredients
- Strawberries
- All-purpose flour
- Baking powder
- Salt
- Unsalted butter
- Vegetable oil
- Granulated sugar
- Vanilla extract
- Large eggs
- Whole milk
- Bittersweet chocolate (60% cacao)
- Natural cocoa powder
- Red food coloring
Instructions
- Execute strawberry reduction. Puree the strawberries and simmer in a heavy-bottomed saucepan for 15 minutes until volume is reduced by half to concentrate flavor and remove moisture.
- Prepare baking environment. Preheat the oven to 176°C (350°F) and grease three 8-inch cake pans, lining them with parchment rounds.
- Sift dry framework. Whisk together the flour, baking powder, and salt in a bowl to ensure uniform leavening distribution.
- Achieve ribbon stage. Beat butter, oil, sugar, and vanilla in a stand mixer for 4 minutes until the mixture is pale, thick, and creamy.
- Emulsify proteins. Incorporate eggs one at a time, ensuring each is fully integrated before adding the next to maintain a stable emulsion.
- Incorporate solids. Alternately add the dry ingredients and milk in two stages, mixing only until combined to avoid overworking the gluten.
- Formulate strawberry layer. Fold the cooled strawberry reduction and food coloring into 2 1/4 cups of batter, adding two extra tablespoons of flour, then transfer to a prepared pan.
- Define remaining layers. Divide the remaining batter into two bowls, stirring vanilla into one and melted chocolate with cocoa powder into the other, then pour into separate pans.
- Monitor thermal set. Bake for 23 to 28 minutes until a probe thermometer reads 98°C (208°F), then cool in pans for 3 minutes before transferring to wire racks.
- Assemble the cake. Trim the cooled layers, stack them starting with chocolate, and apply a crumb coat of frosting before final decoration.
Notes
- Ensure all dairy and egg ingredients are at room temperature to prevent the batter from splitting during the creaming stage.
- Use a digital kitchen scale for all measurements to maintain the precise flour-to-fat ratios required for the cake structure.
- Cool melted chocolate to exactly 32°C before folding into the batter to avoid collapsing the aerated butter.
- Always use a long, serrated knife dipped in hot water when slicing to achieve clean, professional cross-sections of the three layers.
- Prep Time: 120 mins
- Cook Time: 28 mins
- Category: Dessert
- Method: Baking
- Cuisine: Modern American
Weighed & Ready
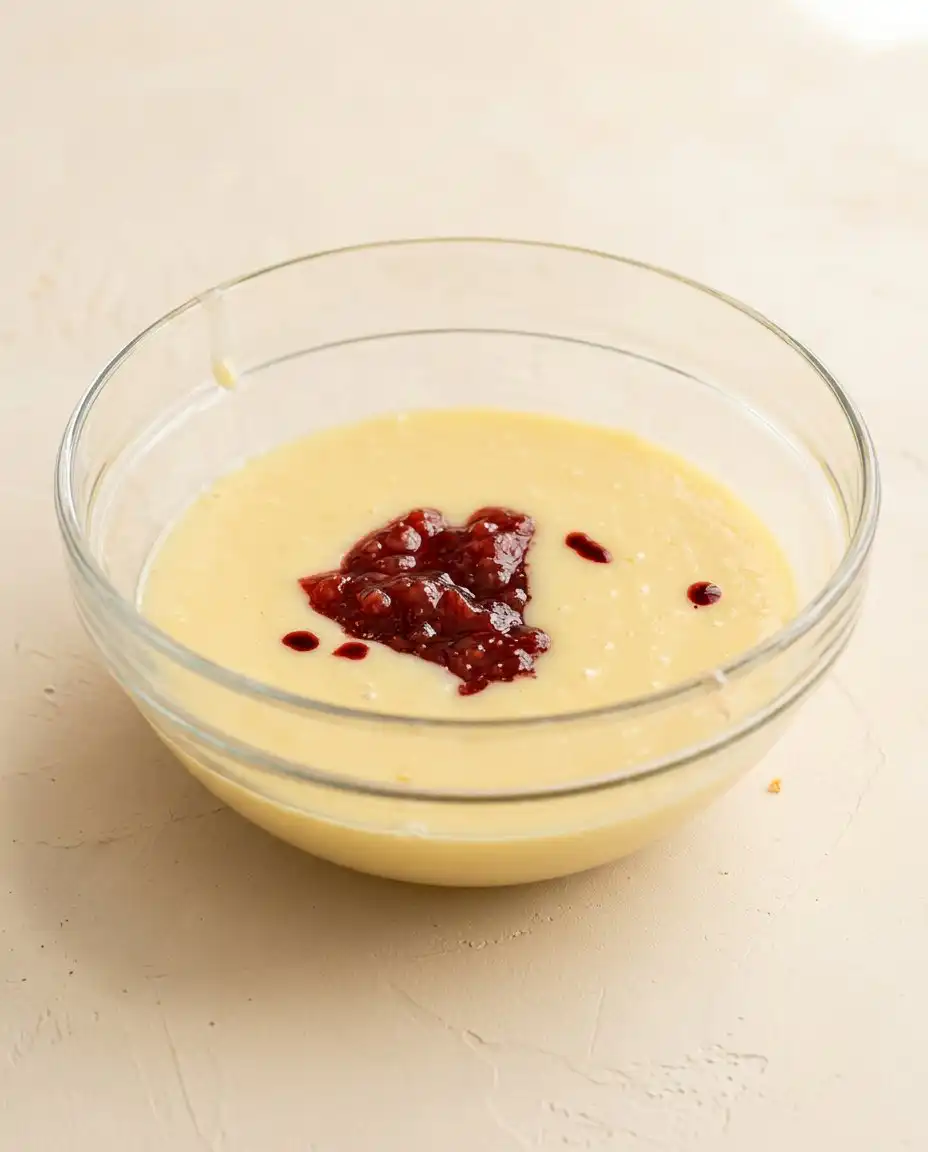
Successful pastry relies on the specific interaction between proteins and fats, particularly when incorporating acidic fruit elements that can destabilise a batter. This recipe utilises both butter for flavour and vegetable oil for room-temperature tenderness, ensuring the sponge remains soft yet structurally sound enough to support a heavy buttercream finish.
- Strawberry Puree: This must be reduced to half its volume to remove water that would otherwise weaken the gluten structure.
- Bittersweet Chocolate: Using a 60% cacao content provides the necessary cocoa solids to stabilise the bottom layer without adding excessive sugar.
- All-Purpose Flour: A protein content of approximately 10.5% provides the necessary structural framework for the high-ratio liquid ingredients.
- Unsalted Butter: Using unsalted varieties allows for total control over the sodium content, which affects both flavour and the hydration of flour proteins.
- Natural Cocoa Powder: This adds a sharp, acidic chocolate note that contrasts with the sweetness of the vanilla and strawberry layers.
| Ingredient | Why It Matters |
|---|---|
| Reduced Strawberry Puree | Concentrates flavour while managing hydration levels. |
| Bittersweet Chocolate | Provides structural fat and a deep cocoa profile. |
| Vegetable Oil | Maintains a soft crumb at room temperature. |
| Large Eggs | Create the protein matrix necessary for height. |
| Baking Powder | Provides reliable aeration for a consistent rise. |
The Tested Procedure
Step 1: Execute the Strawberry Reduction
Begin by processing the strawberries into a fine puree and transferring them to a heavy-bottomed saucepan. Heat over medium intensity until the mixture reaches a slow boil, stirring consistently to prevent the natural sugars from scorching. You must reduce the volume by half, specifically achieving 1/2 cup plus 2 tablespoons, which concentrates the pectin and flavour while removing excess moisture. This process typically requires 15 minutes of thermal application to ensure the viscosity is thick enough to not disrupt the cake emulsion.
Step 2: Prepare the Baking Environment
Set the oven to 176°C (350°F) and prepare three 8-inch cake pans with parchment rounds to ensure a clean release. Precision in pan preparation prevents the delicate outer crust from tearing upon removal, which is essential for the later striping process. Grease the vertical walls of the pans with a light coating of butter and flour, tapping out the excess to avoid a thick, greasy shell. A probe thermometer should be available to verify the internal temperature during the later stages of the bake.
Step 3: Sift the Dry Framework
Whisk the flour, baking powder, and salt together in a secondary bowl to ensure the leavening agents are distributed with total uniformity. This aeration step prevents clumps of baking powder from creating uneven pockets of carbon dioxide, which would result in large, irregular holes in the finished sponge. The salt is not merely for seasoning; it strengthens the gluten network, allowing the cake to hold its shape during the rise. Set this mixture aside while you begin the creaming phase.
Step 4: Achieve the Ribbon Stage
Combine the butter, vegetable oil, sugar, and vanilla in the bowl of a stand mixer and beat for exactly 4 minutes on medium-high speed. This duration is necessary to incorporate minute air bubbles into the fat, a process known as aeration, which provides the foundation for the cake’s volume. The mixture should appear pale and significantly lightened in texture, resembling a soft, thick cream. Skimping on this time will result in a dense, heavy sponge that lacks the characteristic melt-in-the-mouth quality.
Step 5: Emulsify the Proteins
Add the large eggs one at a time, ensuring each is fully incorporated before the next is introduced to the emulsion. This gradual addition prevents the fat and water from separating, which would lead to a curdled appearance and a tough, greasy final texture. If the mixture begins to split, add a tablespoon of the measured flour to help bind the ingredients. Scrape the bottom of the bowl frequently to ensure no pockets of unmixed fat remain at the base.
Step 6: Incorporate Solids and Liquids
Add the dry ingredients in two stages, alternating with the milk to maintain a stable emulsion within the batter. You must mix only until the flour streaks disappear, as overworking the batter at this stage will over-develop the gluten and result in a bready, tough cake. The batter should be thick and glossy, showing the beginning of structural set even before it enters the heat of the oven. This careful folding technique preserves the air bubbles created during the creaming stage.
Step 7: Formulate the Strawberry Layer
Remove approximately 2 1/4 cups of the base batter and place it in a clean bowl, then gently fold in the cooled strawberry reduction and red colouring. This specific layer requires the addition of 2 extra tablespoons of flour to compensate for the weight and moisture of the fruit solids. Fold until the colour is uniform, but do not beat the mixture, as this would deflate the aeration. Transfer this batter into one of the prepared pans and level the surface with an offset palette knife.
Step 8: Define the Vanilla and Chocolate Layers
Divide the remaining batter into two equal portions, treating one with extra vanilla and the other with the melted bittersweet chocolate and cocoa powder. The chocolate layer becomes the most dense due to the addition of cocoa solids, so it requires careful folding to ensure it remains aerated. By separating the flavours at this stage, you ensure that the chocolate and vanilla layers maintain their distinct structural properties. Pour each into its respective pan, ensuring the weights are equal for a uniform bake.
Step 9: Monitor the Thermal Set
Place the pans in the centre of the oven and bake for 23 to 28 minutes, checking the chocolate layer specifically as it often requires the full 28 minutes. Use a digital probe thermometer to ensure the centre has reached 98°C (208°F), or verify that a skewer inserted comes out with only a few moist crumbs. The sponge should pull away slightly from the edges of the pan, indicating the protein structure has fully set. Allow the layers to rest in the pans for 3 minutes before transferring them to wire racks.
Step 10: Assemble the Neapolitan Anniversary Cake
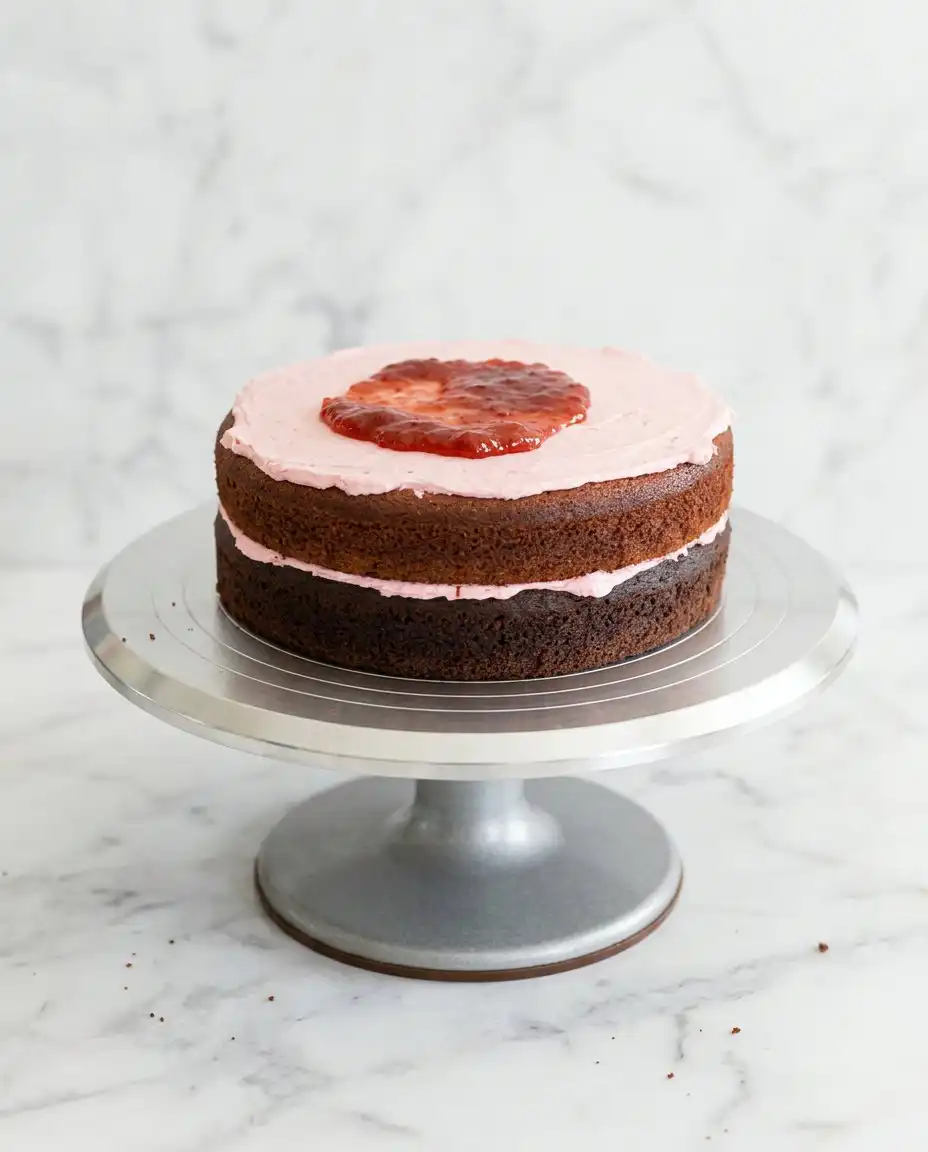
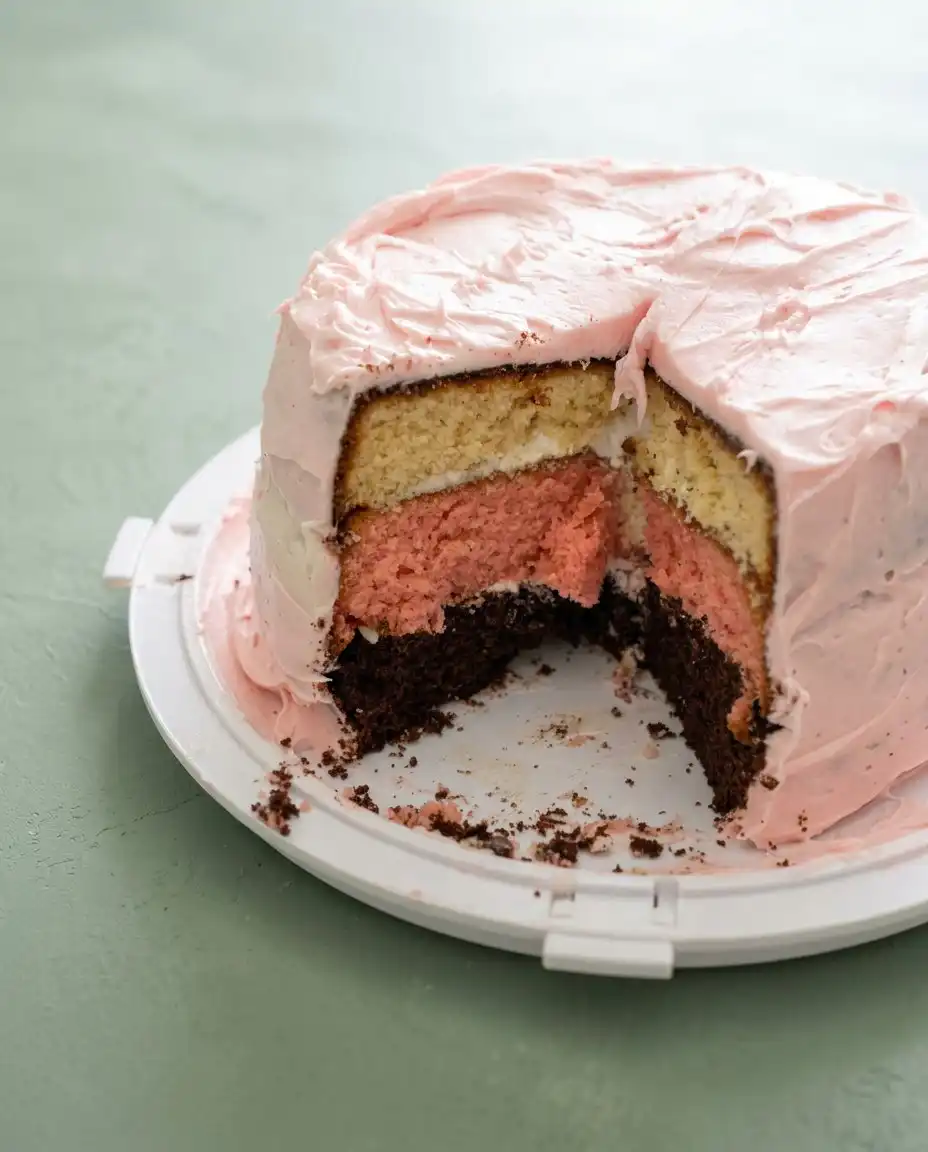
Once the layers are entirely cold, remove the domes with a serrated knife to create flat surfaces for stacking. Place the chocolate layer on the base, followed by chocolate frosting, the strawberry layer with strawberry frosting, and finally the vanilla layer. This structural sequence places the heaviest layer at the bottom for stability. Apply a thin crumb coat of vanilla frosting over the entire exterior and refrigerate for 20 minutes to lock in any loose particles before the final decorative striping.
Pastry Bench Tips
Always utilize a digital scale for your measurements rather than volume-based cups. The density of flour can vary significantly depending on how it is packed, and a variance of even 20 grams can be the difference between a tender sponge and a dry, crumbly one. Using grams ensures that the ratio of liquid to solid remains precisely as intended for structural success.
If your buttercream appears broken or curdled during the mixing process, the temperature of your butter was likely too low. To fix this, remove a small portion of the frosting, melt it slightly in the microwave, and then slowly stream it back into the mixer while running on medium speed to re-establish the emulsion. For more complex flavour profiles, you might consider how the techniques in a strawberry chocolate cake can assist in stabilizing fruit-based frostings.
To achieve the cleanest stripes on the exterior of the cake, use a heated metal bench scraper. Dip the scraper in hot water, wipe it completely dry, and then run it around the cake in one continuous motion. The residual heat slightly melts the outer layer of fat in the buttercream, creating a glass-like finish that highlights the distinct colour transitions.
When melting the bittersweet chocolate for the cake batter, ensure it cools to approximately 32°C (90°F) before adding it to the mixture. If the chocolate is too hot, it will melt the aerated butter in the batter, causing the cake to collapse and become dense. If it is too cold, it will seize upon contact with the cooler ingredients, leaving unappealing chunks of hard chocolate throughout the sponge.
For those interested in the technical aspects of moisture management, managing cake hydration and fruit reductions provides excellent further reading on how to balance fruit solids in high-ratio bakes. This ensures the strawberry layer never becomes soggy or underbaked.
Always rotate your pans halfway through the baking cycle if your oven has known hot spots. This prevents one side of the cake from setting faster than the other, which can lead to an uneven rise and a slanted cake. A uniform rise is essential for a stable anniversary cake that must stand tall under the weight of several layers of frosting.
Frequently Asked Questions
Can I Freeze Neapolitan Anniversary Cake?
Yes, this cake responds well to freezing if the process is handled with care. You should wrap the individual, unfrosted layers tightly in plastic wrap and then a layer of foil to prevent desiccation and the absorption of freezer odours. When you are ready to assemble, thaw the layers in the refrigerator overnight while still wrapped to ensure the moisture redistributes evenly back into the crumb.
Why is it necessary to reduce the strawberry puree?
Reducing the puree is essential for managing the hydration of the batter. Raw strawberries are approximately 90% water, and adding that much liquid directly to a cake batter would dilute the proteins and lead to a structural collapse. By boiling off the water, you concentrate the flavour and pectin, allowing for a fruit-forward taste without compromising the sponge’s integrity.
What should I do if my cake layers are too fragile to stack?
If the layers feel too soft, they likely need more time to allow the fat and protein structures to firm up. Place the layers in the refrigerator for at least one hour before attempting to level or stack them. Cold cake is significantly easier to handle and is less prone to crumbling when you apply the crumb coat or final frosting layers.
Can I substitute the oil for more butter?
While you can use all butter, the combination of butter and oil is chosen for a specific technical reason. Butter provides superior flavour and aeration, but it becomes quite hard when refrigerated. The vegetable oil remains liquid at lower temperatures, ensuring that the cake retains a soft, moist mouthfeel even if it has been stored in a cold environment.
How do I prevent the coloured frosting layers from bleeding into each other?
The key to clean lines is temperature control and minimal contact. Apply each colour of frosting while it is at the same consistency, and use a bench scraper to smooth the sides in as few passes as possible. If the frosting becomes too warm and soft, the colours will naturally smear into one another, so work in a cool kitchen and refrigerate the cake between steps if necessary.
Is it possible to make the buttercream in advance?
You can prepare the buttercream up to three days in advance and store it in an airtight container in the refrigerator. Before using, allow it to come to room temperature and re-whip it in a stand mixer for several minutes to restore the light, aerated texture. This ensures the frosting is pliable enough to pipe and smooth over the cake without tearing the delicate crumb.
Considered Adjustments
For a variation that holds its shape with even more rigidity, you can substitute the all-purpose flour for cake flour. This adjustment results in a finer, tighter crumb structure that is particularly effective if you plan to carve the cake into specific shapes. Be aware that cake flour is more absorbent, so you may need to increase the milk by one tablespoon to maintain the correct batter viscosity. This technique is similar to what is used in a classic vanilla cake to achieve that signature soft bite.
If you prefer a more pronounced fruit acidity, consider replacing the strawberry reduction with a raspberry alternative. Raspberries have a higher pectin content, which can result in a slightly firmer fruit layer that contrasts beautifully with the richness of the chocolate. Ensure you strain the seeds through a fine-mesh sieve to maintain the smooth, professional mouthfeel that defines this recipe.
To create a deeper flavour profile in the chocolate layer, replace the bittersweet chocolate with an equivalent weight of 72% dark chocolate. This increases the cocoa butter content, which requires a slightly longer mixing time to ensure a proper emulsion. When making these adjustments, remember that chocolate strawberry cake techniques can be applied here to ensure the higher fat content does not lead to a greasy crumb.
Serving the Structure
For the cleanest presentation, serve this cake at a controlled room temperature of approximately 20°C (68°F). If the cake is served directly from the refrigerator, the butter in the frosting and the chocolate in the base layer will be too firm, masking the delicate flavours of the strawberry and vanilla. Allow the cake to sit out for at least one hour before the planned serving time to ensure the fats have softened to the point of melting on the palate.
When slicing a multi-layered anniversary cake, use a long, thin-bladed serrated knife that has been dipped in hot water and wiped dry between every single cut. The heat from the metal allows the blade to glide through the chocolate ganache and the various buttercream layers without pulling or smearing the distinct colours. This technical approach preserves the visual impact of the internal layers, showing off the precision of your work. Consider pairing each slice with a simple strawberry vanilla cake garnish to reinforce the fruit notes.
The structural skin of the chocolate ganache drip provides a crisp textural contrast to the soft frosting. To ensure the ganache does not overwhelm the delicate sponge, apply it sparingly using a squeeze bottle for maximum control. This allows the drip to set in individual droplets rather than a thick, heavy sheet that might cause the cake to lean or shift over time.

What the Technique Gives You
Mastering the Neapolitan Anniversary Cake is a study in the balance of moisture, fat, and protein. By treating each layer as its own technical challenge, you ensure that the final assembly is more than just a combination of flavours; it is a cohesive architectural achievement. The precision required for the strawberry reduction and the emulsion of the chocolate batter pays off in every bite, offering a sophisticated texture that reflects the discipline of professional pastry. Trust the weights, monitor your temperatures, and the result will be a cake that holds its shape while providing a luxurious melt.
Once you have successfully executed this method, you will find that the foundational techniques of reduction and aeration can be applied to many other classic vanilla cake variations. We encourage you to share your results and the technical details of your process with our community of dedicated bakers. Documenting the structural success of your bake helps others understand the importance of pastry precision in achieving the perfect mouthfeel.