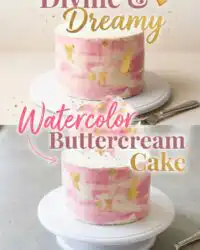
A fluffy cake with a smooth, painted finish takes twenty minutes, start to spoon, delivering a texture that stays soft and luscious through every bite.

A Two-Layer Watercolor Buttercream Cake provides the ideal solution when you need a dessert that looks professional without the heavy time investment. This technique relies on the smear and smooth method, turning basic frosting into a blended masterpiece that feels indulgent and decadent. By using a few clever tools, you can transform a basic bake into something spectacular between dinner and bedtime.
What Makes This Two-Layer Watercolor Buttercream Cake Quick & Luscious
Prep: 20 min · Serves: 12 · Difficulty: Easy
- Finish a professional design in minutes.
- Modern colors create a bold visual.
- Simple smoothing creates a soft texture.
- Minimal cleanup keeps the night stress-free.
- Secondary hues blend for artistic results.
Express doesn’t mean dry when you use this clever technique. Many bakers believe that detailed designs require hours of work, but this classic vanilla bean layer cake method proves that you can achieve a high-end look while the kettle boils.
Get The Full Cake Recipe
Print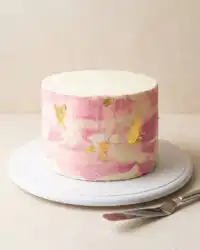
Two-Layer Watercolor Buttercream Cake
- Total Time: 35 mins
- Yield: 12 servings
- Diet: Vegetarian
Description
Create a stunning, professional-looking dessert with this easy watercolor buttercream technique. This method uses simple blending to turn basic frosting into an artistic masterpiece that is perfect for any occasion.
Ingredients
- Crumb-coated cake layers
- Stiff buttercream frosting
- Concentrated gel food coloring
Instructions
- Organize decorating station. Place your crumb-coated cake on a rotating stand and prepare your tinted frosting bowls and tools within easy reach.
- Tint frosting colors. Divide frosting into small bowls and stir in concentrated gel colors until combined, aiming for harmonious shades.
- Apply base layer. Cover the sides of the cake with your primary frosting color to create a stable, wet canvas for the artistic layer.
- Paint color patches. Use an offset spatula to randomly dab small amounts of tinted frosting around the sides of the cake for visual depth.
- Smooth the surface. Hold an icing smoother at a forty-five-degree angle and rotate the stand slowly to blend the colors into a soft, watercolor finish.
- Touch up details. Inspect the cake for gaps or thin spots, adding fresh dabs of frosting if needed and giving the stand one final, gentle rotation.
- Clean top edges. Use your spatula to pull excess frosting from the top edge toward the center, creating a crisp and clean finish.
- Final chill stage. Refrigerate the cake for fifteen minutes to firm the buttercream and lock the artistic design in place before serving.
Notes
- Keep the cake chilled between steps if your kitchen environment is warm to prevent the frosting from sliding.
- Always wipe your icing smoother clean after every rotation to ensure the colors remain distinct and vibrant.
- Ensure you are using gel or paste food colors only, as liquid dyes can ruin the consistency of your buttercream.
- Maintain a steady, stationary hand position while rotating the stand to achieve a smooth and professional finish.
- Prep Time: 20 mins
- Cook Time: 0 mins
- Category: Dessert
- Method: Decorating
- Cuisine: American
Shortcut-Friendly Pantry
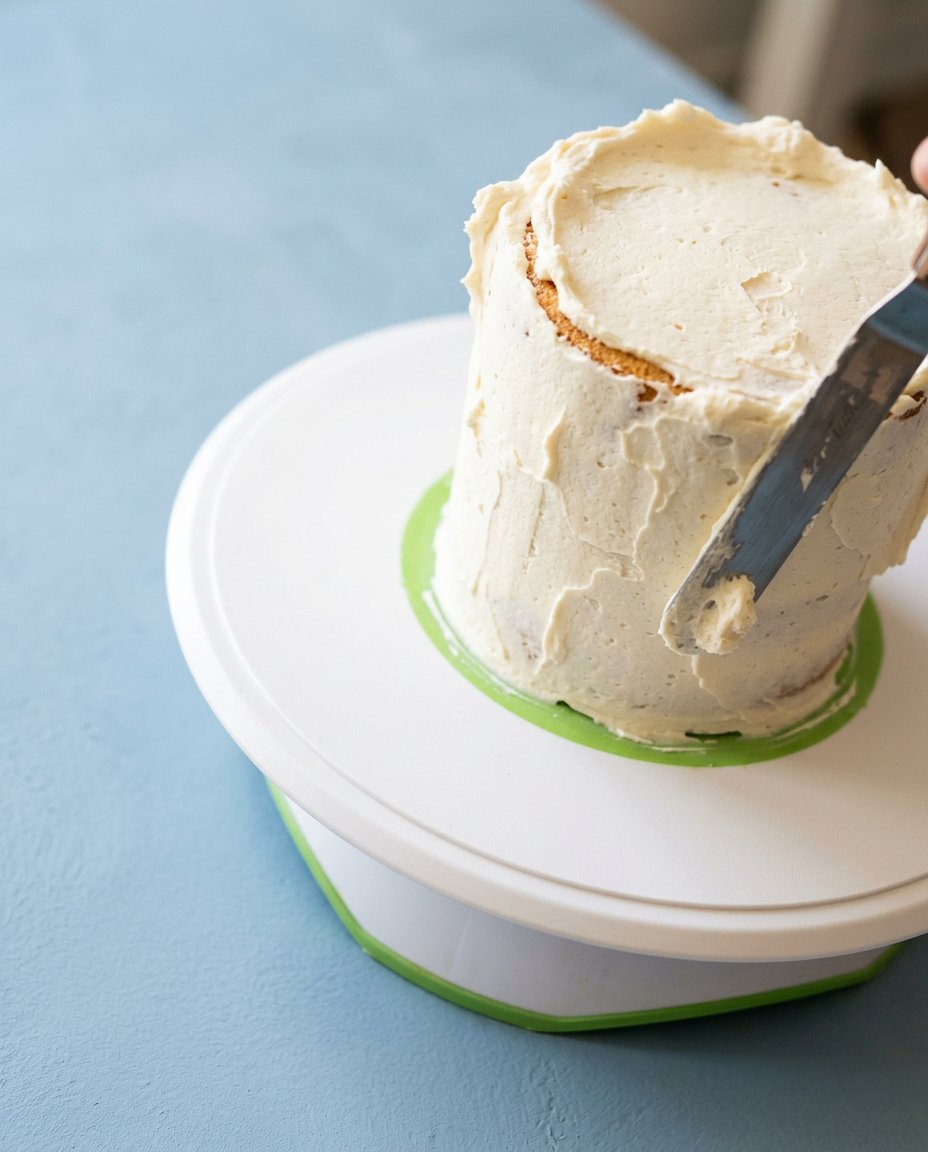
Creating a painted effect on your dessert requires a stable base and concentrated colors that do not thin out the frosting. You want ingredients that hold their shape while remaining soft enough to spread across the sides of the cake without pulling at the delicate crumb. These specific items help you achieve a smooth finish that looks like a watercolor painting without requiring a professional degree in pastry arts.
- Buttercream Frosting: Use a stiff yet spreadable frosting that allows for smooth blending between the different color applications.
- Gel Food Coloring: Choose highly concentrated gels to provide rich color without adding extra moisture that might cause the frosting to slide.
- Pre-Baked Cake Layers: Having your layers ready and crumb-coated saves time and provides a cold, stable surface for the artistic application.
- Rotating Cake Stand: This tool helps you maintain a steady hand and provides the momentum needed for a smooth, single-rotation blend.
- Offset Spatula: A small spatula gives you the precision needed to place patches of color exactly where you want them for the best visual balance.
| Ingredient | Why It Matters |
|---|---|
| Crumb-Coated Cake | Provides a stable, cold surface for the outer layers. |
| Gel Coloring | Adds bold hues without changing the frosting consistency. |
| Buttercream | Acts as the canvas for the watercolor blending technique. |
| Offset Spatula | Allows for precise placement of secondary color patches. |
From Bowl to Spoon
Step 1: Organize Your Decorating Station
Begin by gathering all your tools in one place so the process remains fast and efficient without searching through cupboards. Place your crumb-coated cake on the rotating stand and make sure you have your bowls of frosting ready to be tinted for the artistic layers. Having your icing smoother and offset spatula within reach will make the smoothing process go much faster once the colors are applied.
Step 2: Tint Your Secondary Colors
Divide your remaining frosting into small bowls and add a tiny drop of gel coloring to each to create your palette. Stir the color in thoroughly until no white streaks remain, keeping in mind that the colors will appear darker once they are smeared together on the cake. Aim for 2 to 3 colors that sit near each other on the color wheel to help them blend harmoniously during the rotation.
Step 3: Apply the Base Frosting Layer
Cover the sides of the cake with your primary color, spreading it thick enough to hide the crumb coat but thin enough to stay light. Do not worry about making this layer flawless as you will be adding more frosting and smoothing it out later in the process. The goal is to provide a wet canvas that the secondary colors can grab onto during the painting phase.
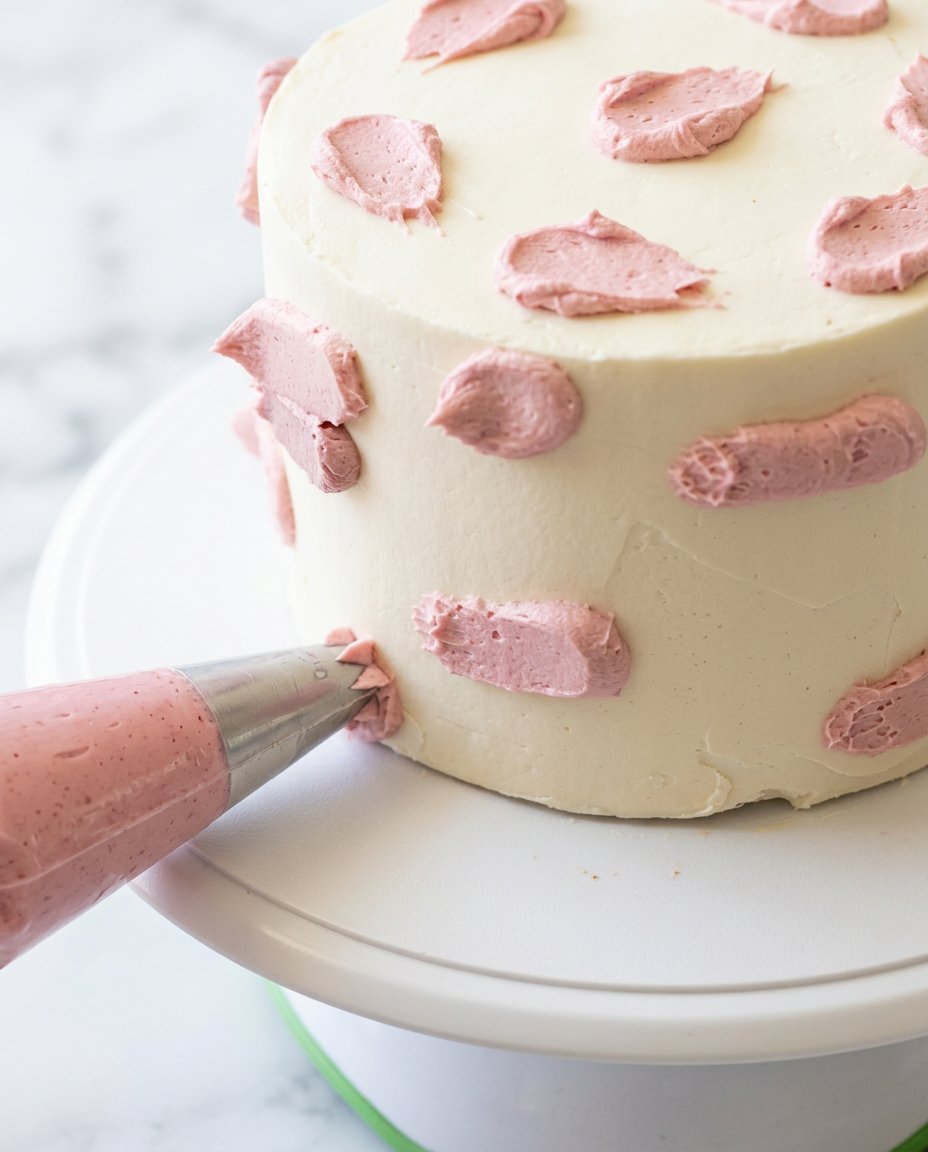
Step 4: Paint the Secondary Color Patches
Using the tip of your offset spatula, pick up a small amount of tinted frosting and dab it randomly around the sides of the cake. Place these patches of color at different heights and intervals to create a natural, organic look that mimics the appearance of a painting. You can use more of one color and less of another to create a sense of depth and visual interest across the surface.
Step 5: Smooth the Two-Layer Watercolor Buttercream Cake Surface
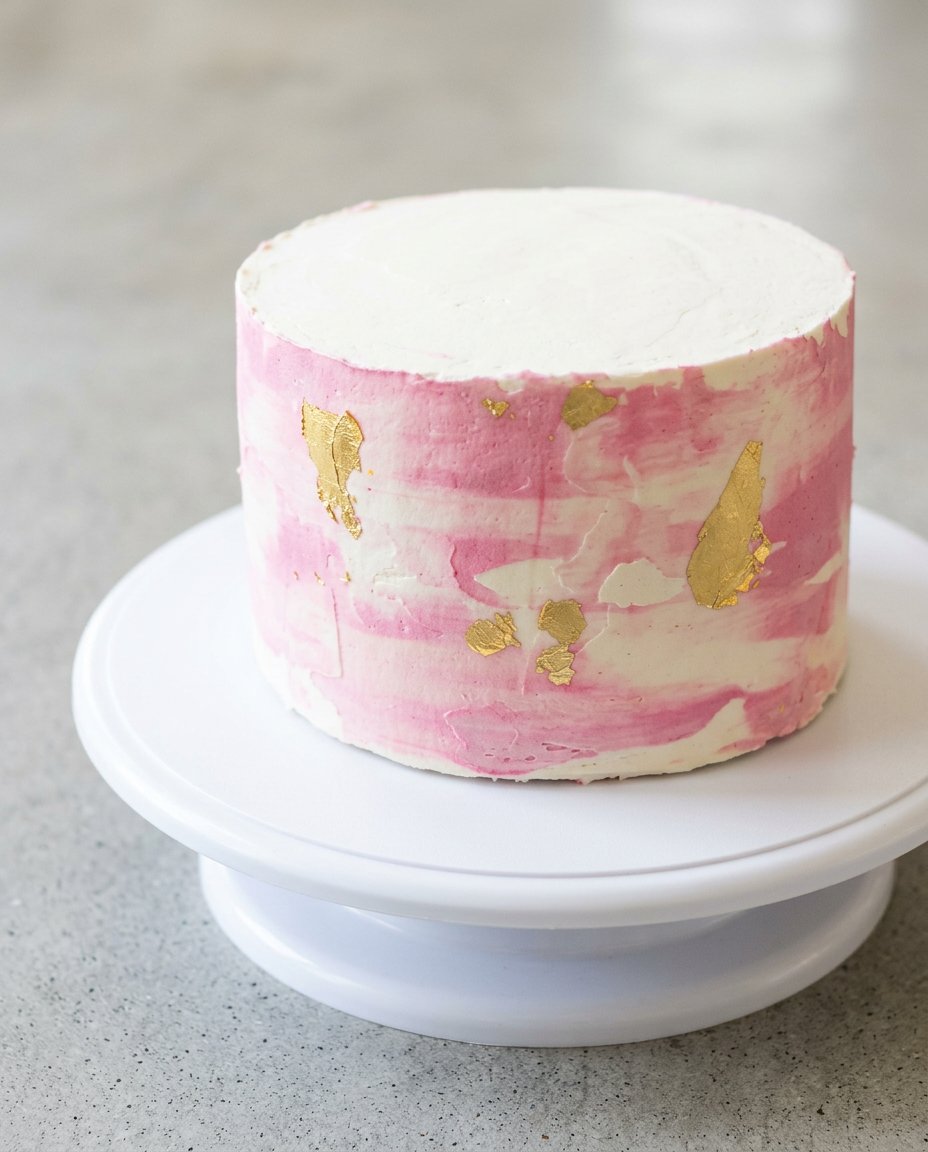
Hold your icing smoother against the side of the cake at a forty-five-degree angle and begin to rotate the cake stand slowly. As the cake turns, the smoother will catch the edges of the colored patches and smear them into the base layer, creating a soft transition between hues. The colors will begin to flow into one another, turning the blobs of frosting into a blended, artistic finish that looks incredibly sophisticated.
Step 6: Assess and Touch Up the Blend
Stop the rotation and look at the patterns created to see if there are any gaps or areas where the colors have become too thin. If needed, add a small dab of the reserved base color or a secondary tint to specific spots and give the stand another quick turn. Be careful not to overwork the frosting, as too many rotations will cause the colors to mix into a single muddy shade rather than remaining distinct.
Step 7: Clean the Top Edges
Use your offset spatula to gently pull the excess frosting from the top edge toward the center of the cake to create a flat surface. This helps define the shape of the cake and provides a clean finish that contrasts well with the textured look of the sides. Wipe your spatula clean after every stroke to avoid dragging secondary colors across the top of the primary base.
Step 8: Final Chill for Stability
Place the finished cake in the refrigerator for at least fifteen minutes to allow the buttercream to firm up and lock the colors in place. This short rest helps the texture become stable enough for transport or slicing, making sure your artistic work stays intact when it comes time to serve. The cold air will also give the frosting a slight matte finish that looks beautiful under warm kitchen lights.
Easy-Baker Texture Tricks
Temperature is the most important factor when working with this technique to keep the frosting from becoming too soft. If your kitchen is warm, chill the cake for five minutes between applying the base layer and adding the color patches to help the colors stay distinct. This prevents the tints from sliding down the sides of the cake before you have a chance to smooth them out with the icing smoother.
Always clean your icing smoother after every single rotation of the cake stand to keep the colors from looking muddy. If you leave excess frosting on the tool, you will drag old colors into new areas, which ruins the clean watercolor effect you are trying to achieve. Using a damp cloth to wipe the metal blade between turns will help it glide over the frosting for a much smoother finish on this moist devils food layer cake or any base you choose.
If the colors become muddy or blend too much during the smoothing process, the frosting is likely too warm or you are applying too much pressure. Stop immediately, chill the cake for ten minutes, and then add a few fresh dabs of the base color on top of the muddy areas. A single light pass with the smoother after chilling will often fix the issue without having to scrape off all your hard work.
To learn more about the technical aspects of frosting, you can read about how to blend watercolor buttercream to understand how different temperatures affect the flow of the pigments. Understanding how the fat in the butter interacts with the gel dyes will give you more control over the final look of your dessert.
Avoid using liquid food coloring for this specific design because it can thin out the buttercream and make it runny. Liquid colors often separate from the fat in the frosting, leading to streaks or beads of moisture that disrupt the smooth surface. Stick with gels or pastes to maintain the thick, luscious texture that makes this decorating style so successful on a weeknight timeline.
When holding the icing smoother, try to keep your arm tucked against your side to maintain a steady, unmoving position while the stand does the work. Moving your hand while the cake rotates will create waves and uneven ridges in the frosting rather than a flat, professional finish. Consistency in your hand position is the secret to a cake that looks like it came from an expensive boutique bakery.
Frequently Asked Questions
Which type of buttercream is best for this watercolor technique?
American buttercream is often the easiest choice for this design because it crusts slightly, which helps hold the colors in place. However, Swiss Meringue buttercream offers a much smoother glide for the icing smoother and results in a more professional, glossy finish. Both will work well as long as the frosting is at room temperature and has been beaten long enough to remove large air bubbles.
How do I fix large air bubbles in the frosting surface?
If you notice small holes or bubbles after smoothing, use a toothpick to pop them and then fill the gap with a tiny amount of frosting. Give the cake one final, very light pass with the icing smoother to level out the surface. To avoid this entirely, stir your buttercream by hand with a spatula for a minute before using it to knock out any excess air trapped during mixing.
Can I make this cake a day in advance?
Yes, this cake stores well in the refrigerator for up to three days if kept in an airtight container or a cardboard cake box. Be sure to take the cake out of the fridge about two hours before serving so the buttercream can soften back to its luscious, creamy state. Cold buttercream can be quite hard and will not deliver the melt-in-the-mouth texture that makes this recipe so indulgent.
Why are my colors bleeding into each other too much?
Colors usually bleed when the frosting is too soft or if the cake has been overworked with too many rotations of the stand. If you see the hues becoming a single muddy color, stop immediately and place the cake in the freezer for five minutes. This will firm up the butter and allow you to add a few fresh dabs of color on top to restore the distinct watercolor look.
Is it possible to do this technique on a square cake?
While it is possible, it is much more difficult because you cannot use a continuous rotation on the cake stand. You would need to smooth each side individually, which makes it harder to maintain a smooth transition at the corners. For the fastest and most efficient results, a round cake is highly recommended for the watercolor smear method.
How should I transport this cake to a party?
Make sure the cake is thoroughly chilled for at least an hour before moving it so the frosting is firm to the touch. Place it on a non-slip mat inside a sturdy cake box and keep it on a flat surface like the floor of your car rather than a tilted seat. Keeping the cake cool during transport will prevent the buttercream from softening and potentially sliding or smudging your artistic design.
Fast Flavor Swaps
You can easily adapt this look for different seasons by changing the color palette to match the holidays or special occasions. For a winter look, use shades of blue and silver, or try deep oranges and reds for a fall celebration that feels warm and inviting. This method works beautifully with a funfetti birthday layer cake recipe because the internal sprinkles provide a hidden pop of color that matches the artistic exterior.
Try an ombre variation by placing your darkest secondary color at the bottom of the cake and the lightest at the top before smoothing. As the icing smoother moves around the cake, it will create a soft gradient that feels modern and elegant without requiring complex piping skills. This version is especially popular for baby showers or bridal events where a soft, romantic aesthetic is desired.
If you want more texture, use the back of a small spoon instead of an icing smoother to create a scale-like pattern with the colored patches. Instead of a smooth rotation, you will press and lift the spoon across the surface to create small peaks and valleys that catch the light. This gives the cake a more tactile, rustic feel while still utilizing the quick and luscious watercolor blending method.
Quick Serving Ideas
When you are ready to bring this cake to the table, use a long, thin knife dipped in hot water to get the cleanest slices possible. Wipe the blade clean between every cut to make sure the watercolor frosting on the outside does not smear into the internal layers of the cake. This maintains the visual impact of the design from the first slice to the last, making the dessert feel like a true centerpiece.
This cake pairs beautifully with a simple cup of coffee or a light sparkling wine, as the richness of the buttercream benefits from a slightly acidic or bitter contrast. If you are serving this for a birthday, consider adding a few fresh flowers or a simple gold topper to the center to emphasize the artistic theme. It is a fantastic follow-up to a classic two layer yellow cake chocolate frosting if you want to show off your range of decorating skills.
For a truly indulgent experience, serve each slice with a small dollop of lightly sweetened whipped cream or a few fresh berries on the side. The tartness of raspberries or blueberries cuts through the sweet frosting and complements the visual colors on the outside of the cake. This simple addition makes a weeknight dessert feel like a high-end restaurant experience without any extra cooking time.
The Weeknight Wrap-Up
Mastering the art of the watercolor finish is a game-changer for anyone who wants to serve impressive desserts without spending hours in the kitchen. This technique proves that you do not need to be a professional artist to create a cake that looks like a masterpiece. By focusing on the temperature of your frosting and the speed of your rotation, you can produce a luscious, beautiful cake that will have everyone asking for your secret.
I encourage you to try different color combinations and see how they transform your favorite chocolate layer cake or vanilla base. Bakes like this are meant to be shared, so don’t forget to take a photo of your creation before the first slice disappears. It is the kind of recipe that makes any Tuesday night feel like a reason to celebrate with something sweet and visually stunning.
If you enjoyed this quick decorating tutorial, please share your results with me on social media and follow along for more fast and luscious recipes. You can find more inspiration on our Pinterest, Facebook, TikTok, and Telegram channels. Happy baking, and enjoy the process of creating something beautiful.