In Mediterranean kitchens, we understand that patience is the secret behind every sweet bite, a philosophy that makes these delicate Red Velvet Cake Pops a true labor of love.

There is a unique pleasure in crafting a dessert that fits entirely in the palm of your hand, offering a singular moment of sweet indulgence. When you prepare these Red Velvet Cake Pops, you are not merely baking a dessert; you are transforming a rich, cocoa-infused sponge into tender, melting spheres. The secret lies in the harmony between the fine crumb and the silky coating, a pairing that guarantees each bite remains moist and soft. Let us slow down the afternoon, brew a fresh pot of coffee, and appreciate the quiet satisfaction of rolling, chilling, and dipping these crimson gems.
What Makes the Texture of Red Velvet Cake Pops Sing
Prep: 40 min · Serves: 24 · Difficulty: Medium
- Velvet crumbs that melt in your mouth.
- Soft interior paired with a crisp shell.
- Rich cocoa flavors balanced with sweet vanilla.
- Beautiful crimson color makes every platter stunning.
- Fun to prepare with family and friends.
If you love the deep cocoa notes of a traditional red velvet cake, you will appreciate how this recipe condenses that rich experience into a single, melting mouthful.
Get The Full Cake Recipe
Print
Red Velvet Cake Pops
- Total Time: 1 hour 25 mins
- Yield: 24 pops
Description
These elegant red velvet cake pops feature a moist, cocoa-infused sponge center encased in a crisp, glossy candy shell. Perfectly bite-sized and beautiful, they are a refined dessert choice for any gathering or peaceful afternoon coffee break.
Ingredients
- Red velvet cake mix
- Vegetable oil
- Eggs
- Water
- Pillsbury vanilla frosting
- White candy melts
- Red candy melts
- Melting aid
Instructions
- Bake the cake. Whisk eggs, cake mix, oil, and water, then bake in a prepared dish until set; cool completely to room temperature.
- Trim the edges. Use a serrated knife to remove all outer crusts and caramelized top layers, leaving only the soft interior.
- Crumble the sponge. Break the cake into fine, uniform crumbs using your hands, ensuring no large chunks remain.
- Bind the dough. Mix in the vanilla frosting until a smooth, pliable dough forms that holds its shape like soft playdough.
- Shape the spheres. Scoop the mixture using a cake pop former and roll between your palms into smooth, uniform balls.
- Secure the sticks. Dip the end of each stick into melted white candy, insert into the cake balls, and allow to set as a glue.
- Chill the pops. Place the cake pops in the freezer for exactly fifteen minutes to firm the structure before dipping.
- Prepare the coating. Melt white candy with a melting aid until smooth and thin, then transfer to a deep, narrow glass.
- Dip and decorate. Submerge each pop into the candy, tap off excess, allow to set, and drizzle with melted red candy.
Notes
- Ensure cake balls are chilled but not frozen to prevent cracking the coating during the dipping process.
- Use exactly the recommended amount of frosting to keep the cake balls dense enough to stay securely on their sticks.
- Avoid stirring melted candy vigorously to keep air bubbles out of your final glossy shell.
- Apply decorative drizzles only after the base candy coating has hardened completely to ensure clean, professional lines.
- Prep Time: 40 mins
- Cook Time: 30 mins
- Category: Dessert
- Method: Baking and Dipping
- Cuisine: Mediterranean-inspired
From the Mediterranean Pantry

To achieve the perfect melting texture, we gather ingredients that provide structure, moisture, and a balanced sweetness. Each element plays a quiet but essential role in guaranteeing that the cake crumbles beautifully and holds its shape on the stick. By choosing the right components, we create a treat that is sweet, never cloying.
- Red Velvet Cake Mix: This provides the classic cocoa depth and beautiful ruby color that forms the heart of our sweet spheres.
- Vegetable Oil: Unlike butter, this fat keeps the baked sponge exceptionally moist and pliable when crumbled.
- Pillsbury Vanilla Frosting: A small amount binds the crumbs together into a tender dough that glides through like butter.
- Wilton Candy Melts: These melt into a smooth, glossy coating that seals the moisture inside each individual bite.
- Melting Aid: This helps thin the melted candy coating, creating a sleek finish without making it heavy.
| Ingredient | Why It Matters |
|---|---|
| Red Velvet Cake Mix | Establishes the cocoa foundation and distinctive crimson color. |
| Vegetable Oil | Keeps the baked crumb tender and easy to shape. |
| Vanilla Frosting | Binds the crumbled cake into a smooth, cohesive dough. |
| Candy Melts | Creates a crisp, glossy protective shell around the cake. |
The Method, Step by Step

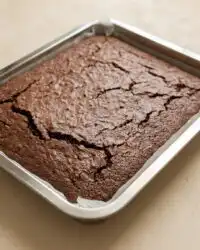
Step 1: Baking the Crimson Sponge
Begin by whisking the eggs, cake mix, vegetable oil, and water in a spacious bowl until the batter is smooth and fragrant. Pour the rich, red batter into a baking dish prepared with nonstick spray, smoothing the surface with a spatula. Bake the cake according to the package directions, watching for the moment the kitchen fills with the scent of sweet cocoa and the center springs back to the touch. Remove it from the oven and let it cool completely to room temperature on a wire rack.
Step 2: Trimming the Golden Edges
Once the cake has cooled, use a sharp serrated knife to trim away the outer crusts and caramelized top layers. These dry pieces do not absorb moisture well and can cause your finished treats to fall apart during the dipping process. By removing them, you make sure that only the softest, most uniform red crumbs are used. Place these trimmings aside to enjoy with a cup of hot tea later in the day.
Step 3: Crumbling with Care
Crumble the trimmed cake with your hands into a large, clean mixing bowl, rubbing the pieces between your palms. Work patiently until the entire cake is transformed into a pile of fine, uniform red sand with no large chunks remaining. The finer you crumble the cake, the smoother the final texture will be when you bite into it. Take your time with this step, appreciating the soft feel of the cake between your fingers.
Step 4: Binding and Shaping Red Velvet Cake Pops
Add two tablespoons of creamy vanilla frosting to the bowl of crumbled cake, stirring gently with a wooden spoon. After the frosting is distributed, use your hands to work it thoroughly into the crumbs until a cohesive, pliable dough forms. The mixture should feel like soft playdough and hold its shape easily when squeezed. If it feels too dry, you can add a tiny touch more frosting, but be careful not to make it greasy.
Step 5: Rolling the Spheres
Scoop the cake mixture and shape it into uniform balls using a cake pop former that is about one and a quarter inches in diameter. Press the dough firmly into the mold to compress the crumbs, then remove any excess that squeezes out of the sides. Gently release the ball and roll it between your damp palms to refine its shape into a smooth, perfect sphere. Set each finished ball onto a baking sheet lined with parchment paper while you work through the remaining dough.
Step 6: Securing the Sticks
Melt about a quarter cup of white candy melts in a small, microwave-safe bowl, heating in short thirty-second intervals to prevent burning. Dip the end of a cake pop stick about half an inch into the warm, glossy candy coating. Gently insert the coated end of the stick into the center of a cake ball, pushing it slightly more than halfway through. This small dab of melted candy acts as a strong glue, anchoring the cake ball securely to the stick as it cools.
Step 7: The Gentle Chill
Place the entire baking sheet of cake pops into the freezer for exactly fifteen minutes to firm up. This brief rest is a crucial step; it hardens the cake mixture and sets the candy glue, preventing the balls from sliding off. Do not leave them in the freezer for too long, or they will expand and crack the outer shell when dipped. The cake should feel firm to the touch but not frozen solid when you remove them.
Step 8: Preparing the Glossy Coating
While the cake pops rest, melt the remaining white candy melts in a narrow, deep microwave-safe cup. Heat them in short intervals, stirring with a rubber spatula in between, until the mixture is completely liquid and smooth. Stir in one tablespoon of melting aid chips, which will thin the coating to a pourable, silk-like consistency. Pour the mixture into a tall, narrow glass to make the dipping process smooth and effortless.
Step 9: The Perfect Dip and Drizzle
Hold a chilled cake pop by the stick and lower it straight down into the cup of melted candy in one single motion. Pull it straight back up, then hold the stick horizontally and gently tap your wrist to allow the excess coating to drip back into the cup. Once the coating has set, melt a handful of red candy melts and use a spoon to drizzle thin, elegant lines across each sphere. Place the finished treats upright in a piece of styrofoam to dry completely before serving.
Mediterranean Baker’s Notes

The temperature of your ingredients is critical when assembling cake pops of any flavor. If your cake balls are too cold and your melted candy is too hot, the sudden temperature shock will cause the outer shell to crack as it cools. For more guidance, check out this detailed red velvet cake pop tutorial which highlights similar temperature rules. Always let the melted coating cool slightly before dipping, and make sure the cake balls are chilled but not frozen.
If your cake balls keep falling off the sticks during dipping, the cake mixture might be too dry or too heavy. Make sure you use the exact amount of frosting; too little will make the dough crumbly, while too much makes it heavy and greasy. If a ball feels loose on the stick, slide it off, mix in a tiny pinch of dry crumbs, and re-roll the ball before chilling again.
Avoid stirring the melted candy melts too vigorously, as this introduces unwanted air bubbles into the coating. If you notice tiny bubbles on your dipped treats, gently tap the stick on the edge of the cup to release them before the candy sets. You can also use a toothpick to pop any stubborn bubbles that remain on the surface.
When dipping, remember to submerge the cake ball completely in one smooth motion, covering the base where the stick meets the cake. This creates a secure seal that prevents the cake from sliding off or leaking moisture. Never stir the cake pop around in the cup, as the suction can easily pull the cake right off its stick.
If your candy coating becomes thick and gloppy, it has likely overheated or come into contact with moisture. To fix this, stir in a teaspoon of coconut oil or cocoa butter to restore its liquid shine. Never add water to thick candy melts, as even a single drop will cause the entire bowl to seize into a dry, unusable paste.
For the neatest presentation, make sure the drizzle is applied only after the base coat has hardened completely. Use a piping bag with a tiny tip, or a fork dipped in contrasting candy, and move your hand back and forth in a quick, confident motion. This technique yields beautiful, clean lines that mimic the work of a professional pastry chef.
Frequently Asked Questions
How do you make cake pops from scratch?
To make these treats from scratch, you begin by baking a traditional buttermilk cocoa sponge from scratch. Once cooled, you trim, crumble, and mix the cake with homemade cream cheese frosting before shaping them into rounds. This scratch method takes a bit more time but allows you to control the depth of cocoa flavor and the sweetness of the dough.
Can you make red velvet cake pops with box mix?
Yes, using a high-quality box mix is a wonderful, time-saving method that yields excellent results. The box mix guarantees a consistent moisture level and a soft texture that crumbles easily into the perfect base. It is a fantastic option for busy bakers who want to focus their energy on the art of shaping and dipping.
What frosting goes best with red velvet cake pops?
While creamy vanilla frosting is easy to work with, cream cheese frosting is the traditional pairing that matches the cocoa sponge beautifully. The tangy notes of cream cheese balance the rich sweetness of the candy melts, creating a well-rounded flavor. If you choose cream cheese, use a firm version so the balls do not become too soft.
Do red velvet cake pops need to be refrigerated?
No, these treats are best kept at room temperature in an airtight container. Refrigeration can introduce humidity, which leads to unsightly condensation forming on the smooth candy shell. Keep them in a cool, dry pantry away from direct sunlight to preserve their glossy finish and soft interior.
How long do red velvet cake pops last?
When stored properly at room temperature, these sweet bites will remain fresh and delicious for up to five days. The candy coating acts as a protective seal, locking in the cake’s natural moisture so it stays soft and tender. If you need to store them longer, they can be frozen for up to six weeks.
Can you freeze red velvet cake pops?
Yes, you can freeze them either before or after they have been dipped in the candy coating. Place them in a single layer on a baking sheet to freeze solid, then transfer them to an airtight container with parchment paper between layers. When you are ready to serve, thaw them slowly in the refrigerator, then let them reach room temperature.
Why are my cake pops cracking or falling off the stick?
Cracking is usually caused by a rapid temperature change, such as dipping cold cake balls into hot candy coating. If they are falling off the stick, the cake balls may be too heavy from excess frosting, or the stick was not dipped in candy glue first. Make sure your cake pops are cool rather than freezing cold when dipping.
What is the secret to perfect cake pops?
The secret is patience during the resting and cooling steps, allowing the cake balls to set completely before dipping them. Always trim the dry edges of the cake to ensure a uniform, tender crumb that binds seamlessly. Additionally, keeping your candy coating at a warm, fluid temperature prevents a thick, clumpy finish.
Make It Yours
For a beautiful citrus twist, you can fold a teaspoon of orange blossom water or finely grated orange zest into the cake dough. The bright, floral citrus notes pair wonderfully with the deep cocoa flavor, offering a classic Mediterranean profile. If you prefer a lighter crumb, you can see how to make classic vanilla cake pops using a similar method with white sponge cake.
Introducing a nutty, textured finish is easy: roll the freshly dipped cake balls in finely chopped pistachios or toasted almonds before the coating sets. The salty crunch of the nuts balances the sweet candy coating beautifully, creating a satisfying contrast of textures. This variation brings a delightful rustic charm to the dessert platter, reminiscent of traditional syrup-soaked pastries.
You can also substitute the vanilla frosting with a rich cream cheese frosting to stay true to the classic red velvet cake pairing. The slight tang of the cream cheese cuts through the sweetness of the candy coating, creating a perfectly balanced bite. Be sure to use the cream cheese frosting sparingly to maintain the structural integrity of the balls.
Coffee & Cake Pairings
There is something deeply satisfying about serving these delicate treats on a quiet, sun-soaked afternoon. Arrange the crimson spheres on a vintage ceramic platter, letting their glossy surfaces catch the light of the fading day. Pair these sweet bites with a small cup of strong Turkish coffee or a fragrant dark roast, allowing the bitter notes of the coffee to balance the rich, sweet candy shell. This simple ritual turns a humble dessert into an occasion to slow down and enjoy the present moment.
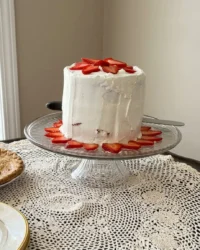
If you are hosting a celebration, these treats make a stunning addition to any dessert table alongside a grand centerpiece. To see how these bite-sized sweets fit into a larger dessert spread, you can view the red velvet layer cake story for more presentation inspiration. Displaying the pops upright in a block of rustic wood or wrapped in delicate cellophane tied with ribbon adds a touch of elegant charm that guests will love.

A Quiet Last Note
As the last drizzle of candy sets, we are reminded that some of the best things in life require a gentle touch and a bit of patience. Baking is a journey of transformation, turning simple pantry staples into moments of pure joy shared around a table. These crimson bites represent the sweet reward of taking your time to craft something truly special.
If you find yourself dreaming of a larger creation, you can always transition these flavors into a magnificent red velvet layer cake for your next gathering. Whichever path you choose, let the process be peaceful and the results be shared with those you love. I hope these sweet creations bring a sense of warmth and comfort to your kitchen and table.
Please share your baking journey with us and let us know how your treats turned out. You can find more inspiration and connect with our baking community on Pinterest, Facebook, and Telegram. Let us continue to bake, rest, and celebrate the sweet moments together.


