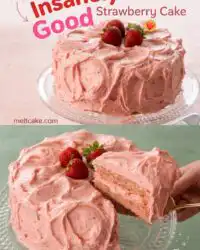
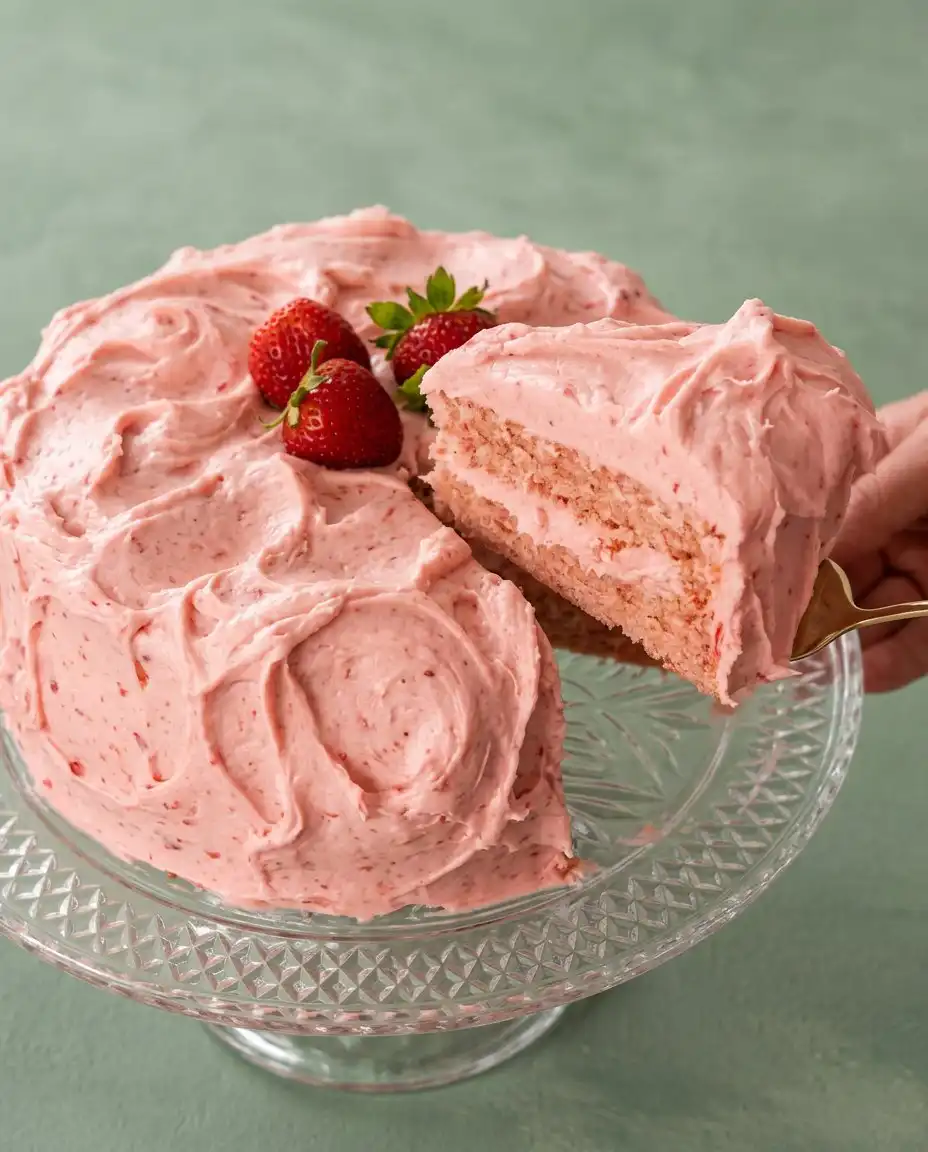
A crisp, set crust protects the tender crumb within, where precision ensures the Strawberry Cake holds its structure while delivering a concentrated, molten fruit experience.

The challenge of fruit-based sponges often lies in the moisture content, which threatens to destabilize the crumb. By reducing the strawberry puree to a precise volume, we achieve an intense flavor without compromising the protein network of the flour. This Strawberry Cake relies on a stable emulsion of fats and sugars to create a texture that remains firm yet dissolves effortlessly on the palate. Achieving this balance requires careful attention to the temperature of your ingredients and the mechanical aeration of the butter.
Why Precision Pays Off Here
Prep: 25 min · Serves: 12 · Difficulty: Advanced
- The reduction technique intensifies natural berry flavor.
- Cream cheese frosting provides structural stability.
- The crumb maintains perfect moisture levels.
- Egg whites create a refined, light texture.
- Properly emulsified batter prevents common density issues.
Precision ensures this strawberry cake achieves a professional finish.
Get The Full Cake Recipe
Print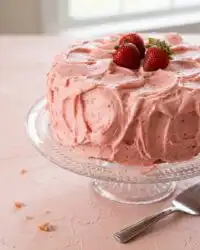
Strawberry Cake
- Total Time: 1 hour 20 mins
- Yield: 12 servings
Description
This professional-grade strawberry cake utilizes a precise fruit reduction to achieve intense flavor without compromising the structural integrity of the crumb. Finished with a stable, velvety cream cheese frosting, this dessert offers a sophisticated balance of tender sponge and vibrant berry notes.
Ingredients
- 450g fresh strawberries
- 227g unsalted butter, softened to 65°F
- Egg whites
- All-purpose flour
- Granulated sugar
- Baking powder
- Salt
- Baking soda
- Vanilla extract
- Whole milk
- Cream cheese
- Powdered sugar
Instructions
- Reduce the strawberries. Simmer 450 grams of processed strawberries in a saucepan for 25 minutes until reduced to exactly 240 milliliters, then cool to room temperature.
- Sift dry ingredients. Whisk together the flour, baking powder, salt, and baking soda in a separate bowl to aerate and ensure even distribution.
- Cream the butter. Beat the softened butter and sugar in a stand mixer for five minutes until the mixture is pale, aerated, and fluffy.
- Integrate egg whites. Add egg whites and vanilla extract to the butter mixture, beating for one minute to build a strong protein structure.
- Mix the batter. Alternately add the flour mixture and milk with the strawberry reduction on low speed, mixing only until just combined.
- Bake the layers. Divide into two nine-inch pans and bake at 350°F for 30 minutes until the internal temperature reaches 205°F.
- Prepare the frosting. Beat cream cheese and butter until smooth, then gradually add powdered sugar and remaining strawberry reduction until creamy.
- Assemble the cake. Apply an even layer of frosting between cooled cake layers and finish with a smooth crumb coat and final exterior layer.
Notes
- Always measure ingredients by weight using a digital scale to ensure consistent batter chemistry.
- Verify that your milk, eggs, and reduction are at room temperature to prevent the butter emulsion from breaking.
- Use a probe thermometer to confirm the cake reaches an internal temperature of 205°F for the perfect set.
- Chill the frosting briefly if it becomes too soft, ensuring the layers stay secure during the final assembly.
- Prep Time: 25 mins
- Cook Time: 55 mins
- Category: Dessert
- Method: Baking
- Cuisine: Modern American
The Working Components
Selecting high-quality ingredients is the first step in building a reliable cake structure. Each component serves a technical purpose, from the protein content in the flour to the specific fat ratio in the cream cheese, ensuring the final product does not collapse under its own weight.
- Fresh Strawberries: These provide the base for our reduction, which delivers flavor without excessive water content.
- Unsalted Butter: At 227 grams, the butter must be at exactly 65°F to allow for optimal air entrapment during the creaming process.
- Egg Whites: Using only the whites avoids the fat in yolks, leading to a cleaner strawberry profile and a lighter crumb.
- All-Purpose Flour: This provides the necessary gluten structure to support the height of a multi-layer cake.
- Cream Cheese: This dense fat source stabilizes the frosting, preventing it from weeping or sliding between layers.
- Whole Milk: The liquid component aids in the hydration of starches and the gelatinisation process during baking.
| Ingredient | Why It Matters |
|---|---|
| Strawberry Puree | Concentrates flavor without adding excess moisture to the batter |
| Egg Whites | Creates a structural foam that lightens the overall cake density |
| Granulated Sugar | Tenderizes the crumb by interfering with excessive gluten development |
| Baking Powder | Provides the primary chemical leavening for a consistent vertical rise |
The Tested Procedure
Step 1: Execute the Strawberry Reduction
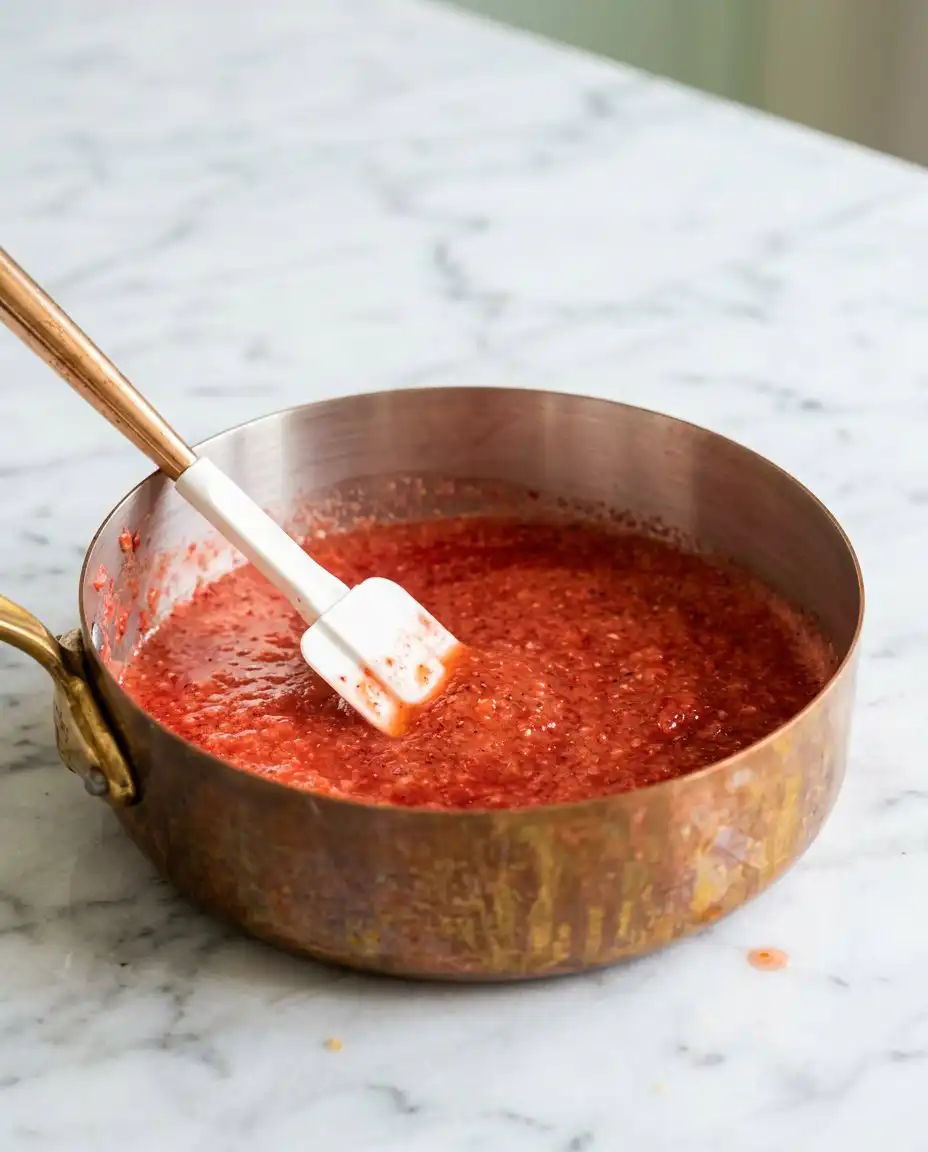
Begin by processing 450 grams of strawberries into a smooth liquid. Simmer this mixture in a heavy-bottomed saucepan for approximately 25 minutes until it reduces to exactly 240 milliliters, or one cup. This process, known as evaporation, is critical because it removes water that would otherwise weaken the gluten structure, leaving behind concentrated pectin and flavor. The liquid should be thick enough to coat the back of a spoon and must be cooled to room temperature before it is introduced to the fat-based batter components.
Step 2: Sift the Dry Structural Elements
Whisk together the flour, baking powder, salt, and baking soda to ensure even distribution of the leavening agents. Sifting is not merely for removing lumps; it aerates the flour, which allows for a more uniform crumb once the liquid ingredients are added. The salt acts as a flavor enhancer, but more importantly, it strengthens the gluten bonds, providing a more resilient structure that can hold the weight of the strawberry frosting later. Keep these dry ingredients in a separate bowl until the creaming stage is complete.
Step 3: Achieve the Creaming Emulsion
Place the softened butter in your stand mixer and beat on medium speed for 60 seconds. Gradually add the sugar and continue beating for a full five minutes until the mixture reaches a pale, aerated state known as the creaming stage. This mechanical action creates millions of tiny air pockets that will expand in the oven. If the butter is too warm, it will melt and fail to hold air; if too cold, it will not expand, resulting in a dense, greasy sponge.
Step 4: Integrate the Protein Network
Incorporate the egg whites and vanilla extract into the butter mixture, beating for one minute. The egg whites must be at room temperature to prevent the butter from seizing, which would break the emulsion. As you beat, the proteins in the egg whites wrap around the air bubbles created in the previous step, reinforcing the walls of the crumb. The mixture should appear voluminous and slightly glossy before moving to the next phase.
Step 5: Mix the Strawberry Cake Batter
Set the mixer to the lowest speed to avoid overworking the gluten. Add the flour mixture in three parts, alternating with the milk and the cooled strawberry reduction. Start and end with the flour to prevent the batter from curdling or separating. Mix only until the last streaks of flour disappear, as over-mixing will lead to a tough, bready texture rather than a tender melt. The batter should be thick, pale pink, and hold its shape when dropped from a spatula.
Step 6: Thermal Setting and Baking
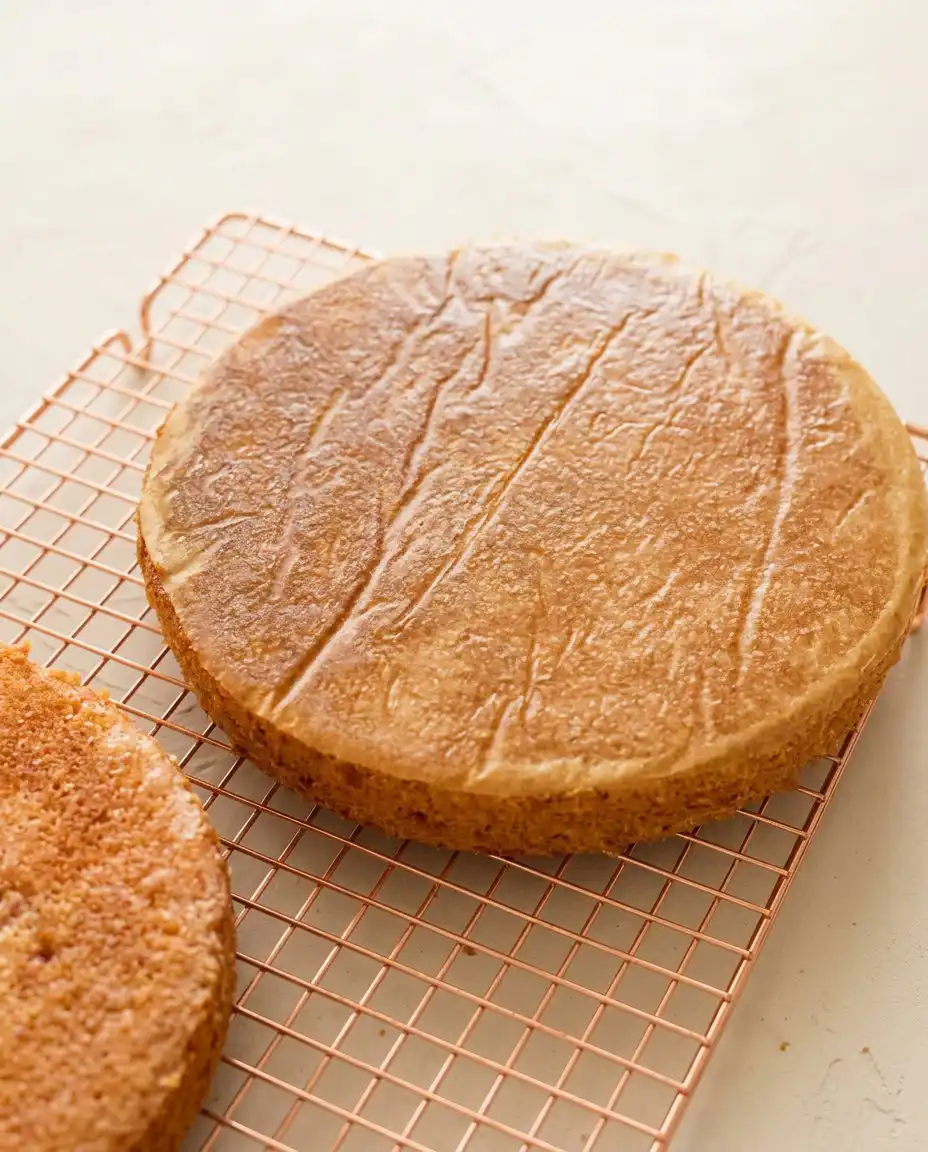
Divide the batter equally between two lined nine-inch pans and bake at 350°F for 30 minutes. Use a probe thermometer to check for an internal temperature of 205°F, or look for the moment the cake begins to pull 2 millimeters away from the sides of the pan. This thermal transition, where proteins set and starches gelatinise, happens quickly. The thirty-second window between perfectly set and overbaked is the difference between a moist crumb and a dry one.
Step 7: Stabilize the Frosting Emulsion
Beat the cream cheese and butter together until completely smooth and free of lumps. Add the powdered sugar one cup at a time, alternating with small amounts of the remaining strawberry reduction. The goal is a high-fat emulsion that remains stiff enough to hold its shape but soft enough to spread. If the frosting feels too soft, chill it for 15 minutes to allow the fats to recrystallize before attempting to assemble the layers.
Step 8: Final Assembly and Structural Set
Place the first cooled layer on a cake stand and apply a level 240-milliliter layer of frosting using an offset palette knife. Top with the second layer and apply a thin crumb coat to seal in any loose particles. After a brief chill, apply the remaining frosting in smooth, confident strokes. This final layer of fat-rich frosting protects the internal moisture of the cake, ensuring it stays fresh for days. Structure is what makes the melt possible, and this layering technique proves it.
Precision Notes
Temperature control is the primary factor in a successful bake. Ensure your milk, eggs, and strawberry reduction are all within 5 degrees of room temperature (70°F) before mixing. If cold milk hits a warm butter emulsion, the fat will seize and create a curdled batter that lacks the necessary air pockets for a proper rise.
Weighing your ingredients in grams rather than using volume measurements is the only way to guarantee consistency. A cup of flour can vary by 30 grams depending on how it is scooped, which is enough to turn a tender cake into a dry one. Using a digital scale eliminates this variable and ensures the ratio of protein to moisture is exactly what the recipe requires for this fresh strawberry cake to succeed.
If your cake layers are doming excessively in the center, your oven temperature may be too high, causing the edges to set before the center can rise. You can fix this by using dampened fabric baking strips around the outside of the pans to insulate the edges. This promotes a flat, even bake that requires less trimming and results in a more professional appearance.
Properly how to achieve stable fruit cake reductions involves patience during the simmering stage. If you rush the reduction by using high heat, you risk scorching the natural sugars, which will introduce a bitter note to your cake. Simmer slowly and stir frequently with a silicone spatula to ensure the heat is distributed evenly across the bottom of the pan.
If your frosting appears broken or grainy, it is likely because the butter and cream cheese were at different temperatures. To fix this, you can gently warm the bowl over a pot of simmering water for 10 seconds, then beat it again on high speed. This brief application of heat allows the fats to re-emulsify and smooth out into a silky consistency.
Precision for the sake of mouthfeel extends to the cooling process. Never frost a cake that is even slightly warm to the touch, as the residual heat will melt the butter in the frosting, causing the layers to slide. Allow the cakes to reach an internal temperature of exactly 70°F on a wire rack to ensure the structural integrity of the final build.
Frequently Asked Questions
What is the secret to a moist strawberry cake?
The secret lies in the strawberry reduction and the use of the creaming method. By removing excess water from the berries, you add flavor without thinning the batter. Meanwhile, beating the butter and sugar for a full five minutes creates a structural lattice that traps moisture without becoming gummy.
How do I get the most strawberry flavor in the cake?
Concentration is the key to intense flavor. Reducing one pound of berries down to a single cup ensures the flavor is potent enough to stand up against the flour and sugar. Using fresh, ripe berries will always yield a superior result compared to out-of-season fruit or artificial extracts.
Can I use frozen strawberries for this recipe?
Yes, frozen strawberries work well for the puree reduction as they are often picked at peak ripeness. However, they contain more water due to the freezing process, so they may require up to 45 minutes of simmering to reach the correct one-cup volume. Always measure the final volume of the reduction rather than relying on a timer.
Why did my strawberry cake turn out dense?
Density usually occurs from over-mixing the flour or using ingredients that were too cold. When flour is over-mixed, gluten becomes too strong and rubbery. Additionally, cold ingredients prevent the proper emulsion of fats, meaning the air pockets needed for a light crumb never form during the creaming stage.
How should I store this cake to keep it fresh?
Because of the cream cheese in the frosting, this cake should be stored in the refrigerator if the ambient temperature is above 70°F. However, for the best texture, always allow a slice to sit at room temperature for 20 minutes before eating. Cold butter-based cakes often feel dry because the fats are solid; letting them warm up restores the melt-in-the-mouth quality.
Can I make the strawberry reduction in advance?
The reduction can be made up to three days in advance and stored in the refrigerator. This is actually preferred as it ensures the mixture is completely cold before it is added to the batter. Just make sure to stir it well before measuring to ensure the pectin and solids are evenly distributed.
Considered Adjustments
For a variation that introduces a different textural contrast, you might consider a strawberry crunch cake approach. By adding a layer of toasted freeze-dried strawberries and crushed vanilla wafers between the layers, you introduce a mechanical crunch that offsets the creamy frosting. This does not change the base science of the sponge but adds a complex mouthfeel that many find appealing for celebratory events.
If a more traditional European profile is desired, you can replace the cream cheese frosting with a Swiss meringue buttercream. This involves heating egg whites and sugar to 160°F before whipping them into a stable foam and slowly incorporating cool butter. The resulting frosting is less sweet and more buttery, providing a sophisticated finish that highlights the natural acidity of the reduced strawberry puree. These variations should always be measured by weight to maintain the established balances of the recipe.
Serving the Structure
When plating this dessert, use a sharp, thin-bladed knife dipped in hot water and wiped dry between each cut. This technique ensures clean slices where the distinct layers of cake and frosting are visible without compression. The structural skin of the frosting should be firm, providing a clean break when the fork enters the slice. Serving on a chilled plate can help maintain the integrity of the cream cheese frosting in warmer environments.
Consider pairing a slice with a lightly sweetened herbal tea or a dry sparkling wine. The acidity in the wine cuts through the richness of the butter, while a light tea complements the floral notes of the fresh berries. For a more casual presentation, a simple dollop of unsweetened whipped cream can provide a textural bridge between the dense cake and the sweet frosting. This presentation style is reminiscent of a strawberry shortcake but with the added complexity of a professional layer cake.
If serving at a large gathering, maintain the cake’s temperature by keeping it in a cool, shaded area. The butter-heavy structure will soften if left in direct sunlight, which may lead to the layers shifting. Plating each piece individually just before serving is the best way to ensure every guest receives a slice that looks as precise as it did when first assembled.
What the Technique Gives You
Mastering the strawberry reduction and the creaming emulsion provides you with a versatile set of skills applicable to many pastry disciplines. This recipe proves that flavor does not have to come at the expense of structure. By weighing your ingredients and respecting the thirty-second window of the bake, you create a dessert that is as technically sound as it is delicious. The result is a sponge that holds its shape under the weight of a rich frosting while maintaining a tender, dissolving crumb.
I encourage you to trust your digital scale and your probe thermometer as you tackle this bake. The discipline of the pastry bench is what allows for such consistent results every time you preheat your oven. If you enjoyed this methodical approach to fruit-based cakes, you may also find our guide to strawberry tres leches cake useful for exploring different hydration levels in sponges.
Please share your results and tag us in your progress photos as you refine your technique. Connecting with other ambitious bakers is a vital part of the learning process in French and British pastry traditions. You can find more technical guides and community support on our social channels: