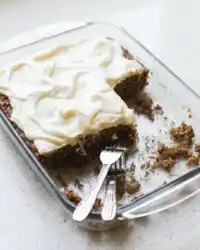
The moment the bright mango slices meet the airy whipped cream, a fragrance of late afternoon sun fills the kitchen, promising a slice that melts like a quiet dream on a summer evening.

Making a Classic Mango Sponge Cake requires a soft touch and the kind of patience that turns a few humble eggs into a gossamer-light masterpiece. This dessert captures the essence of a Mediterranean summer, where the heat is balanced by the cool, refreshing touch of fruit and cream. The texture is the true hero here, offering a crumb so tender that it feels like it might dissolve upon reaching the tongue. Each layer is a study in balance, holding the weight of the fruit without ever losing its signature cloud-like lift.
Why This Classic Mango Sponge Cake Melts the Way It Does
Prep: 30 min · Serves: 6 · Difficulty: Medium
- Tender crumb that glides through like butter.
- Natural sweetness that never feels cloying.
- Glossy fruit slices in every single bite.
- Airy texture achieved through patient whisking.
- Radiant appearance suitable for any garden gathering.
This recipe offers the unhurried grace of a Mediterranean sunset for those who appreciate mini vanilla layer cakes but desire a fruit-forward finish.
Get The Full Cake Recipe
Print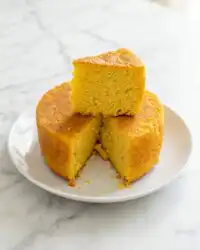
Classic Mango Sponge Cake
- Total Time: 3 hours
- Yield: 6 servings
- Diet: Vegetarian
Description
Experience the essence of a Mediterranean summer with this light-as-air sponge cake layered with fresh mango ribbons and decadent whipped cream. This elegant dessert offers a delicate, melting texture perfectly balanced by the natural sweetness of sun-ripened fruit.
Ingredients
- Large egg yolks
- Cornstarch
- Fresh mangoes
- Thickened cream
- Granulated sugar
- Vegetable oil
- All-purpose flour
- Baking powder
- Salt
- Vanilla essence
- Egg whites
- Vanilla extract
Instructions
- Prepare the base. Preheat oven to 160°C and line an 8-inch cake tin with parchment; whisk hot water and sugar until dissolved.
- Whisk the yolks. Add egg yolks and vanilla to the sugar water, whisking until the mixture forms a pale, thick ribbon.
- Incorporate dry ingredients. Gradually whisk in oil, then gently fold in sifted flour, baking powder, cornstarch, and salt.
- Fold the meringue. Beat egg whites with remaining sugar to stiff peaks, then carefully fold into the yolk batter in three parts.
- Bake the cake. Pour into the prepared tin and bake for 40 to 50 minutes until golden and springy to the touch.
- Cool upside down. Invert the pan on a wire rack immediately to prevent collapse; chill thoroughly before slicing.
- Prepare the cream. Whisk chilled thickened cream with sugar and vanilla until stiff, snow-like peaks form.
- Slice the layers. Cut the cooled sponge into three even layers using a long, sharp serrated knife.
- Assemble the layers. Place a layer on a turntable, spread with cream and mango slices, then repeat to stack.
- Final decorative finish. Frost the exterior with remaining cream, pipe a border, and top with fresh mango cubes before chilling for two hours.
Notes
- Ensure your mixing bowls and whisks are thoroughly chilled to achieve the best stability for the whipped cream.
- Sift the dry ingredients twice to eliminate any clumps and ensure a perfectly uniform, gossamer-light crumb.
- Use a wide rubber spatula to fold the meringue using a gentle, sweeping motion to keep the air bubbles intact.
- Select mangoes that are fragrant and firm to prevent excess juices from compromising the stability of the cream.
- Peel off the thin caramelized crust of the chilled sponge before layering to create a superior, uniform mouthfeel.
- Prep Time: 30 mins
- Cook Time: 50 mins
- Category: Dessert
- Method: Baking
- Cuisine: Mediterranean
Ingredients for the Cake & the Soak
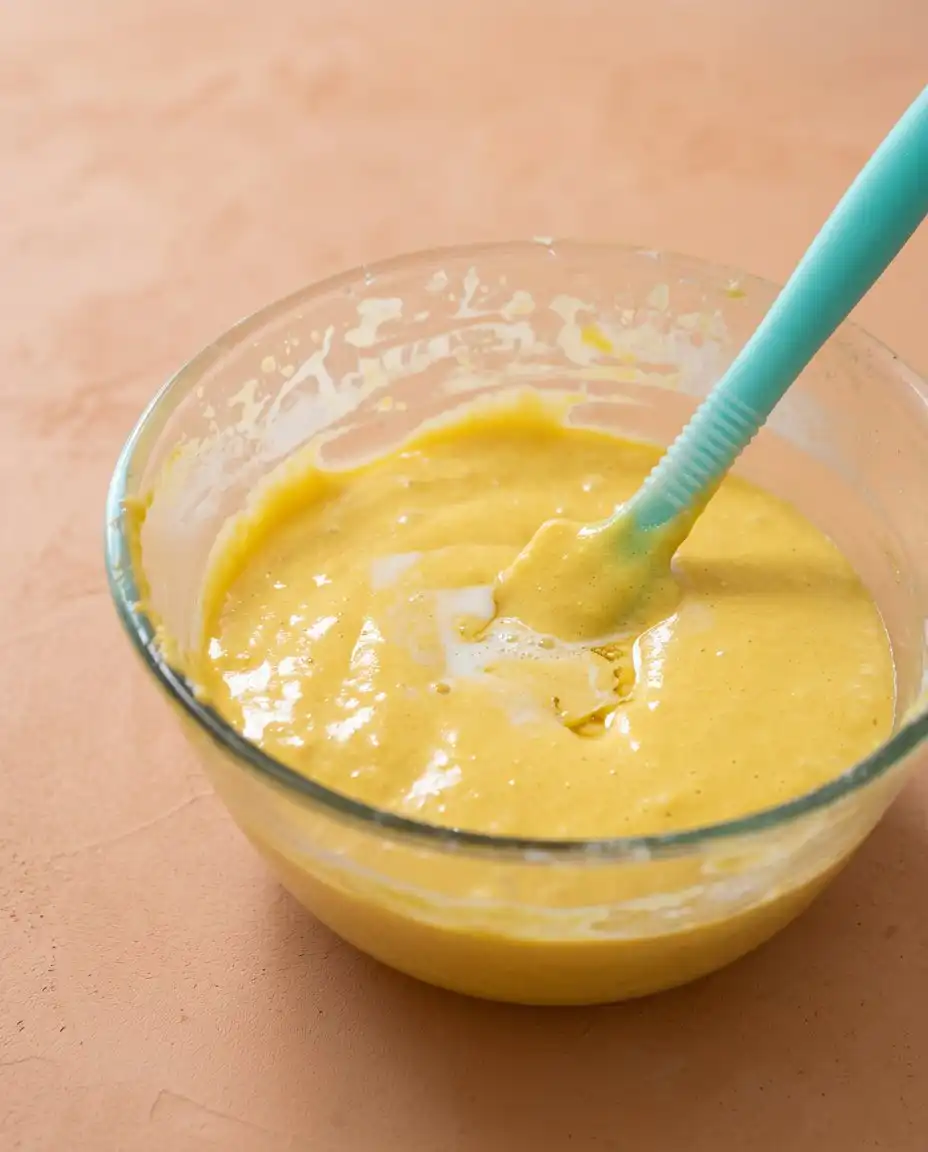
The secret to a cake that melts in the mouth lies in the quality of the pantry staples and the temperature of the air as you whisk. We rely on the structural integrity of the eggs and the fine grain of the flour to create a foundation for the fruit and cream.
- Large Egg Yolks: These provide the fat and golden color that form the rich heart of our sponge.
- Cornstarch: By breaking the gluten bonds, this ingredient guarantees a crumb that remains tender and soft.
- Fresh Mangoes: We look for fruit that is fragrant and yielding, offering a natural acidity to balance the sugar.
- Thickened Cream: This acts as the silken glue that holds the airy layers together while providing a cool mouthfeel.
- Granulated Sugar: It serves both as a sweetener and a stabilizer for the delicate meringue structure.
- Vegetable Oil: A small amount of fat keeps the sponge moist even after it has rested in the fridge.
| Ingredient | Why It Matters |
|---|---|
| Egg Yolks | Provide the fat and structure for the initial light custard base. |
| Cornstarch | Softens the flour to ensure the crumb remains tender and airy. |
| Fresh Mango | Offers natural brightness and sweetness to balance the cream. |
| Whipped Cream | Creates the luscious, melting texture between the layers. |
| Granulated Sugar | Stabilizes the meringue and adds weight to the bake. |
Cake, Syrup, Rest
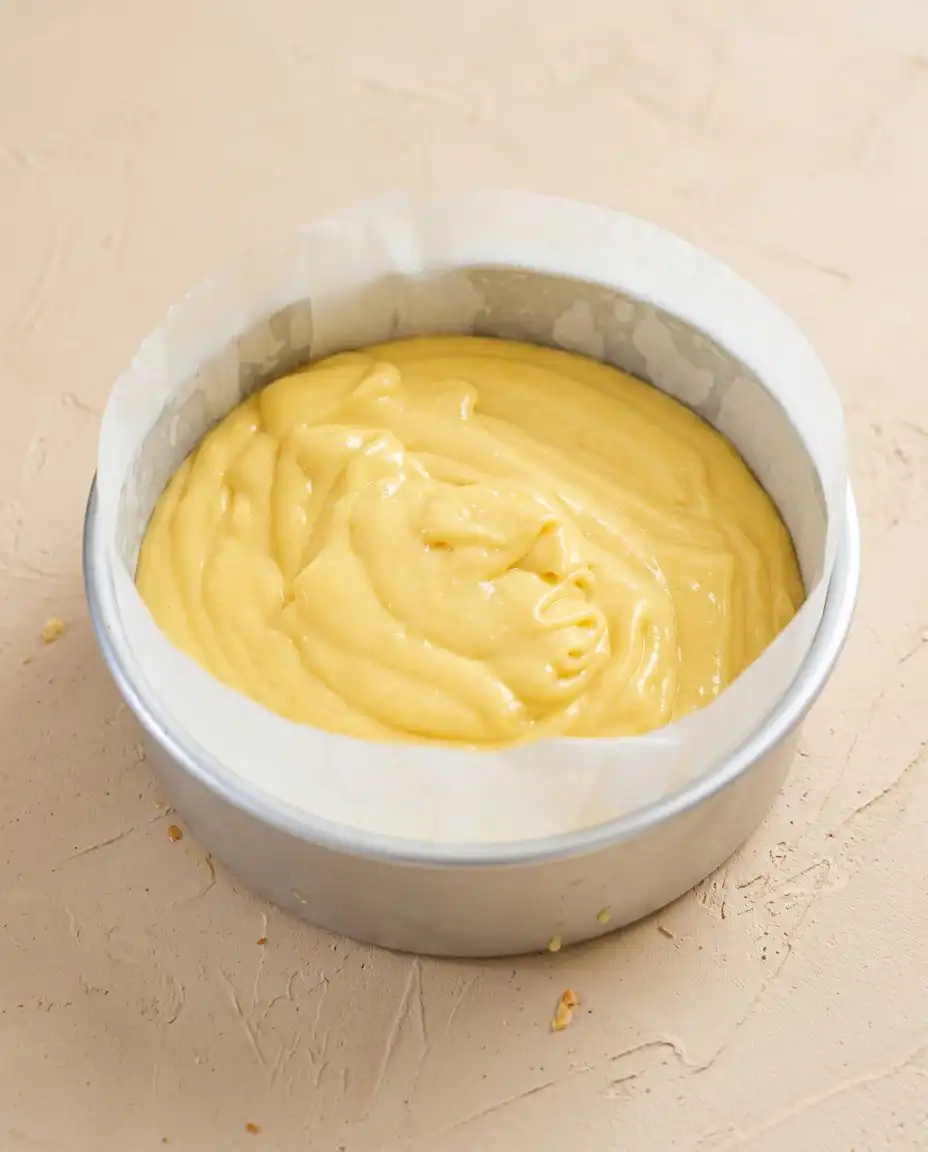
Step 1: Prepare the Delicate Base
Preheat your oven to 160°C (320°F) and line the bottom of an 8-inch cake tin with parchment paper. In a large bowl, combine the hot water and the first portion of granulated sugar, whisking until the granules have dissolved completely. This warm start helps the eggs expand later, creating the volume we desire for our sponge.
Step 2: Whisk the Yolks to Gold
Add the egg yolks and vanilla essence to the sugar water, whisking with a steady hand until the mixture doubles in size. You are looking for a pale, straw-colored foam that leaves a faint ribbon when the whisk is lifted. This stage is where the air begins to inhabit the batter, promising a light finish.
Step 3: Incorporate the Oil and Flour
Slowly pour in the vegetable oil while continuing to whisk gently, allowing the fat to emulsify with the yolks. Sift in the all-purpose flour, baking powder, cornstarch, and a pinch of salt. Use a folding motion rather than a stirring one, as we must protect the air bubbles we have worked so hard to invite into the bowl.
Step 4: Folding the Classic Mango Sponge Cake Batter
In a separate, clean bowl, beat the egg whites until they become foamy and white. Gradually add the second portion of sugar and continue beating until stiff, glossy peaks form that stand tall. Carefully fold this meringue into the yolk mixture in three parts, turning the spatula over with a slow, rhythmic motion until no white streaks remain.
Step 5: The Gentle Bake
Pour the batter into the prepared tin and tap it once on the counter to release any large air pockets. Bake for 40 to 50 minutes, watching for the top to turn a soft golden brown and the center to spring back when touched. The scent of vanilla and toasted sugar will begin to fill the air, signaling the cake is nearly ready.
Step 6: The Upside Down Cool
Remove the cake from the oven and immediately turn the tin upside down onto a wire rack to cool. This technique prevents the delicate structure from collapsing under its own weight as the air inside cools. Once it has reached room temperature, place it in the fridge to chill, which makes slicing the layers much easier.
Step 7: Prepare the Silken Cream
In a chilled bowl, combine the thickened cream, sugar, and vanilla extract for the filling. Whisk on high speed until the cream holds its shape and forms stiff peaks that look like fresh snow. Transfer a portion of this cream into a piping bag with a round tip, keeping everything cool until the moment of assembly.
Step 8: Layer with Fragrant Fruit
Peel your mangoes and slice them into thin, translucent ribbons, reserving one fruit to be cut into neat cubes for the top. Cut the chilled sponge into three even layers using a long serrated knife, moving slowly to keep the crumb intact. This is the moment where the cake begins to take its final, beautiful form.
Step 9: Assemble with Patience
Place the first layer on a turntable and spread a thin, even coating of cream across the surface. Lay the mango slices over the cream in a single layer, then cover them with another thin veil of cream to act as a glue. Repeat this process with the second layer, stacking them with care to ensure the cake remains level.
Step 10: The Final Smooth Finish
Cover the entire cake in a thin layer of cream, using a palette knife to create a smooth, clean exterior as you spin the turntable. Pipe a decorative border around the top edge and pile the mango cubes in the center. Allow the cake to rest in the fridge for two hours so the moisture can settle and the flavors can marry.
Patience-Pays-Off Tips
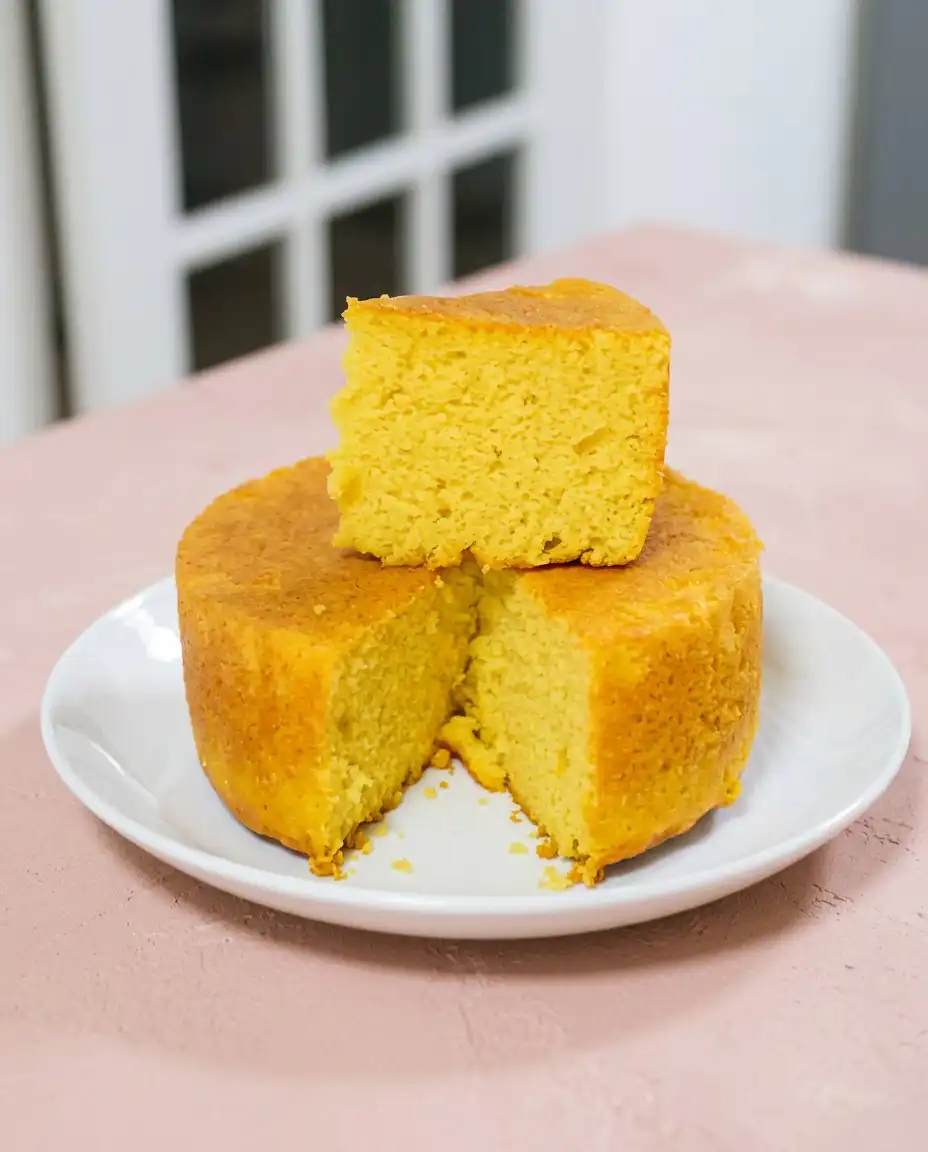
Patience is the secret to a sponge that feels like silk rather than bread. When you are sifting your dry ingredients, do it twice to ensure that every particle of flour is aerated and free of clumps. This extra step might seem small, but it contributes significantly to the final gossamer texture of the crumb.
If your sponge appears dense or rubbery, it is often because the flour was folded in too vigorously. Use a wide rubber spatula and move in a large circular motion, cutting through the center and lifting from the bottom. This preserves the delicate air bubbles in the meringue that provide the lift.
To achieve a flawless finish on your cream, make sure your bowl and whisk are ice cold before you begin. If the cream starts to look grainy or separated, add a tablespoon of liquid cream and whisk gently by hand to smooth it back out. You can learn more about techniques for making a fruit-filled sponge to refine your assembly skills.
The temperature of your eggs is vital for a successful foam. Using room temperature egg yolks and cold egg whites often yields the best volume and stability for this specific method. Cold whites whip into a tighter, more stable meringue, while warm yolks emulsify more easily with the sugar and oil.
When preparing your fruit, choose mangoes that are ripe but still firm to the touch. If the fruit is too soft, it will release too much juice and cause the cream layers to slide apart during the rest. For more guidance on stacking delicate bakes, see my notes on the classic vanilla bean layer cake which uses similar principles.
Removing the caramelized outer crust of the sponge after chilling is a professional touch that improves the mouthfeel. Gently rub the edges with your fingertips until the thin brown layer peels away, leaving only the soft, pale yellow sponge behind. This allows the cream to bond directly to the crumb for a more integrated bite.
Frequently Asked Questions
Can I make this sponge cake a day in advance?
Yes, you can bake the sponge a day ahead and keep it wrapped tightly in plastic in the fridge. However, it is best to assemble the cream and mango on the day you plan to serve it. This ensures the fruit stays fresh and the cream remains stable and light.
Why did my cake sink in the middle after baking?
A sinking center usually happens if the oven door was opened too early or if the cake was underbaked. The structure needs time to set fully before it is exposed to cooler air. Make sure the center springs back firmly when pressed before you decide to remove it from the oven.
What is the best way to store leftovers?
Leftover slices should be kept in an airtight container in the refrigerator for up to two days. Because of the fresh fruit and whipped cream, the cake will begin to soften over time. The rest actually improves the texture for the first few hours, but it should be eaten relatively quickly.
Can I use frozen mangoes for this recipe?
Fresh mangoes are highly recommended for the best texture and flavor profile. Frozen mangoes tend to release too much moisture as they thaw, which can make the cream layers soupy and the sponge soggy. If you must use frozen, drain them thoroughly and pat them dry with a paper towel first.
Is it possible to freeze the assembled cake?
Freezing the fully assembled cake is not recommended because the whipped cream and fresh mango do not thaw well. The cream can lose its airy structure and become grainy, while the fruit may turn mushy. You can, however, freeze the plain sponge layers for up to a month if they are well-protected.
What can I use if I do not have cornstarch?
If cornstarch is unavailable, you can replace it with additional all-purpose flour, though the texture will be slightly less tender. The cornstarch is what gives the cake its unique melting quality by softening the gluten. You could also try potato starch as a suitable alternative for a similar crumb.
Across the Fruit Orchards
While mango is the star of this particular show, the Mediterranean spirit is one of adaptation and seasonal grace. You might consider swapping the mango for fresh peaches or nectarines during the height of summer, as their stone-fruit acidity pairs beautifully with the vanilla cream. The process remains the same, but the flavor profile shifts toward the sun-drenched orchards of the coast.
For a more floral note, you can add a single teaspoon of orange blossom water to the cream before whisking. This subtle addition brings a hauntingly beautiful aroma that reminds one of gardens at dusk. It is a classic touch that works particularly well when combined with a few crushed pistachios scattered between the layers for a bit of crunch, much like a three layer italian cream cake.
If you prefer a more citrus-forward experience, zest a lemon directly into the dry ingredients before sifting. The lemon oils brighten the sponge and provide a sharp contrast to the sweet mango and rich whipped cream. This variation is particularly refreshing when served on a hot afternoon alongside a tall glass of iced tea or a cold sparkling water.
Serving the Mango Slice
This cake is best enjoyed in the late afternoon when the shadows are long and the air begins to cool. Place a generous slice on a simple white plate to let the golden hues of the mango stand out. The fork should glide through like butter, meeting no resistance from the airy sponge or the silken cream layers.
A small cup of dark Turkish coffee or a strong espresso provides the ideal bitter contrast to the sweetness of the cake. If you are serving this at a larger gathering, a platter of fresh berries and a few sprigs of mint can add a touch of color to the table. For those who enjoy a variety of textures, you might serve this alongside a sponge cake 2 to show the versatility of the medium.
Keep the cake chilled until the moment of service to maintain the integrity of the whipped cream. If the day is particularly warm, you might even chill the dessert plates in the fridge for a few minutes. This small gesture keeps the first few bites perfectly cold and refreshing for your guests.
From My Kitchen
Baking this cake is an act of love that requires you to slow down and appreciate the process of creation. From the first whisk of the eggs to the final placement of the mango cubes, every step is a movement toward a moment of shared joy. I hope this recipe finds a permanent home in your kitchen, becoming a tradition that marks the arrival of summer every year.
When you finally sit down to enjoy a slice, take a moment to notice how the flavors of the fruit and the lightness of the sponge come together. It is a reminder that the best things in life often require a bit of patience and a gentle touch. For more inspiration on traditional bakes, you might enjoy my classic two layer yellow cake chocolate frosting for your next celebration.
Please share your baking journey with us and let us know how your cake turned out. We love seeing your creations and hearing the stories of the tables they grace. Connect with us on Pinterest, Facebook, TikTok, or Telegram to stay part of our community.