Thirty-five minutes of hands-on prep delivers a tender, cloud-like crumb that melts under the spoon with pure coconut creaminess.

Bringing a bakery-style showpiece to life does not require spending an entire afternoon in the kitchen when you have smart, texture-locking secrets on your side. This Three-Layer Coconut Cream Cake delivers the deep, tropical richness of toasted cream without demanding endless steps or complicated baking mechanics. It proves that you can achieve a velvety, melt-in-the-mouth texture even on a busy Tuesday evening when time is short. Let this fluffy sponge cool while you finish dinner, and you will have a decadent slice ready before the late-night craving strikes.
What Makes This Three-Layer Coconut Cream Cake Quick & Luscious
Prep: 35 min · Serves: 12 · Difficulty: Medium
- Bakes to a remarkably tender texture
- Uses egg whites for an airy feel
- Locks in moisture with cool sour cream
- Assembles easily with a smooth frosting glide
- Delivers deep tropical flavor in every bite
You will get a lush, bakery-quality cake without sacrificing your entire evening.
When you crave a dessert that feels truly luxurious, this triple-tier masterpiece steps up to deliver decadent richness without the typical stress of baking from scratch. It uses unsweetened canned coconut milk to infuse every single crumb with rich flavor while keeping the sponge light. If you love classic tropical bakes, you will find this coconut cake stands out as a supreme quick-prep luxury that turns any dinner into an event. Your friends will assume you spent hours whipping egg whites, but your mixer did all the heavy lifting.
Busy home bakers deserve reliable recipes that behave beautifully in the oven every single time. That is why this baking process relies on balancing fine-milled cake flour with high-fat dairy to prevent a dry or dense bake. You get to enjoy the preparation knowing that the results will be wonderfully soft, tender, and incredibly moist. It is the ideal reward to slice into right after a long day of work when you need a little comfort.
Preparing a layered dessert should feel like a fun kitchen escape rather than a chore. By breaking the assembly down into simple, manageable steps, we remove the intimidation factor entirely. This method is designed to fit into your busy life without requiring specialized pastry training or complex equipment. You will love how easily the buttercream glides over the soft sponge layers as you build your masterpiece.
Get The Full Cake Recipe
Print
Three-Layer Coconut Cream Cake
- Total Time: 1 hour 30 mins
- Yield: 12 servings
- Diet: Vegetarian
Description
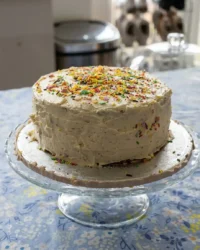
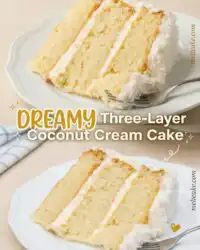
This decadent three-layer coconut cream cake combines a tender, cloud-like sponge with a velvety cream cheese frosting and a snowy finish of shredded coconut. It is a show-stopping tropical dessert that is simple enough to bake for a weeknight indulgence.
Ingredients
- 2 1/2 cups cake flour
- 1 tablespoon baking powder
- 1/2 teaspoon baking soda
- 1/2 teaspoon salt
- 1 cup unsalted butter, softened
- 1 3/4 cups granulated sugar
- 4 large egg whites, room temperature
- 1 cup sour cream, room temperature
- 1 cup canned coconut milk, room temperature
- 1 tablespoon pure vanilla extract
- 2 teaspoons coconut extract
- 1 1/2 cups sweetened shredded coconut
- 8 ounces cream cheese, softened
- 3 cups confectioners’ sugar
Instructions
- Prep the pans. Preheat oven to 350°F (177°C), grease three eight-inch round pans, and line with parchment paper.
- Combine dry base. Whisk cake flour, baking powder, baking soda, and salt in a bowl until uniform.
- Cream butter and sugar. Beat butter and granulated sugar in a stand mixer on medium-high for two minutes until fluffy.
- Incorporate wet ingredients. Beat in egg whites one at a time, then add sour cream, vanilla extract, and coconut extract.
- Mix final batter. Alternate adding dry ingredients and coconut milk to the bowl, then gently fold in shredded coconut.
- Bake the layers. Divide batter into pans and bake for 21 to 24 minutes until a toothpick comes out clean.
- Cool completely. Rest pans on wire racks for one hour, then carefully invert and peel away parchment.
- Whip the frosting. Beat butter and cream cheese, gradually add sugar, coconut milk, and extracts, then whip until cloud-like.
- Assemble and decorate. Trim cake tops, stack layers with frosting between them, cover exterior with remaining frosting, and press coconut into the sides.
Notes
- Ensure all dairy and egg components reach room temperature before mixing to prevent the batter from curdling.
- Use full-fat brick-style cream cheese rather than tub-style to ensure the frosting remains thick and stable.
- Chill the assembled cake for at least twenty minutes before slicing to achieve clean, professional-looking tiers.
- Pulse your shredded coconut in a food processor for a finer, more delicate texture that clings better to the frosting.
- Prep Time: 35 mins
- Cook Time: 25 mins
- Category: Dessert
- Method: Baking
- Cuisine: Tropical
Shortcut-Friendly Pantry

Selecting high-quality ingredients is the foundation of baking a truly memorable dessert. Each component in this list plays a specific role in balancing the structural stability with a light, melting crumb. These simple baking staples work together to make sure your layers rise beautifully and retain their moisture.
- Cake flour: This low-protein flour prevents gluten from overdeveloping, which keeps each of the three sponge tiers incredibly soft and delicate.
- Egg whites: Leaving out the heavy yolks guarantees the sponge remains light, airy, and bakes to a beautiful pale white color.
- Sour cream: Adding this high-fat ingredient introduces deep moisture and a subtle tang that balances the sweetness of the sugar.
- Canned coconut milk: This rich liquid provides the authentic tropical base flavor and essential fats needed for a tender cake crumb.
- Cream cheese: Combining brick-style cream cheese with butter creates a velvety frosting that spreads smoothly without sliding off the layers.
- Sweetened shredded coconut: Pressing these sweet flakes into the frosting adds a lovely rustic look and a pleasant chewiness to each bite.
- Coconut extract: Incorporating this concentrated extract amplifies the tropical aroma, ensuring the coconut flavor shines through the rich butter.
- Unsalted butter: Using butter softened to room temperature allows for optimal creaming with the sugar, creating tiny air pockets for rising.
| Ingredient | Why It Matters |
|---|---|
| Cake Flour | Low protein content keeps the sponge delicate and extra soft. |
| Egg Whites | Lightens the batter and keeps the tiers beautifully pale. |
| Sour Cream | Introduces rich fat and moisture to prevent dry crumbs. |
| Canned Coconut Milk | Infuses authentic tropical flavor and richness into the crumb. |
| Cream Cheese | Adds structure and a tangy balance to the buttercream. |
| Sweetened Coconut | Covers the cake for a lovely rustic look and chew. |
| Unsalted Butter | Forms the base of both the cake and the smooth frosting. |
From Bowl to Spoon

Step 1: Prep Your Pans and Oven
Preheat your oven to 350°F (177°C) and prepare three eight-inch round baking pans. Grease each pan thoroughly with butter or nonstick spray, line the bottoms with parchment paper rounds, and grease the paper again. This double-greasing method guarantees the delicate sponge layers release without tearing when you flip them onto cooling racks. You will know the pans are ready when the parchment lies completely flat without any trapped air bubbles underneath.
Step 2: Combine the Dry Base
Whisk your cake flour, baking powder, baking soda, and salt together in a large mixing bowl. Make sure you spoon and level the flour instead of scooping it directly from the bag to keep your measurements precise. Mixing these dry elements thoroughly prevents pockets of leavening agents from creating uneven domes during the baking process. The flour mixture should look completely uniform, light, and powdery before you set it aside.
Step 3: Cream the Butter and Sugar
Place your softened room-temperature butter and granulated sugar into a stand mixer bowl fitted with the paddle attachment. Beat on medium-high speed for about two full minutes until the mixture turns pale yellow, fluffy, and light. You should scrape down the sides of the bowl halfway through to make sure every grain of sugar blends with the fat. The creamed mixture should look cohesive and resemble soft whipped frosting before you move to the next stage.
Step 4: Incorporate the Wet Ingredients
Beat the room-temperature egg whites into the creamed butter mixture one at a time until they are fully integrated. Next, add the sour cream, pure vanilla extract, and coconut extract, beating on medium speed until the batter is smooth. The mixture might appear slightly curdled or separated at this point due to the varying textures combining, which is normal. Keep mixing until the liquid is uniform and smells heavily of sweet vanilla and tropical coconut.
Step 5: Finish the Cake Batter
Turn your mixer to low speed and alternate adding the dry ingredients and the canned coconut milk to the bowl. Pour the batter in three additions of flour and two of coconut milk, ending with the dry ingredients to prevent over-mixing. Fold in the sweetened shredded coconut gently using a rubber spatula, scraping the bottom of the bowl to catch any hidden pockets of butter. The final batter will look thick, creamy, and hold soft ribbons when you lift your spatula.
Step 6: Bake Your Three-Layer Coconut Cream Cake Layers
Divide the thick batter evenly among your three prepared baking pans, using a kitchen scale for accuracy if you have one. Bake at 350°F (177°C) for 21 to 24 minutes, watching for a beautiful light golden hue on the edges. To check for doneness, insert a wooden toothpick into the center of the middle layer; it should come out clean. Your kitchen will fill with a rich, toasted coconut aroma as the baking process wraps up.
Step 7: Cool the Layers Completely
Remove the baked pans from the oven and let them rest on wire racks for exactly one hour. Gently run a thin spatula around the edges of each pan to loosen the cake sides before carefully inverting them. Peel away the parchment paper rounds slowly while the layers are warm to reveal a smooth, golden surface. Let the tiers cool completely to room temperature before attempting to frost them, as any residual warmth will melt the buttercream.
Step 8: Whip the Cream Cheese Frosting
Combine the softened butter and brick cream cheese in your mixer bowl and beat on medium speed until silky. Gradually add the confectioners’ sugar, coconut milk, vanilla extract, coconut extract, and a pinch of salt with the mixer running on low. Once the sugar is incorporated, increase the speed to high and whip for three minutes until the frosting is cloud-like. It should look glossy and be thick enough to hold stiff peaks when you lift the whisk.
Step 9: Assemble and Decorate
Trim the rounded tops off your cooled tiers with a long serrated knife to create completely flat surfaces. Place the first layer on a cake stand, spread one heaping cup of frosting over the top, and repeat with the second and third tiers. Spread the remaining buttercream over the top and sides, then press the sweetened shredded coconut into the wet frosting. The finished dessert will look beautifully rustic, covered in a snowy coat of sweet white flakes.
Keep It Luscious

Temperature control is your best friend when working with high-fat dairy and softened butter. Make sure your egg whites, sour cream, and canned coconut milk sit on the counter for at least an hour before you start mixing. Cold ingredients will seize the creamed butter, causing your batter to curdle and bake unevenly in the oven. Having everything at a uniform room temperature creates a smooth emulsion that bakes into a velvety, tender sponge.
If your buttercream starts to look soupy or slides off the layers, here is why and how to fix it. This frustrating issue usually happens because the butter or cream cheese was too warm, or the layers still carried residual heat. Pop the entire bowl of frosting into the refrigerator for fifteen minutes to let the fats firm up, then whip it again. Always let your sponge tiers cool completely to prevent the frosting from melting on contact.
Chilling the assembled dessert is a secret weapon for achieving clean, bakery-style slices. Let the finished cake rest in the refrigerator for at least twenty minutes before you slide a knife through it. Cold temperatures set the cream cheese frosting and firm up the tender crumb so it holds its shape beautifully. Wipe your knife blade clean with a warm, damp cloth between each cut to prevent frosting from smudging.
Do not substitute all-purpose flour for the cake flour if you want that signature melt-in-the-mouth texture. Cake flour has a lower protein content that prevents excessive gluten development, keeping the layers incredibly soft. If you find yourself enjoying this style of baking, trying a classic vanilla bean layer cake will help you practice these delicate crumb techniques. The difference in texture between standard flour and cake flour is immediately noticeable when you take your first bite.
Selecting the right style of cream cheese is vital for a sturdy yet luscious frosting. Always use full-fat brick cream cheese rather than the spreadable tub variety, which contains extra water that thins your frosting. For more advanced decorating advice, reading about how to construct a stable dessert base will give you deeper insight into frosting structural integrity. A stable frosting guarantees your three tiers stand tall and beautiful on the serving platter.
Pulsing your sweetened shredded coconut in a food processor a few times can make a massive difference in your eating experience. Large flakes of coconut can sometimes feel too fibrous or chewy inside a delicate cake crumb. Giving them a quick pulse chops them into smaller bits that blend seamlessly into the batter and cling easily to the frosted exterior. This simple step guarantees that you get the flavor of coconut in every bite without any distracting chewiness.
Frequently Asked Questions
Can I use all-purpose flour instead of cake flour?
You can make a substitute by removing two tablespoons of all-purpose flour from each cup and replacing it with two tablespoons of cornstarch. However, for the softest crumb, actual store-bought cake flour is always best. Standard all-purpose flour has more protein, which can make your layers bake up slightly heavy and dense. Taking the time to find cake flour guarantees your cake melts in your mouth.
What is the difference between cream of coconut and coconut milk?
Canned coconut milk is a savory, unsweetened cooking ingredient that provides fats and flavor to the batter. Cream of coconut is a highly sweetened, thick syrup used primarily for cocktails like piña coladas. Using cream of coconut in this recipe will make your batter far too sweet and greasy, ruining the bake. Always check the label carefully before purchasing your ingredients.
Can I use vegetable oil instead of butter?
While vegetable oil makes cakes incredibly moist, it lacks the rich flavor and structure that creamed butter provides. Butter is essential here to create a sturdy sponge that can support three dense tiers of frosting. Stick to high-quality unsalted butter softened to room temperature for the best results. The buttery flavor is what makes this cake taste truly professional.
How do I make the coconut flavor stronger?
Adding a high-quality coconut extract to both the batter and the frosting is the easiest way to amplify the tropical taste. You can also toast the shredded coconut before pressing it onto the sides to release its natural oils and deepen the aroma. Avoid adding extra coconut milk to the batter, as this will throw off the liquid ratio and make the cake dense. A little extra extract goes a long way.
Should I use sweetened or unsweetened coconut for the outside?
Sweetened shredded coconut is highly recommended because it is much moister and softer than unsweetened flakes. Unsweetened coconut can feel dry and woody in your mouth, which detracts from the velvety cream cheese frosting. If the flakes are too long, easily pulse them a few times in a food processor. This step makes the cake look and taste much more delicate.
How do I get flat cake layers?
Using a sharp serrated knife to shave off the rounded domes after cooling is the easiest way to guarantee flat surfaces. You can also wrap the outside of your baking pans with wet cake strips before they go into the oven. This helps the tiers bake evenly from the edges to the center, reducing the dome height. Flat layers make assembling the cake much easier and safer.
How far in advance can I make this dessert?
You can bake the sponge layers and store them wrapped tightly at room temperature overnight before assembling. The frosting can also be prepared a day early and kept in the refrigerator until you are ready. Let the frosting sit on the counter for fifteen minutes to soften slightly before whipping and spreading. Assembling the cake the day of serving keeps it tasting fresh.
How long does it stay fresh in the fridge?
This cake keeps beautifully in the refrigerator for up to five days when stored in an airtight container. The rich cream cheese frosting acts as a barrier that seals in the moisture of the sponge layers. Slice and enjoy it cold, or let your piece sit at room temperature for ten minutes before serving. It actually tastes even better on the second day as the flavors meld.
Quick Variations
If you want to add a delightful crunch and deep nuttiness to your dessert, try toasting the shredded coconut before applying it. Spread your sweet coconut flakes on a baking sheet and bake at 325°F (163°C) for five to eight minutes until they turn golden brown. For an even richer nutty flavor profile, you can swap this for a three layer italian cream cake which incorporates chopped pecans directly into the batter. This addition brings a beautiful contrast to the velvety cream cheese frosting.
Adding a bright fruit layer between the cake tiers can cut through the rich sweetness of the cream cheese frosting beautifully. Spread a thin layer of mango or lemon curd over the frosting on the first two layers during assembly. This simple addition introduces a bright, zesty contrast that pairs beautifully with the coconut base. It turns a cozy home bake into a refreshing dessert that tastes like a tropical getaway.
Drizzle a quick rum syrup over the warm sponge layers right after they come out of the oven for an adult twist. Boil equal parts sugar and water with a splash of dark rum for five minutes, then pour it over the cake. This technique keeps the crumb incredibly moist while infusing it with a warm, spiced flavor. It is a fantastic way to transform the dessert for a dinner party or holiday celebration.
Spoon It While It’s Warm
This magnificent dessert shines best when served slightly cool, letting the cream cheese frosting remain silky and structured. Pair a generous slice with a hot mug of dark roast coffee or a bitter black tea to contrast the sweet coconut. If you are hosting a larger gathering and want to offer guests options, serving this alongside a delicate three layer earl grey cake creates a stunning tea-time spread. The floral notes of the tea cake complement the tropical creaminess of the coconut beautifully.
Plating this dessert on dark or colorful ceramic dishes makes the snowy white coconut flakes pop visually. You can garnish each plate with a few fresh berries, like raspberries or blackberries, to add a splash of color and a tart bite. This contrast breaks up the rich sweetness of the frosting and cleanses the palate between bites. Serve it at backyard celebrations, casual Sunday dinners, or as a late-night reward on a quiet Tuesday.
Always slice this cake with a warm chef’s knife to keep the layers looking clean and distinct. Run the blade under hot tap water, wipe it dry, and then slide it smoothly through the frosting and sponge. This technique guarantees that every guest receives a beautiful slice showing off the three white tiers. Keep a cake dome handy to cover the remaining dessert quickly so it stays incredibly moist in the refrigerator.

The Weeknight Wrap-Up
Whipping up a stunning dessert does not have to be a stressful all-day production. With a reliable timeline and a few smart ingredient choices, you can create a masterpiece that feels remarkably indulgent. If you find yourself craving another layered project next week, consider trying this delicate chantilly cake recipe for your next baking adventure. Both recipes prove that you can achieve bakery-quality results without losing your peace of mind.
Bring this sweet creation to your table tonight and watch how quickly your family gathers with spoons in hand. It is the kind of bake that makes any normal day feel like a special celebration. We would love to see your beautiful baking creations in your own kitchen. Share your results with us on Pinterest, join our baking community on Facebook, or watch quick baking videos on TikTok and Telegram for daily inspiration.
Baking is all about bringing joy to your kitchen and sharing sweet moments with the people you love. Do not be afraid to tackle a three-layer cake, even on a busy weeknight. This recipe is designed to be approachable, forgiving, and above all, wonderfully delicious. Grab your mixing bowls and let’s get started on this tropical baking journey together.


