In classic British baking, we learn that structural balance dictates the success of any fruit-topped sponge. Proper cake chemistry transforms simple sugars into a faultlessly set fruit crown.

Mastering the traditional Pineapple Upside-Down Cake requires careful attention to the moisture barrier between the fruit and the crumb. A wet topping can easily compromise the delicate structure of the sponge, causing a soggy collapse rather than a clean release. By managing the caramelisation process in the pan bottom, we build a robust, glossy surface that supports the cake once inverted. This recipe relies on a precise balance of fats and sugars to make sure your dessert turns out structurally sound and beautiful every single time.
The Case for This Method and the Ideal Pineapple Upside-Down Cake
Prep: 25 min · Serves: 8 · Difficulty: Medium
This structured approach builds on our classic pineapple upside down cake recipe to deliver unmatched crumb stability and caramel definition. By balancing moisture and heat, we achieve a flawless presentation that holds together beautifully.
- Achieves a stable, non-soggy fruit crown easily.
- Maintains structural integrity upon inversion.
- Provides an exceptionally tender sponge crumb.
- Delivers clean, beautiful fruit slices every time.
- Uses standard kitchen scales for total precision.
Structure is what makes the melt possible.
Get The Full Cake Recipe
Print
Pineapple Upside-Down Cake
- Total Time: 1 hour 10 mins
- Yield: 8 servings
Description
This professional-grade Pineapple Upside-Down Cake uses precise moisture control and a balanced butter-to-sugar ratio to ensure a perfectly stable, caramelized fruit crown. It delivers an exceptionally tender sponge with clean fruit presentation every time.
Ingredients
- Salted butter
- Brown sugar
- Pineapple slices
- Large cherries
- All-purpose flour
- Baking powder
- Salt
- Unsalted butter
- Granulated sugar
- Large eggs
- Whole milk
Instructions
- Prepare the foundation. Preheat the oven to 175°C (350°F), melt butter in a 24cm cake pan, and sprinkle brown sugar evenly to form a uniform base.
- Arrange the fruit. Place dried pineapple slices and cherries in a single layer, embedding them gently into the sugar base.
- Cream the base. Beat softened unsalted butter and granulated sugar until aerated, then incorporate eggs one by one to create a stable emulsion.
- Combine the batter. Whisk flour, baking powder, and salt, then fold into the butter mixture alternately with the whole milk until just combined.
- Spread the batter. Carefully spoon the thick batter over the fruit and smooth the surface to create an even structural lid.
- Bake the cake. Bake at 175°C for 30 minutes, tent with foil, then bake for an additional 15 minutes until a skewer emerges clean.
- Invert the cake. Rest for 12 minutes, then invert the pan onto a platter to release the cake and display the fruit crown.
Notes
- Ensure pineapple slices are thoroughly dried with paper towels to prevent excess moisture from compromising the cake structure.
- Maintain room temperature ingredients to prevent the butter emulsion from splitting during the mixing process.
- Do not skip greasing the sides of the pan to allow the cake to climb and rise evenly during the bake.
- Use a digital scale for the flour measurement to ensure the structural integrity of the sponge remains light and airy.
- Prep Time: 25 mins
- Cook Time: 45 mins
- Category: Dessert
- Method: Baking
- Cuisine: British
Weighed & Ready

In professional pastry work, each ingredient serves a specific structural purpose beyond simple flavour. To achieve a clean release and a crumb that resists sogginess, we must measure our components using weight rather than volume. By understanding how dry and wet elements interact on a chemical level, we can guarantee a stable bake.
- Salted butter: Melted in the pan to form the base of our caramel layer while preventing sticking.
- Brown sugar: Creates a rich, stable caramel coating when melted with butter under the heat of the oven.
- Pineapple slices: Must be patted completely dry to control moisture absorption during the bake.
- All-purpose flour: Forms the structural gluten matrix that holds the fruit and caramel upright.
- Baking powder: Provides the necessary rise to keep the sponge light and airy.
- Whole milk: Hydrates the dry ingredients while adding fat for a tender, moist crumb.
- Large eggs: Emulsify the batter to create a stable crumb that will not collapse under fruit weight.
| Ingredient | Why It Matters |
|---|---|
| Salted butter | Creates a non-stick fat barrier and salty contrast to caramel |
| Brown sugar | Liquefies into a thick, clinging syrup that coats the fruit |
| Dried pineapple | Limits the water release that causes soggy cake layers |
| Whole milk | Encourages starch gelatinisation for a tender sponge structure |
The Tested Procedure

Step 1: Prep the Caramel Foundation
Preheat your oven to 175°C (350°F) to ensure an immediate rise once the cake enters the heat. Pour the melted salted butter directly into the bottom of a 24cm deep cake pan, spreading it evenly across the base and up the sides. Sprinkle the tightly packed brown sugar evenly over the liquid fat to form a uniform bed for your fruit. This creates the initial sugar-fat emulsion that prevents the sponge from bonding directly to the pan walls.
Step 2: Arrange the Fruit Patterns
Carefully arrange the dried pineapple slices in a single layer across the sugared surface, placing whole cherries in the center of each ring. Use halved pineapple slices along the pan edges to build a beautiful, structural border. This deliberate placement ensures every slice of the finished cake has an equal distribution of fruit and caramelized sugar. Press the pieces down gently so they embed slightly into the sugar layer.
Step 3: Establish the Emulsion Base
Cream the softened unsalted butter and granulated sugar together in a clean mixing bowl until light and aerated. Add the room-temperature eggs one at a time, beating thoroughly after each addition to establish a strong emulsion. This step incorporates microscopic air bubbles that will expand in the oven, providing the cake with its structural lift. The batter should look smooth, glossy, and slightly expanded in volume.
Step 4: Sift and Combine Dry Ingredients
Whisk the all-purpose flour, baking powder, and salt together in a separate bowl to distribute the leavening agents. Alternating between the dry mixture and the whole milk, fold the ingredients into the butter emulsion. Use a flexible spatula to mix until just combined, ensuring you do not overwork the gluten and toughen the sponge. The batter should be thick, smooth, and fall from the spatula in a heavy ribbon.
Step 5: Spread the Batter Layer
Gently spoon the thick vanilla batter over the arranged pineapple and cherry layer in the pan. Use an offset palette knife to smooth the surface without disturbing the delicate fruit pattern underneath. This dense batter layer acts as a structural lid, keeping the steam from the fruit trapped to cook the sponge. The layer must be completely level to prevent uneven rising.
Step 6: Bake the Pineapple Upside-Down Cake
Place the pan on the center rack of your preheated oven and bake at 175°C (350°F) for exactly 30 minutes. At this point, loosely drape a sheet of aluminium foil over the top to prevent over-browning while the interior finishes cooking. Continue baking for an additional 15 minutes, ensuring a wooden skewer inserted in the center emerges clean. The cake should feel springy to the touch and pull away slightly from the sides.
Step 7: Perform the Inversion
Allow the baked cake to rest undisturbed on a cooling rack for exactly 12 minutes to let the caramel set. Place your serving platter upside down over the pan, then confidently invert both in one swift motion. Lift the pan away to reveal a beautifully glazed, intact fruit crown that holds its shape. The caramel should be glossy and bubbling slightly at the edges.
Pastry Bench Tips

If your fruit topping slides off the cake after inverting, here is why and how to fix it. This common failure happens when the cake is inverted either too quickly before the sugars have slightly cooled, or too late after the caramel has completely solidified in the pan. Keep a precise kitchen timer running, and always flip the pan exactly 10 to 12 minutes after pulling it from the oven to let the sugars set into a stable, cohesive layer.
Drying your fruit thoroughly is the key to preventing a soggy sponge barrier. Press the pineapple slices between multiple layers of heavy paper towels for at least 15 minutes before arranging them on the sugar bed. This step draws out excess moisture that would otherwise leak into the rising batter and weaken its delicate protein structure.
Ensure your milk and eggs are at room temperature, ideally around 21°C (70°F), before mixing the batter. Cold ingredients will cause the creamed butter emulsion to split, resulting in a dense, greasy crumb that cannot support the caramelized fruit topping. If your batter curdles, gently warm the mixing bowl over warm water for ten seconds to restore the emulsion.
For an alternative approach to baking vintage cakes, you might want to try our cast iron pineapple upside down cake which relies on the superb heat retention of cast iron. The cast iron pan creates a beautiful structural skin — a crisp shell, a set crust — that protects a soft interior and prevents the sugar from turning watery.
Always weigh your flour on a digital scale rather than using measuring cups, aiming for exactly 195 grams. Too much flour creates a heavy, dry cake that lacks the delicate crumb required to absorb the rising caramel steam during baking. Accurate measurements are the foundation of successful pastry work.
Do not skip greasing the vertical sides of the pan with extra butter, even though the bottom is lined with melted fat. The rising cake batter needs a slick surface to climb evenly, which prevents a domed center that would make the inverted cake wobble. A flat, level bottom ensures your cake stands proud and stable on the presentation platter.
Frequently Asked Questions
What is a pineapple upside-down cake?
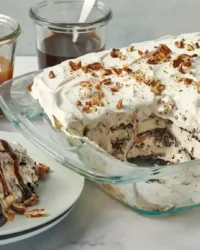
A pineapple upside-down cake is a classic single-layer dessert baked with sliced pineapples and cherries placed at the bottom of the pan over a butter-and-sugar mixture. After baking, the cake is flipped over so that the caramelized fruit becomes the decorative topping. This method allows the fruit juices to baste the sponge cake during the baking process.
Why do they call it upside-down cake?
The name comes from the physical process of baking the dessert with its decorative elements on the bottom of the pan and then flipping it before serving. Historically, these cakes were baked in heavy cast-iron skillets over open fires, making it easier to arrange the fruit at the bottom first. Inverting the cake after baking reveals the beautiful, glossy glaze on top.
What is the secret to flipping a pineapple upside-down cake?
The secret lies in the timing of the flip, which must occur exactly 10 to 12 minutes after the cake comes out of the oven. If you flip too quickly, the hot caramel will be too liquid and run off the sides of the cake. If you wait too long, the sugar will cool completely and stick to the bottom of the pan, tearing the fruit away.
Can I use fresh pineapple instead of canned?
Yes, you can use fresh pineapple, but you must slice it thin and precook it slightly to soften the fibers and reduce excess water content. Canned pineapple is preferred because it has a uniform thickness and a lower moisture level after being patted dry. Fresh fruit contains an enzyme called bromelain, which can break down the cake’s proteins if not heated first.
How do I stop the pineapple from making the cake soggy?
To prevent sogginess, you must thoroughly dry the pineapple slices using paper towels before placing them in the pan. Additionally, maintaining a thick, emulsified cake batter helps act as a structural barrier against the escaping fruit juices. The batter must be dense enough to hold its shape while the starch gelatinises in the oven heat.
How do I keep the cake from sticking to the pan?
You must generously grease the sides of your cake pan with softened butter, even though the bottom is covered with melted fat and sugar. This allows the sponge to rise without clinging to the walls, which prevents a domed center. Using a high-quality, non-stick baking pan or a well-seasoned cast-iron skillet also encourages a clean release.
Should I serve this cake warm or cold?
This cake is best served slightly warm, about thirty minutes after inversion, when the caramel is still soft and the crumb is incredibly tender. If served cold, the butter-rich caramel topping will firm up and lose its glossy, pourable quality. You can gently reheat cold slices in a warm oven for a few minutes before serving.
Considered Adjustments
For a warming winter profile, you can whisk a half-teaspoon of ground cardamom or freshly grated nutmeg into the brown sugar before sprinkling it over the melted butter. This subtle spice addition cuts through the intense sweetness of the fruit without altering the chemistry of the caramelisation process. The spices bloom beautifully in the hot butter during the bake.
If you wish to adapt this structural method to other seasonal fruits, our peach upside down cake recipe provides an exceptional guide to adjusting fruit moisture levels. Peaches offer a softer texture, requiring a slightly longer initial bake to set the fruit glaze properly before inversion. This ensures the caramelized crown remains stable and does not slip.
While a scratch-made vanilla cake is traditional, busy bakers sometimes seek alternative shortcut methods. For a reliable, highly rated guide on making this dessert with a modified box base, you can examine this tested upside down method to see how they balance the crumb structure when using convenient pre-made mixes. This helps you understand how commercial leaveners react under fruit layers.
Serving the Structure
Presenting this cake warm is highly recommended, as the caramel remains beautifully fluid and the crumb retains its maximum tenderness. Allow the cake to cool for about twenty minutes after inversion, which gives the internal starch structure time to set so you can slice it cleanly. Using a sharp, serrated utility knife will prevent crushing the delicate fruit crown during portioning.
Pair each slice with a dollop of unsweetened creme fraiche or lightly whipped double cream to balance the intense sweetness of the caramelized pineapple. If you enjoy the combination of caramelized stone fruits, you might also appreciate our blackberry upside down cake as a stunning addition to your dessert table. The tart berries provide a superb contrast to the buttery sponge.
Serve this dessert on a flat, rimmed platter that can catch any slow-moving caramel drips that escape down the sides. A pot of strong, unsweetened black tea makes the ideal beverage pairing, cutting through the rich butter and sugar to refresh the palate between bites. Keep the presentation simple to let the beautiful fruit pattern remain the focal point.

What the Technique Gives You
Baking with precision transforms what could be a messy, soggy dessert into a structural masterpiece that releases cleanly every single time. By understanding the role of caramel setting times and moisture control, you elevate your home baking to professional standards. The effort you put into drying the fruit and timing the inversion pays off in the very first bite.
If you enjoyed mastering this technique, you can continue your journey with our guide to finding the best pineapple cake for your next gathering. Each recipe on our site focuses on the vital mechanics that make baking both reliable and deeply satisfying. We believe that structure is what makes the melt possible.
We invite you to share your baking results with our growing community of precision pastry enthusiasts. Connect with us on Pinterest, join our discussions on Facebook, and follow our step-by-step videos on TikTok to continue refining your technique.


